
Is a 2-Foot Retaining Wall a Simple Weekend Project — Or a Bigger Deal Than You Think?
Quick answer: A 2 foot retaining wall can be a manageable DIY project for many homeowners, but it still requires proper planning, a compacted gravel base, and drainage to last long-term. Here’s what you need to know at a glance:
- Base depth: Dig 4–6 inches deep and 12 inches wide for the first row
- Footing type: Compacted gravel is usually sufficient — no concrete needed for most block walls under 4 feet
- Drainage: Always include gravel backfill and a 4-inch perforated drain pipe behind the wall
- Best materials: Interlocking concrete blocks, pressure-treated timber, or natural stone
- Time and cost: Expect around 6 hours and roughly $150 in materials for a basic installation
- Permit: Check local codes — some towns in Massachusetts and New Hampshire have height thresholds that trigger permit requirements
- When to call a pro: Sloped sites, clay soil, pool proximity, or any wall near a structure
A small retaining wall can do a lot of heavy lifting in a backyard. It holds back soil, controls erosion, creates flat usable space, and — when done right — adds a clean, finished look to your outdoor living area. That’s especially true here in Eastern Massachusetts and Southern New Hampshire, where sloped lots, clay-heavy soil, and hard winters make proper wall construction more important than it might seem.
But here’s the thing most weekend warriors don’t realize: even a modest 2-foot wall can fail if the base isn’t compacted, the drainage is skipped, or the materials aren’t right for the conditions. A wall that shifts or bulges after one freeze-thaw cycle is far more expensive to fix than it was to build correctly the first time.
This guide walks you through everything — from excavation to backfill — so you can make smart decisions about whether to build it yourself or bring in a professional team.
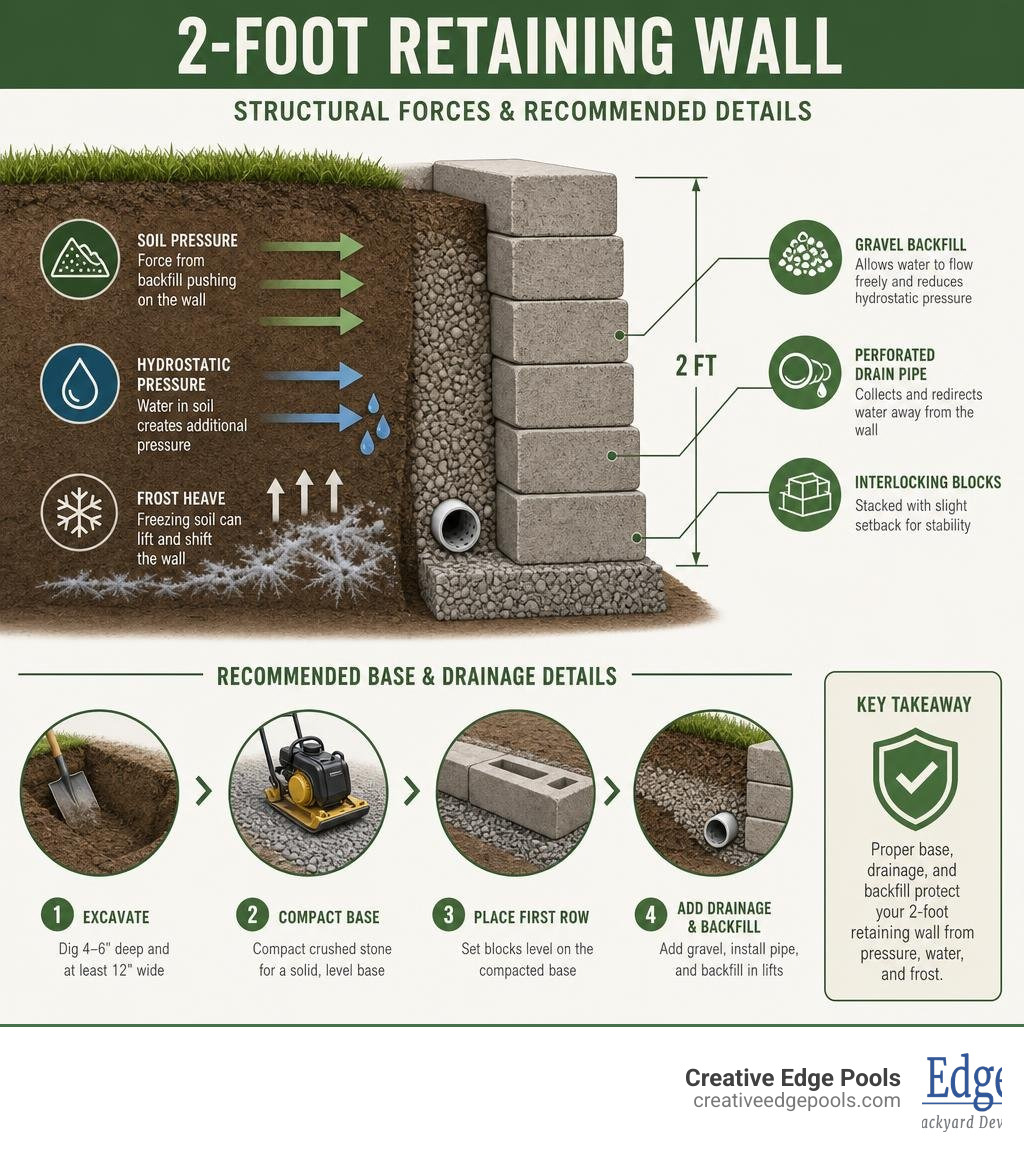
Simple guide to 2 foot retaining wall:
Understanding the 2 foot retaining wall: Foundation and Drainage Needs
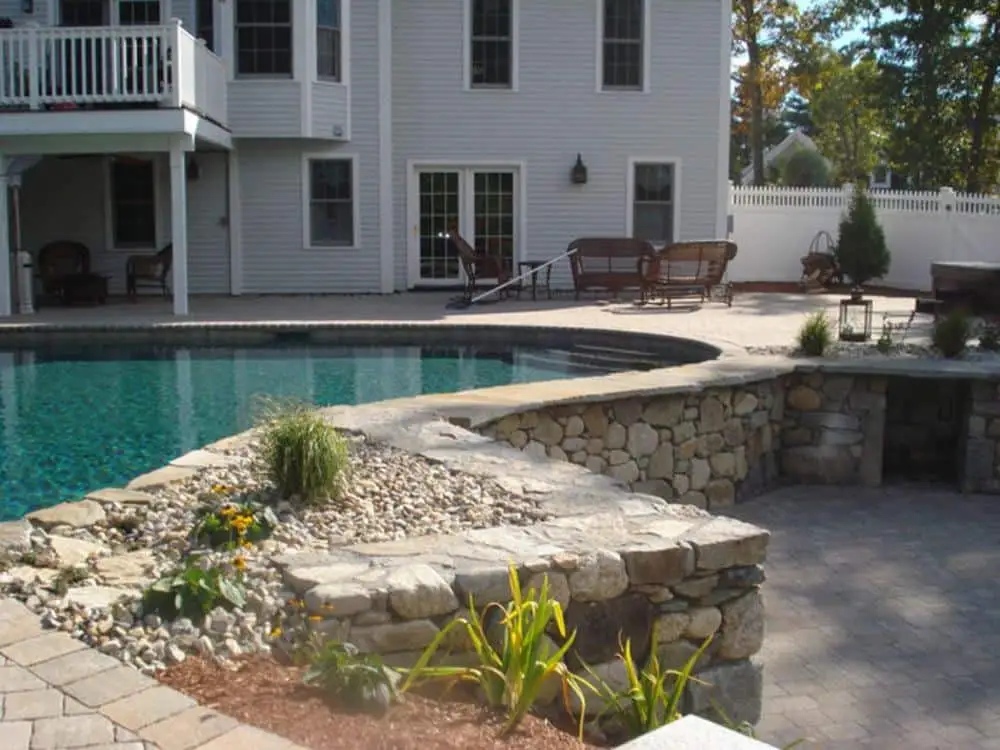
When we talk about a 2 foot retaining wall, we are looking at a structure that is relatively low to the ground but still subject to immense physical forces. Whether you are leveling out a sloped lawn in Andover, MA, or carving out space for a new garden bed in Exeter, NH, understanding how your wall interacts with the earth behind it is the first step toward long-term success.
At its core, a retaining wall is designed to resist the lateral pressure of the soil it holds back. This pressure increases significantly when water gets trapped in the soil. To prevent your wall from leaning, cracking, or collapsing entirely, you must understand what is happening beneath the surface. To learn more about how these structures fit into your overall yard design, check out our guide on Hardscaping and Landscaping.
The Heavy Impact of Clay Soil and Frost Heave
In our region of New England, we deal with two major environmental challenges: clay-heavy soils and severe freeze-thaw cycles.
Clay soil holds onto water like a sponge. When water-saturated clay freezes, it expands. This expansion creates a phenomenon known as frost heave, which can easily push a poorly constructed wall out of alignment. If your wall is built directly on dirt without a proper foundation, the shifting soil will cause the blocks or timbers to separate.
To combat this, a 2 foot retaining wall must be built on a solid, non-shifting foundation. According to the engineering principles outlined in standard guides like the Retaining and Flood Walls manual, walls must be designed to handle both soil weight and hydraulic pressure. For a low wall, this means creating a compacted gravel base that sits below the surface and allows water to escape rather than build up behind the structure.
Does a 2-Foot Wall Need a Concrete Footing?
One of the most common questions we hear is whether a short wall requires a poured concrete footing. The short answer is: usually no, but it depends entirely on your materials.
For modern interlocking concrete block systems or timber walls under 4 feet, a compacted gravel base is highly effective and widely preferred. However, if you are building a mortared stone or cinder block wall, a concrete footing is absolutely necessary because any minor movement in the ground will crack the mortar joints.
| Wall Material | Footing/Base Type | Recommended Depth | Drainage Pipe Required? |
|---|---|---|---|
| Interlocking Blocks | Compacted Gravel | 4 to 6 inches | Yes |
| Treated Timber | Compacted Gravel | 4 to 6 inches | Yes |
| Mortared Stone / Cinder Block | Poured Concrete | Below Frost Line (varies) | Yes |
Understanding these structural elements is a key part of what we do. If you want to dive deeper into how masonry and hardscaping work together to transform your property, take a look at our article explaining What is Landscape Hardscape Service.
Step-by-Step: How to Build a 2-Foot Retaining Wall
While we always recommend partnering with a professional team to ensure your yard’s grading is handled safely, we know that many homeowners enjoy tackling smaller projects themselves. If you are planning to build a basic 2 foot retaining wall on flat, stable ground, here is a high-level overview of the construction process.
Planning and Excavating for a 2 foot retaining wall
Before you pick up a shovel, you must mark out your wall’s path and check for underground utilities. Once your layout is set, the physical work begins with excavation.
- Dig the Trench: For a 2-foot wall, you need to dig a trench that is approximately 12 inches wide. The depth of the trench should be about 4 to 6 inches deep to accommodate your gravel base, plus an additional depth equal to half the height of your first row of blocks.
- Ensure It Is Level: Use a builder’s level to make sure the bottom of the trench is completely flat. If you are building on a slight slope, you will need to step the trench up or down in even increments to keep the rows level. Whether you are working on a project in Wilmington, MA, or nearby towns, starting with a perfectly level trench is non-negotiable.
Laying the Base and First Row of Your 2 foot retaining wall
The base of your wall is its most critical structural component. If the base is uneven or unstable, the entire wall will eventually fail.
- Add Gravel Base: Fill the bottom of your trench with 4 to 6 inches of angular, crushed gravel (often called paver base). Avoid rounded stones like pea gravel, as they do not compact tightly.
- Compact Thoroughly: Use a hand tamper or a mechanical plate compactor to pack the gravel down until it is rock-hard.
- Set the Base Course: Lay your first row of blocks or timbers directly on the compacted gravel. This first row must sit about halfway into the soil (buried) to anchor the bottom of the wall. Use a torpedo level to check every single block front-to-back and side-to-side. If you are using wood, you can learn more about specific timber pinning methods in this guide on How to Build a 2-ft Tall Timber Retaining Wall – DIY Retaining Wall®.
Drainage and Backfilling Requirements
Water is the number one enemy of any retaining wall. Without proper drainage, hydrostatic pressure will build up behind the wall, forcing the blocks outward.
- Install Perforated Pipe: Lay a 4-inch perforated drain pipe behind your first row of blocks. The perforations should face downward into the gravel. Ensure the pipe outlets to daylight at the ends of your wall so water can freely escape.
- Add Filter Fabric: Lay landscape fabric behind the wall to prevent fine soil particles from clogging your drainage gravel over time.
- Backfill with Clean Stone: Fill the space directly behind the blocks with at least 12 inches of clean, crushed stone (such as #57 stone). As you stack subsequent rows, continue backfilling with stone in thin layers, compacting it gently as you go.
Choosing the Best Materials for Your Low Retaining Wall
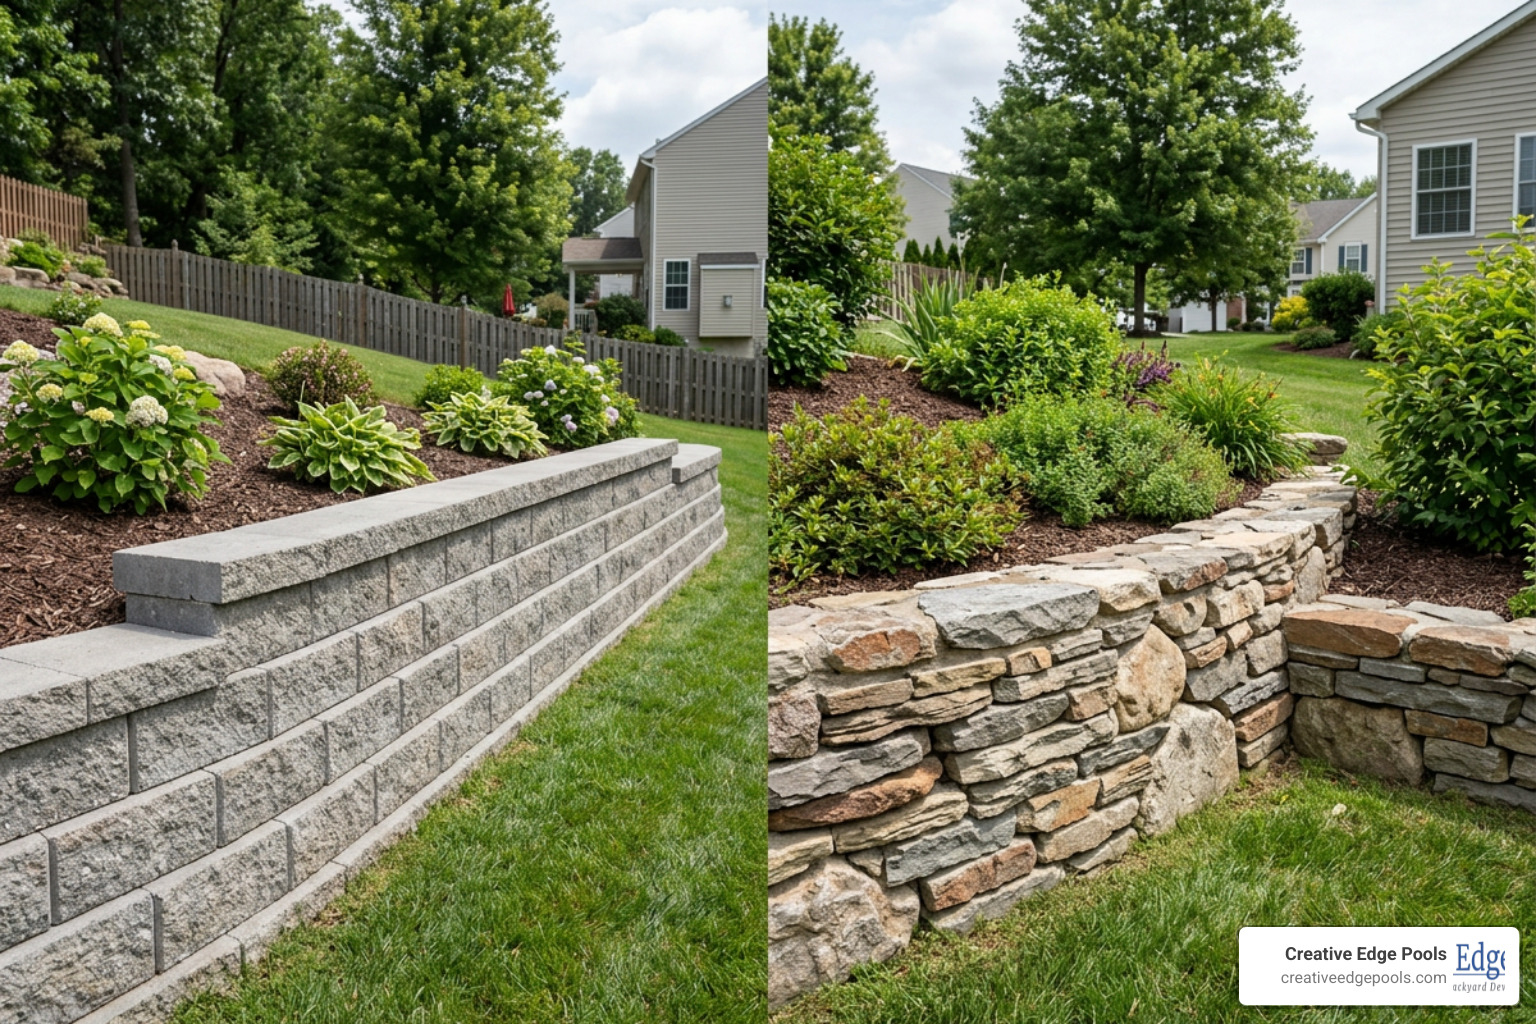
Choosing the right material for your 2 foot retaining wall depends on your budget, the aesthetic of your home, and how the wall will be integrated into your landscape. If you are planning a larger outdoor renovation, such as adding a custom pool, your wall materials should seamlessly match your pool deck and patio. For inspiration on materials and styling, check out our Swimming Pool Masonry Guide.
Interlocking Concrete Blocks
Interlocking segmental blocks are highly popular for DIY projects and professional builds alike. These blocks feature a built-in lip or pin system on the back that automatically locks each row into the one below it. This lip also creates a slight setback (or batter), leaning the wall back into the soil for added stability. They are incredibly durable, resist freeze-thaw cycles beautifully, and require zero maintenance.
Pressure-Treated Wood or Timbers
Timber walls offer a warm, natural look that blends well with rustic landscapes. When using wood, it is critical to select heavy-duty timbers (like 6x6s) rated for ground-contact use. While timber is often more affordable upfront, it does have a limited lifespan compared to stone or concrete and will eventually rot, even with proper treatment.
Natural Stone
Nothing beats the timeless elegance of natural stone. Whether you prefer the rustic look of a dry-stacked fieldstone wall or the clean lines of a wet-set granite wall, natural stone adds significant value and curb appeal to your property. However, natural stone requires highly skilled craftsmanship to install correctly, especially when managing elevation changes around high-value features like custom gunite pools.
The Risks of DIY and When to Hire a Professional
While a 2 foot retaining wall is often marketed as a simple weekend project, skipping even a single step can lead to structural failure. In Eastern Massachusetts and Southern New Hampshire, our harsh winters make improper construction highly unforgiving.
If a DIY wall fails, you don’t just lose the time and money you invested in the initial build — you also face the costly task of tearing down the ruined wall, re-excavating the site, and starting over from scratch. When a wall is built near a pool deck, patio, or driveway, a structural failure can cause severe damage to those surrounding structures.
Understanding the True Costs
Based on publicly available internet data, average material costs for a basic DIY 2-foot wall are typically estimated around $150. However, actual retail prices, tool rentals, and real-world project variables mean you should expect a realistic material price range of $300 to $750 or more for a standard residential yard.
If you choose to hire a professional team to ensure the job is done to engineering standards, industry averages for professional design and installation typically range from $2,000 to $10,000+ depending on the length of the wall, site accessibility, soil conditions, and material choice.
Please note that these are general industry averages sourced from online data and do not represent the pricing, rates, or guarantees of Creative Edge Pools.
If you are dealing with a sloped yard, complex grading, clay soil, or if you want to integrate a beautiful stone wall seamlessly into a custom pool environment, it is always best to work with an experienced hardscaping team. If you are looking for expert craftsmanship in your area, you can find professional support through our Hardscaper Near Me service page.
Frequently Asked Questions
Can I build a 2-foot retaining wall without gravel backfill?
No. Building any retaining wall without gravel backfill is one of the most common causes of wall failure. Without a dedicated layer of clean gravel to channel water away, wet soil will press directly against the back of your wall. Over time, this hydrostatic pressure will cause the wall to bulge, lean, or completely collapse.
Do I need a permit for a 2-foot retaining wall in Massachusetts or New Hampshire?
In most municipalities across Eastern MA and Southern NH, retaining walls under 4 feet do not require a building permit. However, local zoning laws, HOA guidelines, and environmental regulations near wetlands can vary. For example, if you live in Exeter, NH, or Salem, NH, it is always wise to check with your local building department before starting any excavation.
What is the best way to prevent a wood retaining wall from rotting?
To maximize the lifespan of a timber wall, you must use pressure-treated lumber rated for “Ground Contact” (look for UC4A or UC4B standards). Additionally, any cuts or drill holes you make during construction must be brushed with a copper-based wood preservative to protect the exposed interior wood. Keeping a clean gravel barrier between the wood and the natural soil is also critical to prevent rot.
Bring Your Backyard Vision to Life
A beautifully designed 2 foot retaining wall does more than just hold back dirt — it shapes your entire outdoor living experience. Whether you are looking to terrace a sloped lawn, create elegant raised planting beds, or design a seamless transition between your lawn and a custom pool deck, the right wall makes all the difference.
At Creative Edge Pools, we are a family-owned business with over 100 years of combined experience. We specialize in designing, installing, and renovating custom gunite pools, spas, and complete backyard environments throughout Eastern Massachusetts and Southern New Hampshire. From precision excavation to stunning custom masonry, our team is dedicated to bringing your unique homeowner vision to life with craftsmanship that stands the test of time.
If you are planning to elevate your backyard with a professionally built retaining wall or a complete pool transformation, we are here to help. To learn more about how we integrate structural walls into luxury pool designs, explore our guide on Retaining Walls for Pools 101.
Ready to take the first step toward your dream backyard? Contact us today at +978-203-0406 or visit our Contact Us page to schedule a consultation with our expert team!
