Replacing Inground Pool Liner: 10 Powerful DIY Tips 2025
The Ultimate Guide to Replacing Inground Pool Liner
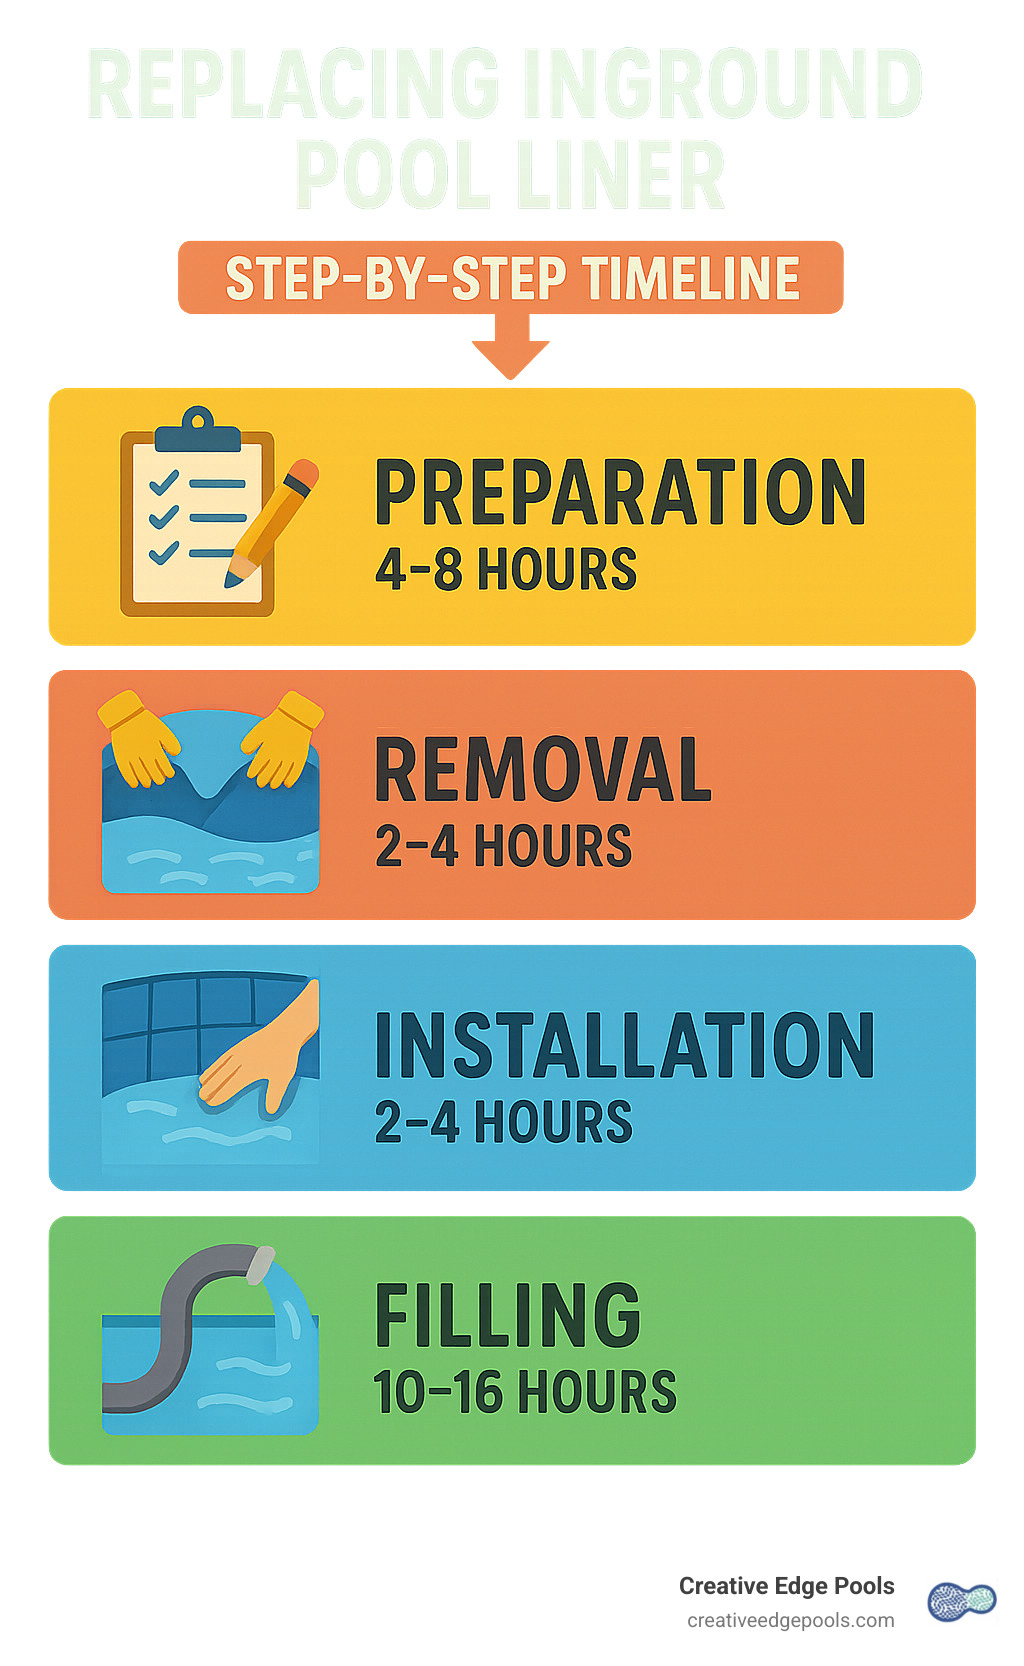
Replacing inground pool liner involves a series of steps that can extend your pool’s life and improve your backyard’s appearance. Here’s a quick overview of the process:
- Measure your pool accurately (length, width, depth)
- Choose the right liner (20-30 mil thickness)
- Drain the pool safely (check local regulations)
- Remove old liner and inspect pool structure
- Prepare surfaces (repair cracks, clean thoroughly)
- Install new liner (best when temperatures exceed 75°F)
- Use vacuum method to remove air and wrinkles
- Fill pool and reinstall fixtures
Most vinyl pool liners last 10-15 years before needing replacement. The entire process typically takes 1-3 days and costs between $1,100-$2,900 for materials alone, with potential savings of 40-60% by doing it yourself instead of hiring professionals.
The best time to replace your liner is during fall or early spring when you’re already opening or closing your pool for the season.
I’m David Brabant, owner of Creative Edge Pools with over thirty years in the swimming pool industry, and I’ve personally overseen hundreds of replacing inground pool liner projects throughout Massachusetts and New Hampshire, ensuring each installation meets our exacting standards for quality and longevity.
Basic replacing inground pool liner terms:
– cost of replacing inground vinyl pool liner
When & Why You Should Replace an Inground Pool Liner
Let’s face it – nothing lasts forever, and your inground vinyl pool liner is no exception. After years of splashing, swimming, and soaking up the sun, there comes a time when that trusty liner needs to be replaced. Recognizing the right moment can save you headaches (and money) down the road.
Replacing inground pool liner becomes necessary when you start noticing these telltale signs:
- Visible cracks and tears that have grown beyond what a simple patch kit can fix
- Severe fading or discoloration that makes your once-beautiful pool look tired and worn
- Mysterious water loss that exceeds normal evaporation (and has you constantly topping up)
- Liner stretching or slipping out of its track despite your best efforts to fix it
- Bead detachment that leaves your liner loose and vulnerable
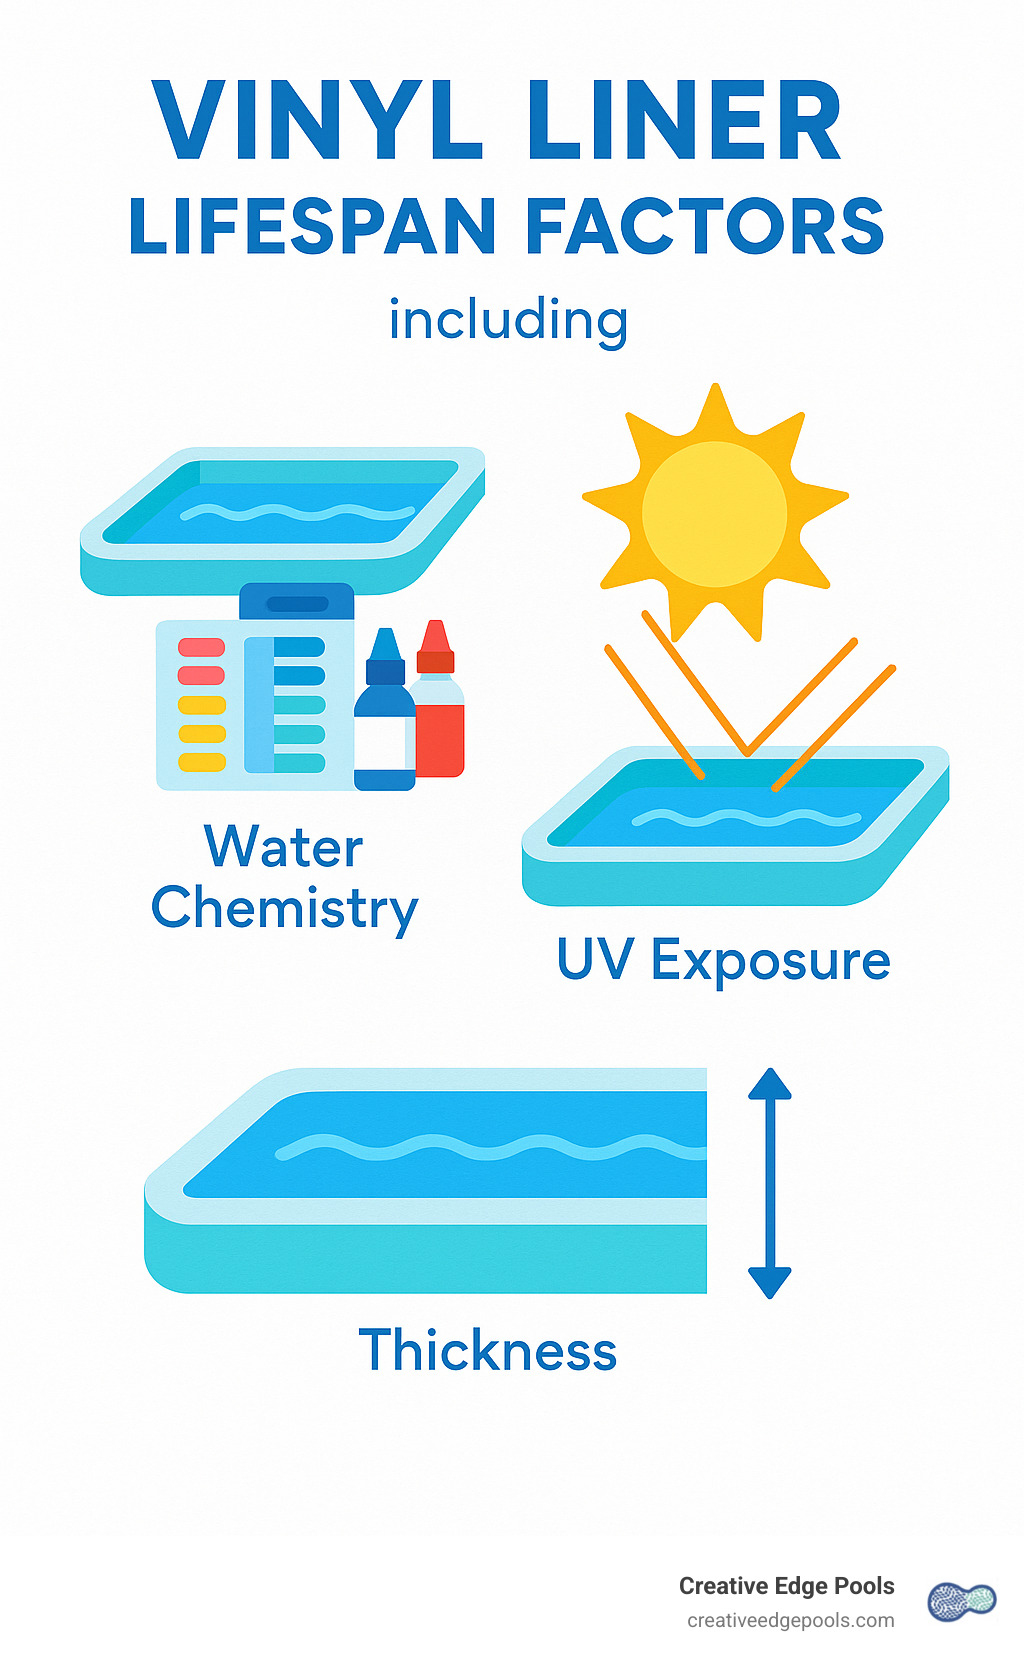
Most vinyl pool liners serve you faithfully for about 10-15 years before waving the white flag. This timeline varies depending on how well you’ve maintained your water chemistry, your pool’s sun exposure, how often you use it, and the thickness of your liner.

Key Signs It’s Time
Beyond the obvious tears and leaks, your liner sends subtle hints when retirement is approaching. Think of these as your pool’s way of asking for a refresh:
When your liner develops wrinkles that won’t smooth out no matter what you try, it’s losing elasticity – a clear sign of aging vinyl. Touch your liner – does it feel brittle or stiff instead of pliable and smooth? That papery feeling means the vinyl is deteriorating.
Is your liner consistently slipping from its track despite multiple attempts to reset it? That’s not just annoying – it’s your liner telling you it’s tired. Notice algae or discoloration behind the liner? This means water is finding its way where it shouldn’t be. And if you’re experiencing consistent chemical imbalances despite your best efforts, your old liner might be leaching chemicals, making water balance nearly impossible.
In our years at Creative Edge Pools, we’ve seen many homeowners try to squeeze “just one more season” out of an aging liner. Unfortunately, this often leads to more extensive (and expensive) repairs when water damages the underlying structure.
Benefits of Timely Replacement
Being proactive about replacing inground pool liner comes with several perks:
First, you prevent structural damage to your pool. Water sneaking through a compromised liner can silently erode your pool’s foundation and walls. A new liner also provides an instant aesthetic refresh – nothing transforms a backyard oasis faster than replacing a faded, dated liner with a fresh, vibrant one.
Replacement time creates the perfect opportunity for upgrades you’ve been dreaming about – custom steps, a tanning ledge, or modern LED lighting. Did you know a new liner can improve energy efficiency? Darker liners absorb more heat, potentially extending your swim season by weeks. And if you’re thinking about selling your home, a fresh liner significantly increases property value and appeal to buyers.
The ideal times for replacing inground pool liner are early spring (before opening) or fall (after closing). These seasons minimize disruption to your swimming schedule and typically offer the moderate temperatures that make installation smoother.
Fall and spring timing also aligns perfectly with when many homeowners are already planning pool maintenance. For a comprehensive guide on the replacement process, check out How to Replace Pool Liner: Step-by-Step Guide.
Measure, Choose & Order the Right Vinyl Liner
Getting the perfect fit when replacing inground pool liner is like buying a custom suit—measurements matter tremendously. A liner that’s even slightly off can create headaches with wrinkles, slipping, or worse.
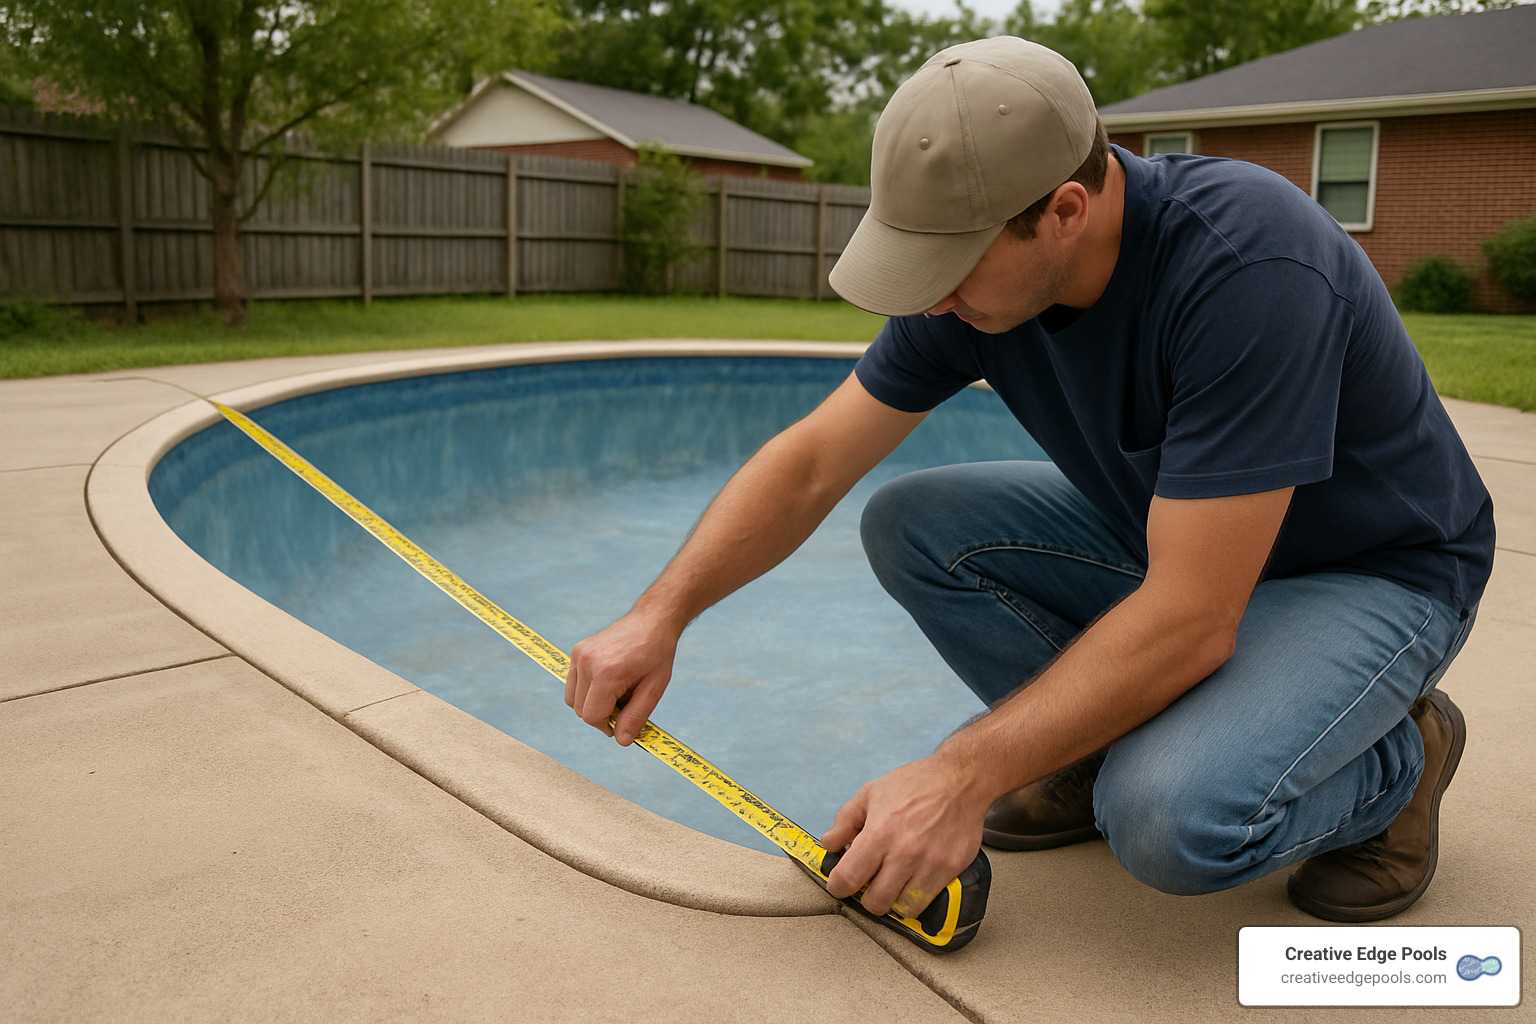
Accurate Pool Measurement Tips
I can’t stress this enough—precision is your best friend when measuring for a new liner. After helping hundreds of homeowners through this process, I’ve learned a few tricks:
Always use a steel measuring tape, not the cloth or plastic ones that can stretch over time. Those extra fractions of an inch really do matter!
When measuring your pool, establish datum points—essentially reference markers—around the perimeter. This helps ensure consistency, especially for those tricky curved sections.
One common mistake I see is measuring down slopes instead of horizontally. Always keep your measurements level for accuracy. For deeper pools, record multiple depth points—this is particularly important for freeform or uniquely shaped pools.
For those beautiful but complex freeform pools, we recommend the A-B plot method. It sounds technical, but it’s actually quite simple: pick two fixed points on opposite corners of your deck, then measure from each point to various spots along your pool’s perimeter. When plotted, these measurements create an accurate map of your pool’s shape.
Most manufacturers provide handy measurement forms that walk you through everything they need to know—pool shape, dimensions at multiple points, corner radii, wall height, depth transitions, and locations of steps and fixtures. Don’t hesitate to use these forms; they’re designed to help you get it right the first time. A good liner measurement form can be a lifesaver.
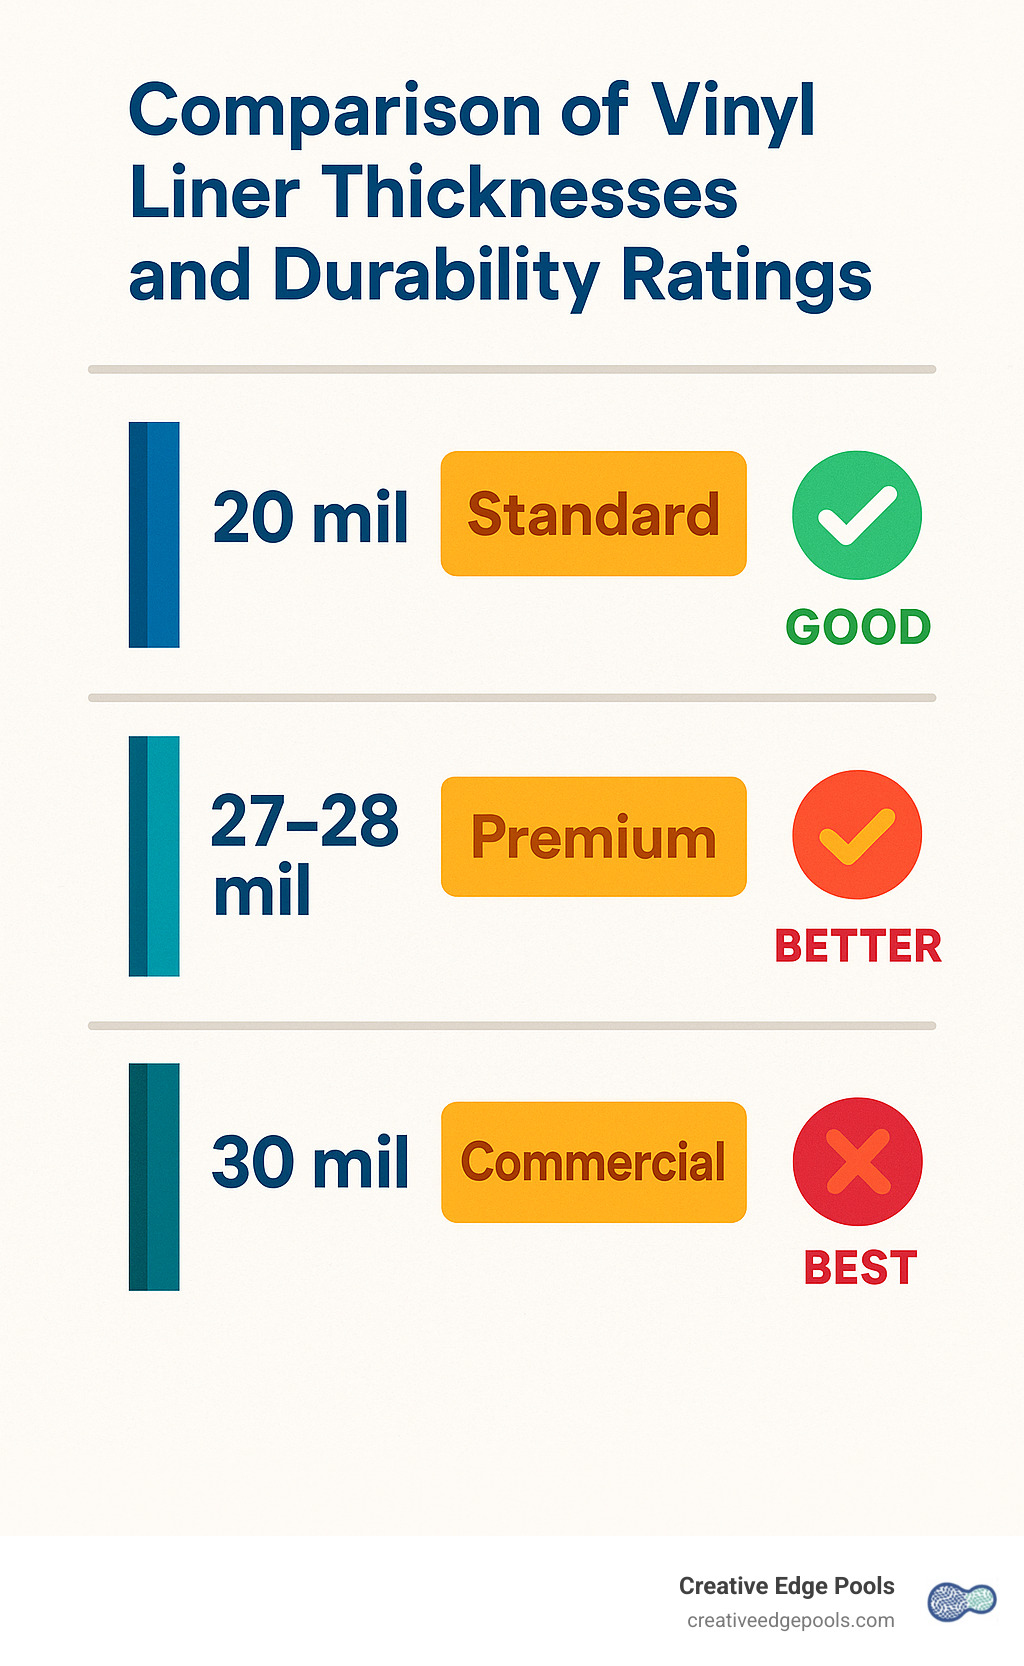
Selecting Thickness & Pattern
Choosing the right thickness for your new liner is a balancing act between durability and budget:
20 mil liners are the standard choice for most residential pools. They’re more affordable but still provide reasonable durability for typical family use.
27-28 mil liners offer that sweet spot of premium protection without breaking the bank. They resist punctures better and stand up to UV damage more effectively.
30 mil liners are the heavy-duty option—what we typically use for commercial pools or homeowners who want maximum longevity. Yes, they cost more upfront, but they often last years longer.
Pattern selection isn’t just about what looks pretty—it actually affects your swimming experience. Dark patterns naturally absorb more heat, warming your water a few degrees (perfect for our chilly New England springs!). Light patterns reflect heat and make smaller pools appear more spacious. Medium-toned patterns are practical workhorses that hide dirt and debris better than their very light or very dark counterparts.
Most manufacturers now offer over 75 pattern options, from classic blue tile borders to contemporary stone looks that can transform your backyard into a resort-like retreat. That UV inhibitors in the vinyl are crucial for longevity, especially with darker colors that absorb more sunlight.
When ordering your liner, timing matters. During the off-season, expect 1-2 weeks for manufacturing. During the summer rush? That can stretch to 6-8 weeks. Custom shapes or special features might take even longer.
In my thirty years of experience at Creative Edge Pools, I’ve found that investing in a thicker liner (27-30 mil) typically pays for itself. While the upfront cost is higher, these premium liners often extend your pool’s life by 2-3 years compared to standard options. That’s not just a sales pitch—it’s what we’ve consistently observed with our clients throughout Massachusetts and New Hampshire.
For more detailed information about the installation process, check out our guide on Vinyl Liner Installation.
DIY Replacing Inground Pool Liner: 10-Step Process
Ready to tackle replacing inground pool liner yourself? I don’t blame you! DIY installation can save you 40-60% compared to hiring professionals. While it’s definitely a weekend project that requires some elbow grease and attention to detail, most homeowners with basic handyman skills can handle this job successfully.
Preparing for Replacing Inground Pool Liner
The secret to a smooth liner replacement starts with proper preparation. Trust me, I’ve seen what happens when folks rush this part!
First, keep an eye on the weather forecast. You’ll want 2-3 consecutive days with temperatures consistently above 75°F and no rain in sight. The warmer weather keeps the vinyl pliable and easier to work with.
Before draining a drop of water, gather all your tools and materials. Nothing worse than being elbow-deep in your project only to realize you’re missing something crucial! And while we’re talking preparation, this isn’t a solo mission—recruit 1-3 friends or family members to help. Their extra hands will be invaluable when positioning that new liner.
Don’t forget to check your local regulations about where you can discharge all that pool water. Some towns have strict rules about this, and the last thing you want is a visit from unhappy neighbors or local officials!
A quick tip from our team at Creative Edge Pools: take “before” photos of everything—especially where fixtures are positioned. These snapshots will be lifesavers during reassembly.
When you’re ready to drain, use a submersible pump rather than the slow garden hose siphon method. Direct that water well away from your pool structure to prevent erosion, but leave about 6-12 inches in the shallow end to support the deep-end slope. Be particularly cautious if your area has a high water table—draining when groundwater is high can literally cause your pool to “pop” out of the ground!
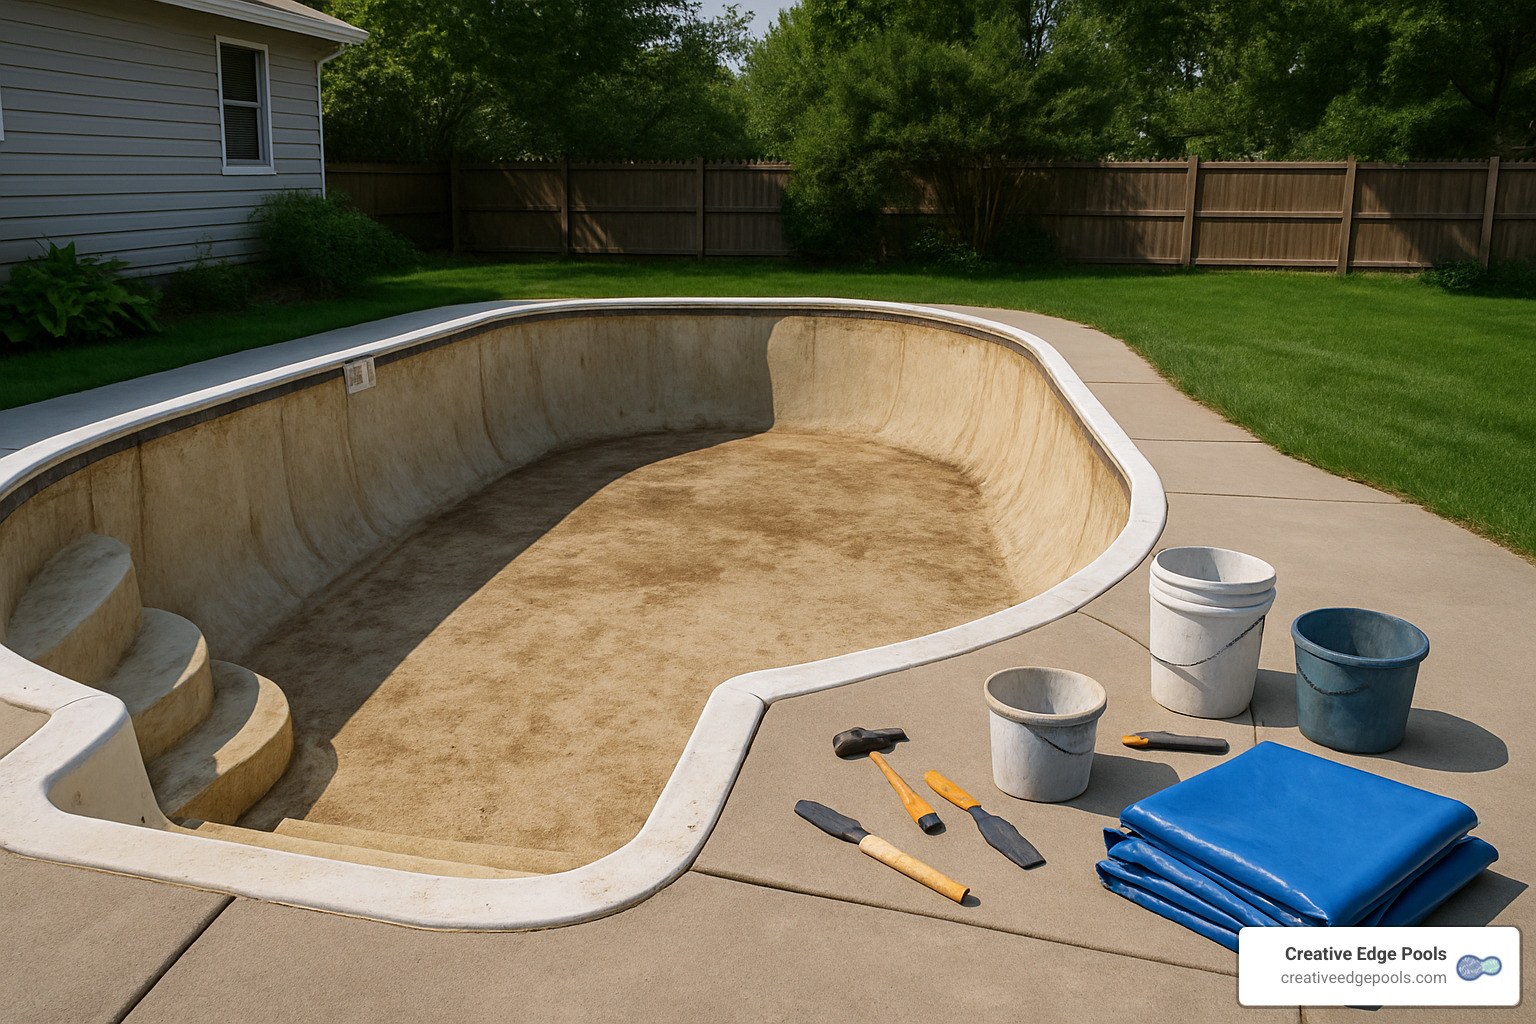
Once drained, remove the old liner by first taking off all faceplates, returns, and skimmer parts (store these small pieces in labeled bags). Cut the old liner into manageable strips for easier removal, and save a small piece for future reference if you ever need patches. This is also your golden opportunity to thoroughly inspect the pool structure for any cracks, rust, or damage that needs repair before the new liner goes in.
Setting & Vacuuming the New Liner
Now comes the fun part! Start by getting your pool surface squeaky clean. Sweep and vacuum the floor thoroughly, removing any sharp objects or debris that could puncture your new liner. Fill any cracks with hydraulic cement, sand down rust spots, and apply rust-preventive spray where needed.
Many homeowners opt to install wall foam at this stage—it’s not required, but it helps insulate and protect your liner. Whatever you decide, be sure to cover all seams with non-ascorbic duct tape to create a smooth surface.
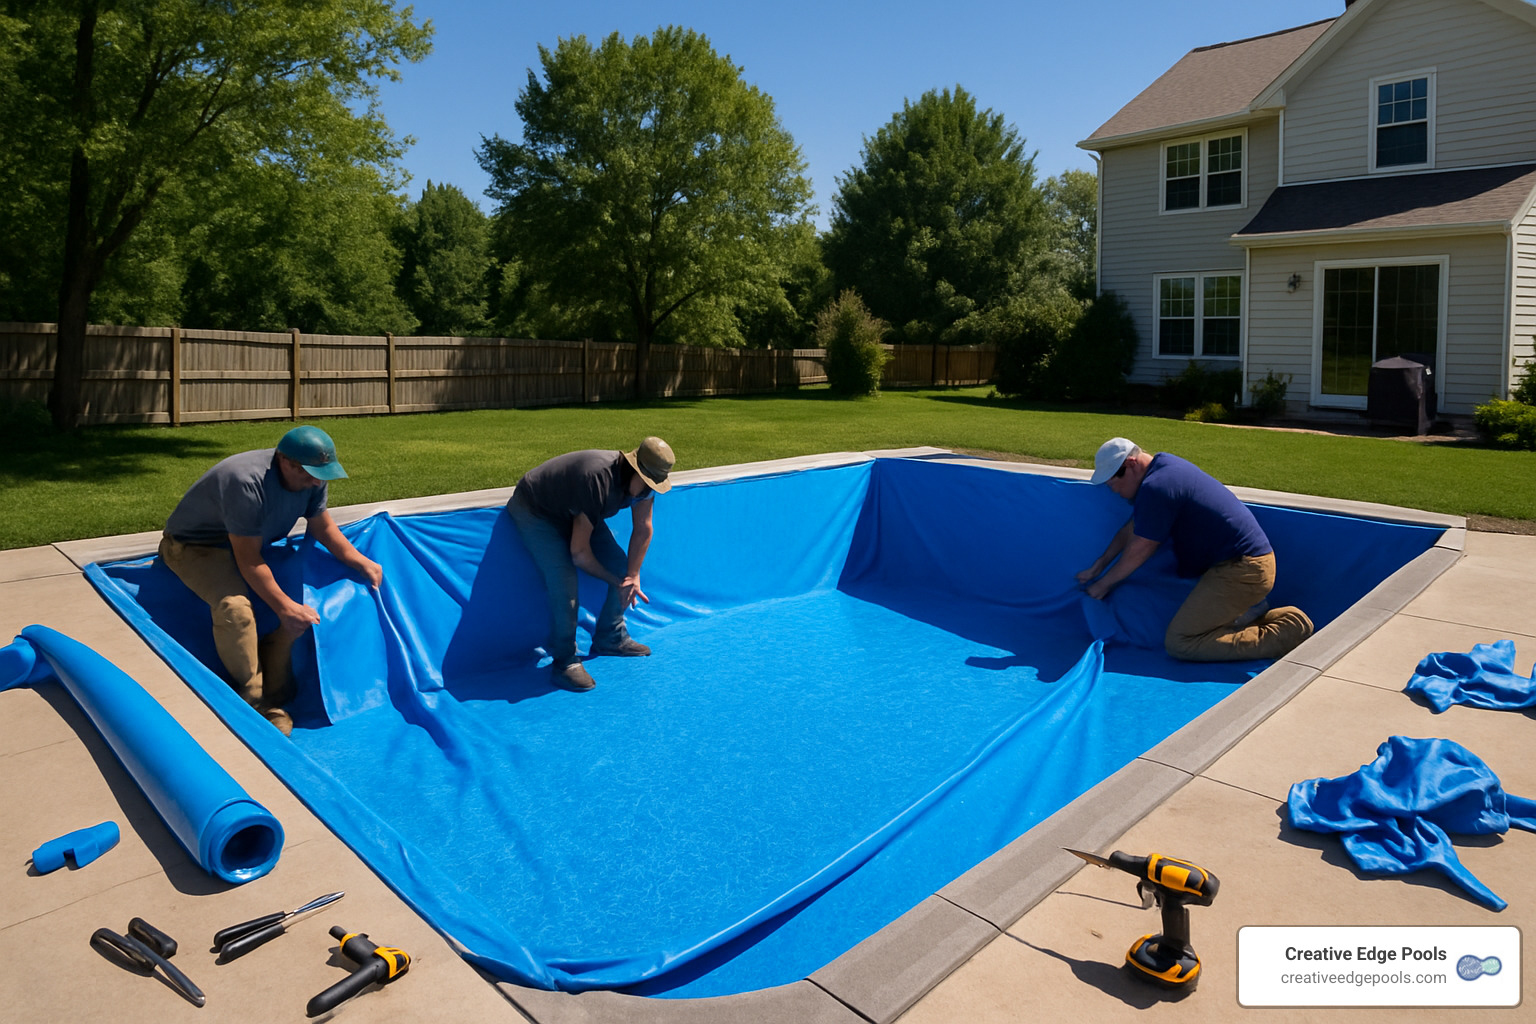
When positioning your new liner, start by unfolding it in the center of the pool (or at the deep end for sloped pools). Look for the manufacturer’s markings to ensure proper orientation. Working barefoot or in stocking feet helps prevent accidental damage to the vinyl.
Securing the liner bead takes patience. Begin at the corners or deep end, then work your way around, securing the bead into the track. Here’s a pro tip we use at Creative Edge Pools: wooden clothes pegs with the springs removed make perfect temporary holders! Skip from side to side as you work to ensure even placement—this prevents pulling too much material to one side.
Now for the vacuum system. You’ll need a shop vacuum (5+ HP) or specialized liner vacuum. Insert the hose between the liner and pool wall, then seal the opening with duct tape. Make sure to seal all other openings like skimmers and returns with cardboard and tape too.
Turn on the vacuum and let it run for 20-30 minutes. You’ll be amazed as you watch the liner magically pull tight against the walls and floor! Gently walk around and adjust any areas that aren’t seating properly, continuing to vacuum until everything looks perfect.
Cutting In & Filling After Replacing Inground Pool Liner
With your liner positioned correctly, it’s time to start filling. Begin with half to three-quarters hose flow to prevent disturbing sandy bottoms, then increase to full flow after a few inches accumulate. Keep that vacuum running until water reaches 6-12 inches in the shallow end, monitoring for wrinkles and making adjustments as needed.
When water reaches the main drain, mark its position, cut an X in the liner directly over the drain, and install the gasket and faceplate. Always tighten screws gradually in a cross pattern to ensure even pressure.
For returns and skimmers, patience is key. Wait until water is within 6 inches of each fitting before cutting them in. Mark the center from inside the pool, make small holes, and install faceplates with new gaskets. Use stainless steel screws lubricated with WD-40 to prevent stripping—a small detail that makes a big difference!
Finally, fill to the middle of the skimmer opening, remove any remaining tape or seals, and install your skimmer baskets and return fittings. Start up your circulation system and add initial chemicals according to manufacturer recommendations.
There you have it—a beautiful new pool liner installed by your own hands! The satisfaction of diving into a pool you’ve restored yourself is truly something special, and the money you’ve saved makes that first swim even sweeter.
Costs, Tools, Weather & Troubleshooting
Let’s talk dollars and cents, must-have equipment, and potential hiccups you might encounter when replacing inground pool liner. Trust me, being prepared makes all the difference between a smooth weekend project and a multi-week headache!
Must-Have Tools & Materials
When I tackle a replacing inground pool liner project, I always make sure my toolbox is properly stocked before draining a single drop of water.
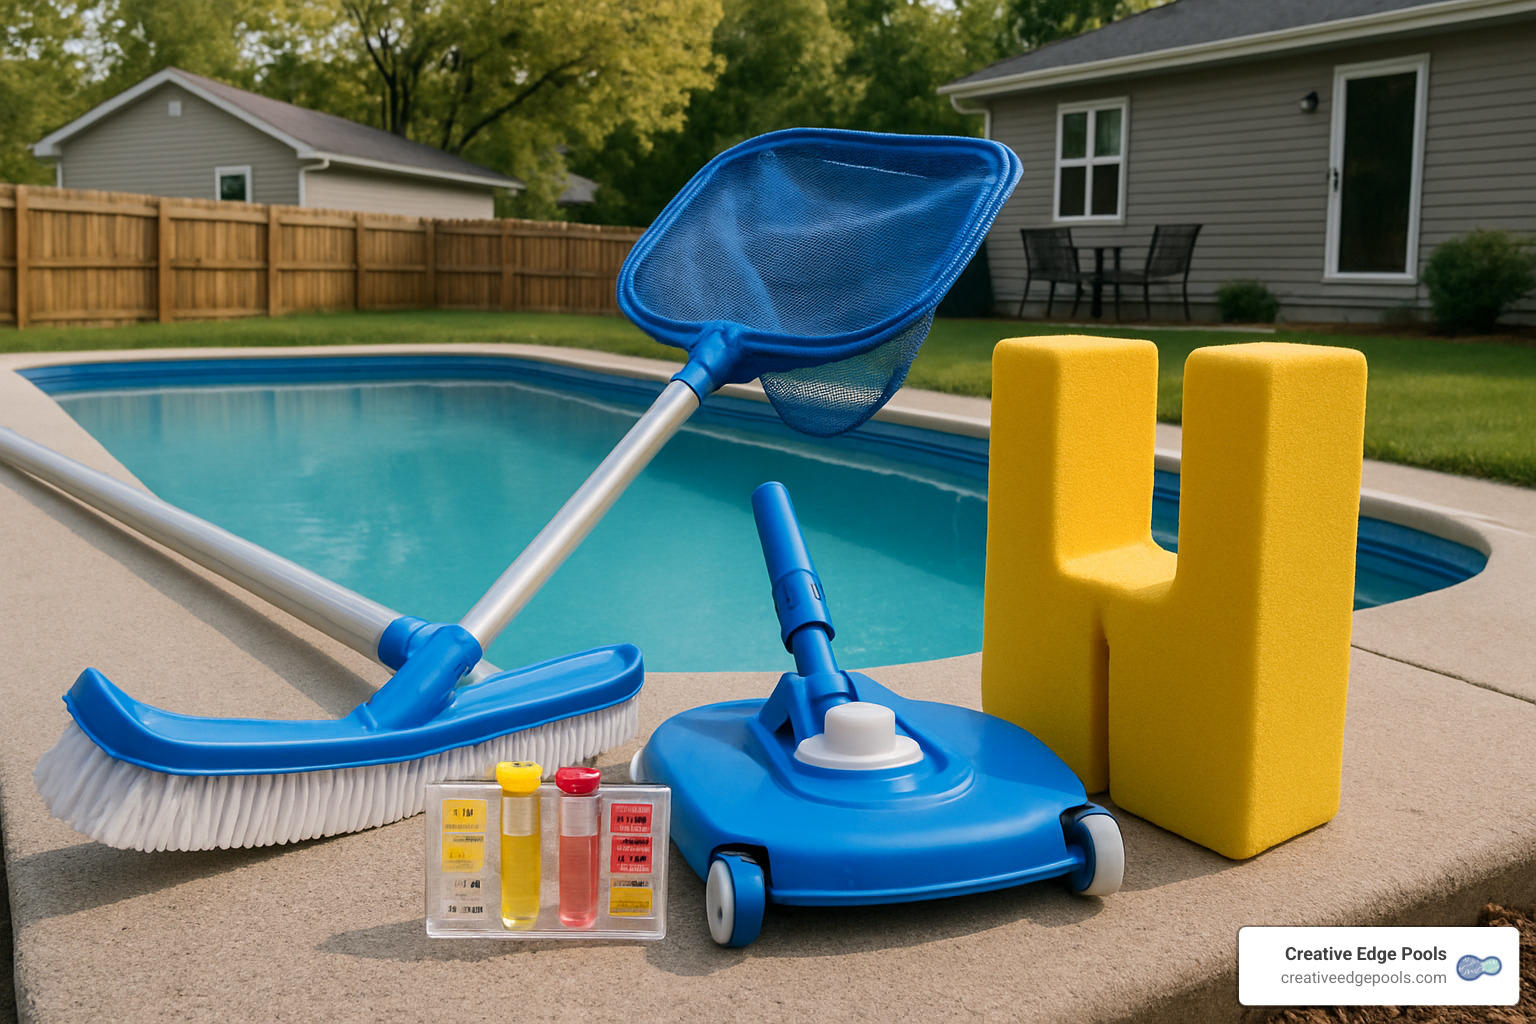
You’ll need a powerful submersible pump (rental is fine if you don’t own one) and a shop vacuum with at least 5 horsepower—this is non-negotiable for proper liner setting. A quality utility knife with several replacement blades will save you frustration, as vinyl dulls blades quickly.
For accurate measurements, only use a steel measuring tape—cloth or plastic ones stretch and can throw off your entire project. Don’t forget basic tools like screwdrivers (both flathead and Phillips), a socket set, non-ascorbic duct tape (regular tape can damage vinyl), and a garden hose for filling.
On the materials side, beyond your new custom-measured liner, consider wall foam as an “optional but worth it” upgrade. This insulating layer not only protects your liner from wall imperfections but also helps maintain water temperature. A liner pad for the floor, hydraulic cement for crack repairs, and replacement gaskets for all fittings are absolute musts.
For a standard 16’x32′ rectangular pool, expect to spend about $1,500-$2,200 on the liner itself, $200-$350 for wall foam, $100-$200 for gaskets and hardware, potentially $200-$400 for tools (if you’re buying rather than borrowing), and around $100-$150 for startup chemicals.
The DIY approach really shines when you consider that professional installation would add another $2,000-$4,000 to your bill. That’s a savings of 40-60%—enough to fund several seasons of pool accessories and backyard barbecues!
Weather & Temperature Factors
Mother Nature can be your best friend or worst enemy when replacing inground pool liner. I’ve learned this lesson the hard way!
The sweet spot for installation is between 75-85°F (24-29°C). At these temperatures, vinyl is wonderfully pliable and forgiving. Below 70°F, the material gets stiff and difficult to work with. Above 90°F, it stretches too easily, potentially leading to sagging later.
Rain is your installation nemesis—not only does it make working conditions miserable, but water can accumulate between the pool structure and your new liner. Even worse is high groundwater after heavy rains, which can actually push against your empty pool shell and cause it to “float” or shift. I’ve seen concrete decks crack from this pressure!
If the weather turns on you mid-project, have a contingency plan. For a partially completed job, tarps can be lifesavers. If you’ve drained but not started, consider a temporary refill until conditions improve. Remember: a rushed installation in poor conditions will haunt you for years.
Troubleshooting Wrinkles & Misfits
Even with perfect preparation, replacing inground pool liner sometimes comes with challenges. Here’s how to overcome the most common issues:
When your liner appears too small, don’t panic! Vinyl has remarkable stretching properties, especially when warmed by the sun. I’ve seen liners that initially seemed inches too short eventually fit perfectly after a few hours of sunshine and gentle coaxing.
Persistent floor wrinkles drive many DIYers crazy, but they’re usually fixable. Re-vacuum the area with your shop vac, and while the suction is pulling the liner tight, gently push wrinkles toward the walls with your feet. Sometimes it takes several attempts, but patience pays off.
If your liner bead keeps popping out of the track, try this old-school trick: wooden clothes pegs (with springs removed) or even pennies can serve as temporary shims. Just be sure to remove them before filling past that point!
Air pockets behind the liner usually indicate vacuum issues. Double-check all your seals, especially around skimmers and returns. Sometimes adding a second vacuum at another point helps create more even suction.
When the liner doesn’t align properly with steps or features, verify the orientation markings from the manufacturer. If you’re significantly off, it’s better to drain and reset now than live with a misaligned liner for the next decade.
Most reputable liner manufacturers offer technical support even for DIY installations, so don’t hesitate to call if you hit a roadblock. At Creative Edge Pools, we’ve guided many homeowners through tricky installations over the phone—sometimes a quick expert tip is all you need to get back on track.
Maintenance & Warranty Essentials
After successfully replacing inground pool liner, you’ll want to protect your investment. Think of your new liner as the skin of your pool—with proper care, it can stay beautiful and functional for years to come.
Tips to Extend Liner Life
Your new pool liner isn’t just a pretty face—it’s the watertight barrier that makes swimming possible. To maximize its lifespan, consistency is key.
Water chemistry is your liner’s best friend—or worst enemy. Test your water weekly using a reliable kit, keeping pH between 7.2-7.6 and chlorine levels at 1-3 ppm. Your total alkalinity should hover between 80-120 ppm, with calcium hardness at 200-400 ppm. These aren’t just numbers—they’re the secret sauce to preventing premature aging and discoloration of your vinyl.
The way you add chemicals matters tremendously. Never toss chemicals directly into the pool (especially not onto the vinyl!), as this can bleach or damage your liner. Instead, pre-dissolve chemicals or add them through the skimmer while the pump is running. Think of it as seasoning your food evenly rather than dumping all the salt in one spot.
Your liner faces physical threats too. Those poolside chairs with metal legs? They’re potential liner punctures waiting to happen. Keep sharp objects away from the pool, use protective pads under ladder legs, and avoid dragging equipment across the liner. I’ve seen countless beautiful liners ruined by a single careless moment with a pool pole or toy.
The sun—while wonderful for swimming days—is surprisingly harsh on vinyl. Consider using a pool cover during extended periods of non-use, and never let water levels drop below the skimmer (which exposes liner to direct UV rays). Some pool owners add UV-inhibiting chemicals as an extra layer of protection—think of it as sunscreen for your pool!
Winter care deserves special attention in our New England climate. Never fully drain your pool for winter—the weight of snow and ice can damage an empty pool. Use proper winterization chemicals, ensure your cover is securely fastened, and regularly remove standing water from winter covers to prevent debris from weighing them down into your pool.
Most vinyl pool liners include warranties ranging from 15-25 years, but read the fine print. These warranties typically decrease in coverage over time (pro-rated) and only cover manufacturing defects—not damage from improper chemistry or installation mishaps. Many manufacturers require proof of professional installation, though some will honor DIY installations with proper documentation.
At Creative Edge Pools, we’ve found that homeowners who keep simple logs of their water tests and maintenance have much better luck with warranty claims if needed. We recommend taking photos of your completed installation and storing them with your warranty paperwork—you’ll thank yourself years down the road if issues arise.
Your pool liner is both functional and aesthetic—proper care keeps your backyard oasis looking fresh and inviting while protecting your investment for years to come. With these simple maintenance practices, you’ll be enjoying that sparkling, leak-free pool long after your neighbors are shopping for replacement liners.
Frequently Asked Questions about Replacing Inground Pool Liner
How often should I budget for a new liner?
While most vinyl liners last 10-15 years, I always tell my customers to budget for replacement every 8-10 years. This isn’t because I’m trying to sell more liners—it’s actually a money-saving strategy in the long run! By planning ahead, you won’t be caught off-guard by sudden liner failures that always seem to happen mid-summer when everyone’s booked solid.
Planning ahead also gives you the luxury of choosing the perfect weather window for your project, rather than scrambling to replace a failed liner during a heatwave or rainstorm. Think of it as preventative maintenance, just like you’d change your car’s oil before the engine seizes.
Can I replace the liner myself if my pool has custom steps?
Yes, you absolutely can tackle custom steps yourself, but I won’t sugarcoat it—this is the “black diamond” challenge of replacing inground pool liner. The dry method works best here: install your liner completely and vacuum it into place before making any cuts.
Once the liner is vacuumed tight, you’ll need to play detective with your fingertips. Gently feel through the liner to identify step corners and edges. Start with tiny cuts at the corners (think paper cut size), then gradually work your way along each edge, cutting and securing small sections as you go.
I’ve seen many DIYers succeed with custom steps, but this is definitely where having an experienced buddy helps. At Creative Edge Pools, we often see that steps are where most DIYers either shine or struggle. Take your time—this isn’t a race, and methodical precision pays off beautifully here.
What’s the safest way to dispose of the old vinyl?
Let’s be good stewards of our environment when getting rid of that old liner. First, check with your local waste management about recycling options—more facilities are accepting vinyl these days, which is fantastic news!
If recycling isn’t available in your area, you’ll want to cut the liner into manageable sections. I usually recommend folding or rolling these sections to make transport easier and less messy. Then take them to a landfill that accepts construction materials.
Here’s an insider tip: some liner manufacturers now have recycling programs of their own. Ask about this when ordering your new liner—it could save you time and help the planet!
Whatever you do, please don’t burn old vinyl liners. They release truly nasty chemicals when burned that aren’t good for you, your neighbors, or the atmosphere. Your lungs (and the EPA) will thank you.
How do I know if my pool has a hydrostatic relief valve?
Most inground pools have a hydrostatic relief valve (HRV) hiding in the main drain. This little unsung hero prevents your pool from literally popping out of the ground due to groundwater pressure—yes, that can actually happen!
To spot this valve, look for a small plastic cap in the center of your main drain. Sometimes it’s tucked underneath the main drain cover, and it typically has small holes or slots that allow water to enter.
When replacing inground pool liner, make sure this valve stays functional. If your pool doesn’t have one and you live in an area with high groundwater (particularly near lakes, rivers, or in regions with a high water table), consider having one installed during your liner replacement. It’s cheap insurance against a very expensive problem.
What if the weather turns bad during my liner replacement?
Murphy’s Law loves pool projects! If storm clouds gather during your liner replacement, don’t panic—you have options.
If you’ve drained but haven’t removed the old liner yet, refill partially to provide weight and prevent the pool from shifting. If you’ve already removed the old liner, cover the pool with heavy-duty tarps secured with sandbags to keep rain and debris out.
For projects caught in the middle with the new liner partially installed, try to reach a stable pausing point—maybe get one section fully secured before buttoning up for the day. And if temperatures suddenly drop, consider using space heaters in the pool area to maintain vinyl pliability.
At Creative Edge Pools, we’re religious about checking extended forecasts before beginning liner replacements. I recommend you do the same for DIY projects—those 10-day forecasts aren’t perfect, but they’re much better than flying blind! Patience with weather delays always pays off with a better installation.
Conclusion
Replacing inground pool liner isn’t just a maintenance task—it’s a chance to breathe new life into your backyard oasis. Whether you’ve followed our guide to tackle this project yourself or you’re considering professional help, a fresh liner transforms both the look and functionality of your swimming pool for years to come.
Throughout this guide, we’ve walked through every aspect of liner replacement, from recognizing when it’s time for a change to selecting the perfect thickness and pattern for your needs. We’ve shared the detailed steps for DIY installation and highlighted the critical factors that contribute to a successful outcome.
The most successful pool liner replacements come down to a few key elements: taking precise measurements before ordering, properly preparing your pool structure, choosing ideal weather conditions, paying close attention to detail during installation, and maintaining proper water chemistry afterward. Get these right, and you’ll enjoy your refreshed pool for many seasons.
At Creative Edge Pools, we’ve helped countless families throughout Eastern Massachusetts and Southern New Hampshire fall in love with their backyards again. There’s something truly special about seeing a tired, faded pool transformed with vibrant new vinyl—it’s like giving your outdoor space a complete makeover without the cost of a full renovation.
Your swimming pool represents more than just a place to cool off on hot summer days. It’s where memories are made, where children learn to swim, and where friends gather for weekend barbecues. A well-maintained pool with a fresh liner improves these experiences while protecting your property value and preventing costly structural damage.
Whether you’re feeling confident to tackle this project yourself or would prefer the peace of mind that comes with professional installation, we’re here to help. Our family-owned business brings decades of experience and a genuine passion for creating beautiful backyard environments that families can enjoy for generations.
Ready to refresh your pool and transform your outdoor living space? We’d love to help you explore your options, from measuring assistance to liner selection or complete installation services. Let’s make your backyard dreams a reality this season.
More info about inground vinyl pool liner replacement
