Concrete Pool Slide Resurfacing: 5 Essential Steps for Amazing Results
Why Concrete Pool Slide Resurfacing is Essential for Your Pool Area
Concrete pool slide resurfacing is the process of cleaning, repairing, and applying a new coating to your pool slide’s surface, restoring its smoothness, safety, and aesthetic appeal.
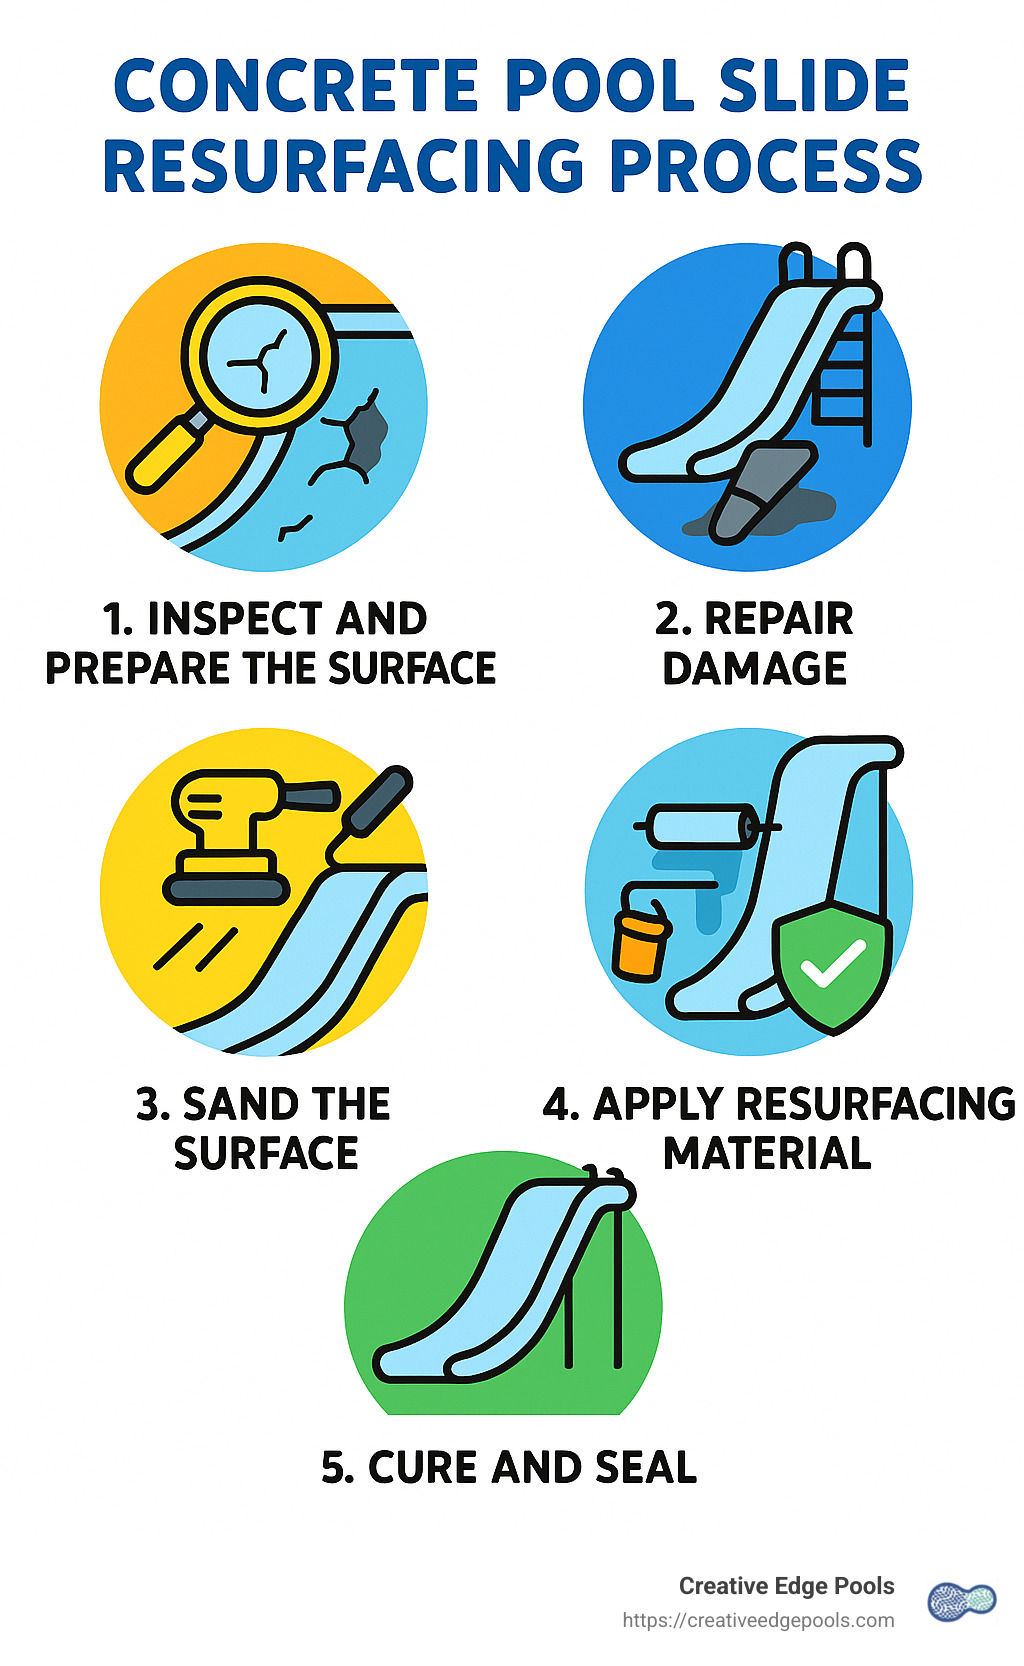
Here’s the quick overview of the resurfacing process:
- Inspect and Prepare the Surface: Identify signs of wear and thoroughly clean the slide.
- Repair Damage: Fill any cracks or chips with appropriate sealants.
- Sand the Surface: Start with coarse grit (80 grit) and finish with fine grit (1000 grit).
- Apply Resurfacing Material: Choose epoxy or polyurethane-based sealant depending on your needs.
- Cure and Seal: Allow proper curing time, then seal with a UV-stable coating for improved durability and slipperiness.
Over time, concrete pool slides can become rough, develop cracks, or lose their slickness, diminishing enjoyment and potentially causing minor injuries. Regular resurfacing extends your slide’s life by up to five years, providing a safer, smoother experience. With the right approach—whether DIY or professional—you can refresh your pool slide to a like-new condition, ensuring more summers of family fun.
I’m David Brabant, owner of Creative Edge Pools, and I’ve spent over thirty years creating custom gunite swimming pools and mastering concrete pool slide resurfacing techniques. In this guide, we’ll explore exactly how you can restore your slide effectively and efficiently.
Easy concrete pool slide resurfacing glossary:
– pool resurfacing
– plaster pool resurfacing cost
– diamond brite pool repair
Signs Your Concrete Pool Slide Needs Resurfacing
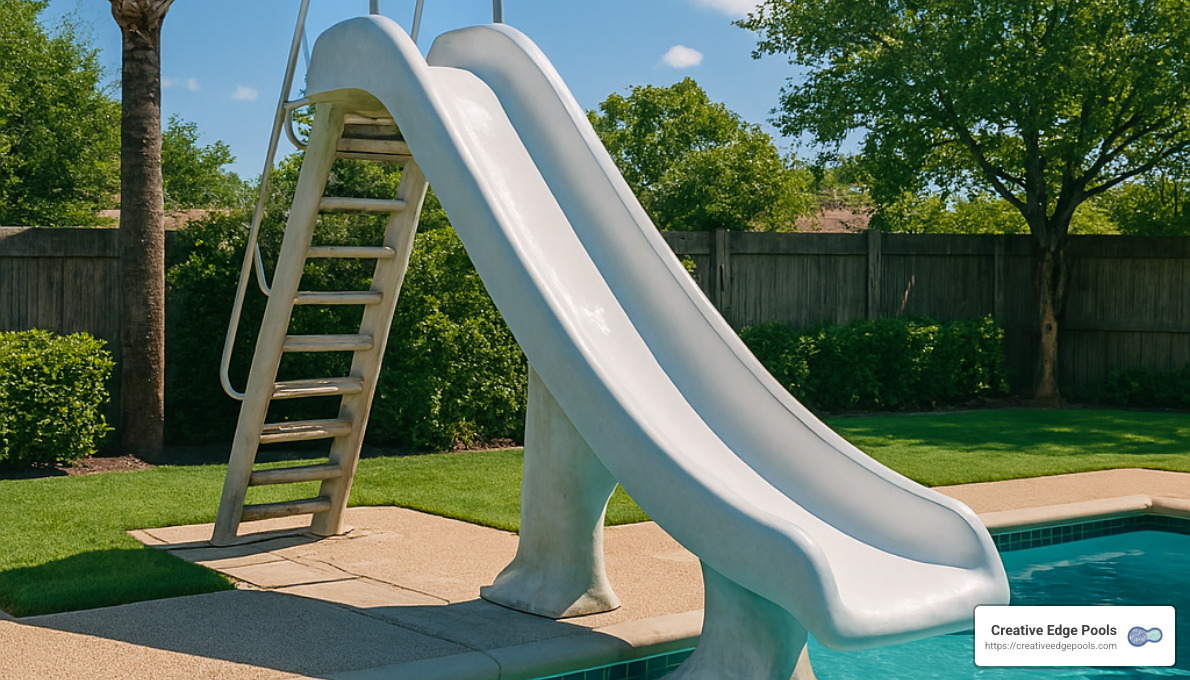
Has your family pool slide become less popular lately? It might not be because your kids are suddenly “too cool” for sliding. Often, the slide has simply lost some of its original smoothness and charm. Concrete pool slide resurfacing helps bring back the fun—and safety—to every backyard pool slide. Here are some key signs telling you it might be time to refresh your slide.
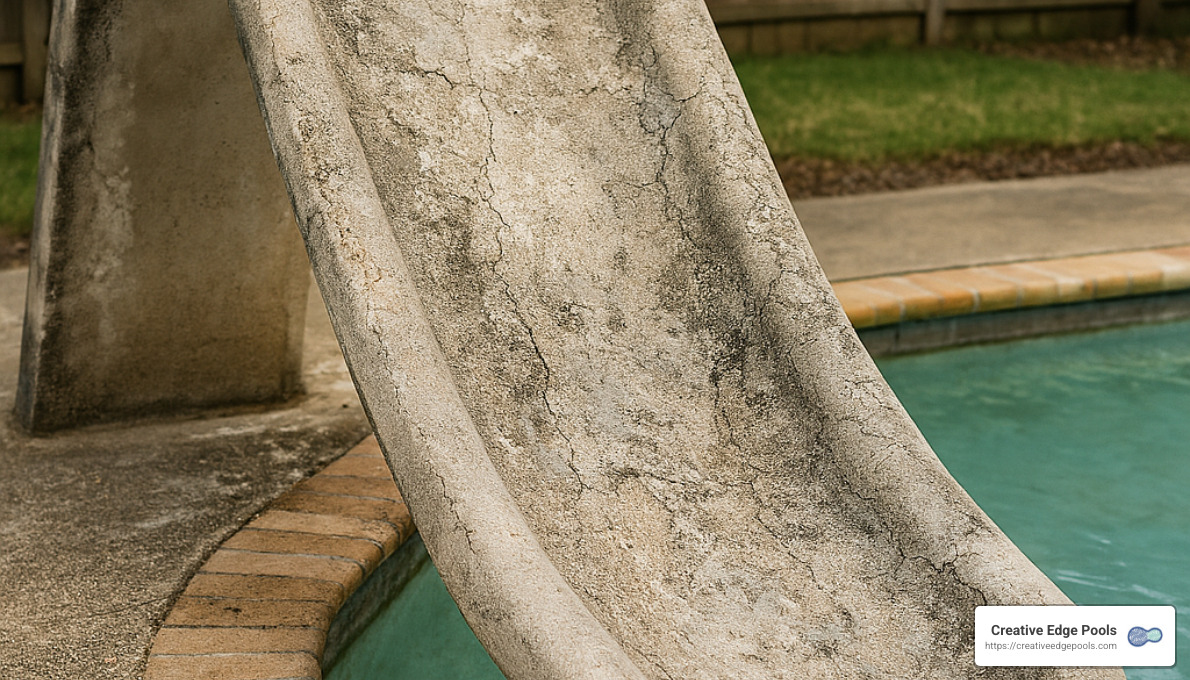
Rough Surfaces
Remember when your pool slide felt like smooth glass under your fingertips? Over time, constant sun exposure, pool chemicals, and general wear and tear can wear off the protective coating. Suddenly, sliding down feels more like a trip on sandpaper than a fun glide into cool water.
If your slide’s surface feels gritty or abrasive, you’re experiencing a common problem. This roughness isn’t just unpleasant—it’s a clear sign the surface is deteriorating, and your slide needs some love.
Cracks and Chips
Even small cracks and chips can quickly become big headaches. These minor imperfections not only ruin the smooth sliding experience—they can snag swimsuits or cause minor scrapes and cuts. Worse yet, cracks become a cozy home for dirt and algae buildup, creating slippery spots where you don’t want them.
And let’s talk about harsh New England winters. Here in Massachusetts and Southern New Hampshire, freeze-thaw cycles can take tiny cracks and make them bigger each season. Those little imperfections can easily expand and eventually impact the structural integrity of your slide.
Discoloration
Faded colors, weird stains, or yellowing aren’t just cosmetic annoyances—they’re clear signs of damage from UV rays and pool chemicals. Your slide’s protective coating is likely breaking down, leaving it vulnerable to more serious damage. If your shiny blue slide is starting to look more like a bleached-out relic, it’s probably time for concrete pool slide resurfacing.
Decreased Slipperiness
Sliding fast into your pool is half the fun—but when friction starts slowing things down, the thrill quickly fades. One homeowner recently told us, “My kids used to zoom down our slide. Now they’re practically inching their way down because there’s so much friction.”
That friction often comes from accumulated dirt, grime, or grooves in the slide’s surface, dramatically slowing descent and potentially causing skin abrasions. Kids (and adults!) might even try unsafe methods to gain speed, like pushing against sidewalls or sitting in awkward positions. Proper resurfacing restores the slickness your family expects—and deserves.
Safety Hazards
Safety is always a top priority. A worn-down slide isn’t just annoying—it can also pose real risks. Algae buildup in cracks can create dangerously slippery spots in unwanted places, while sharp edges from chipped concrete can cut skin and snag swimsuits. Additionally, water seeping into deep cracks weakens the slide’s structure over time, potentially leading to more severe issues.
One Massachusetts mom contacted us after noticing her kids mysteriously stopped using their slide. She told us, “I thought they’d just outgrown it, but when I checked the slide myself, it felt like sandpaper!” After a quick resurfacing, her kids were back to sliding all summer.
To prevent these risks, inspect your pool slide regularly. We recommend running your hand along the slide each spring, checking for roughness, cracks, discoloration, or any other signs of wear. Spotting the issues early makes resurfacing quicker, easier, and more effective. If you find any of these warning signs, it’s definitely time to consider concrete pool slide resurfacing—to keep your slide safe, smooth, and ready for years of family fun.
Preparing Your Concrete Pool Slide for Resurfacing
At Creative Edge Pools, we always tell our clients, “The secret to a lasting finish is all in the prep.” While applying that shiny new coating might seem like the fun part, careful preparation is genuinely the most crucial step in your concrete pool slide resurfacing project. Done right, this step ensures a smooth finish that lasts for years. Let’s walk through exactly how to get your slide ready for its change.
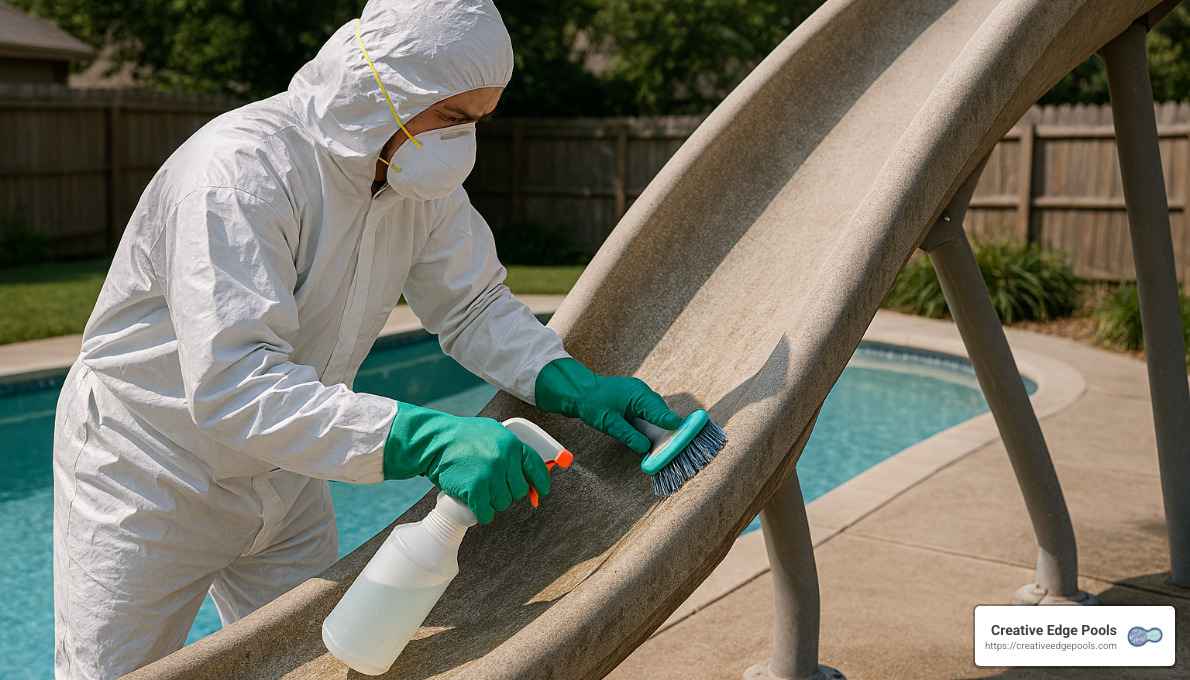
Safety First: Essential Precautions
Before diving into your resurfacing trip, let’s talk safety. After all, a beautiful new slide is great, but a safe DIY experience is even better! Start by ensuring you have the right protective equipment: chemical-resistant gloves, safety goggles or a face shield, a dust mask or respirator (especially important when sanding), sturdy non-slip footwear, and clothing that covers your arms and legs.
Chemicals used during cleaning and stripping can be strong, so handle them carefully. Always take time to read and follow label instructions. Keep these chemicals safely locked away from children and pets, and never mix cleaning products (especially bleach and ammonia—trust us, it’s not pretty!). Work in a place with plenty of ventilation, and keep a bucket of clean water close by in case of accidental splashes.
Next, secure your work area. Temporarily block off access to the pool and slide to prevent curious kids or pets from wandering in. Cover your pool’s surface to avoid contamination from dust or chemical runoff, and remove any patio furniture or valuables from the immediate workspace.
Additionally, think about environmental considerations. Check your local regulations regarding disposing of cleaning chemicals and old coating scrapings. It’s best to avoid resurfacing during extreme heat (over 90°F) or rainy weather. Whenever possible, try to choose environmentally-friendly cleaning solutions, and be mindful of preventing runoff from entering nearby storm drains or natural waterways.
Cleaning and Repairing the Surface
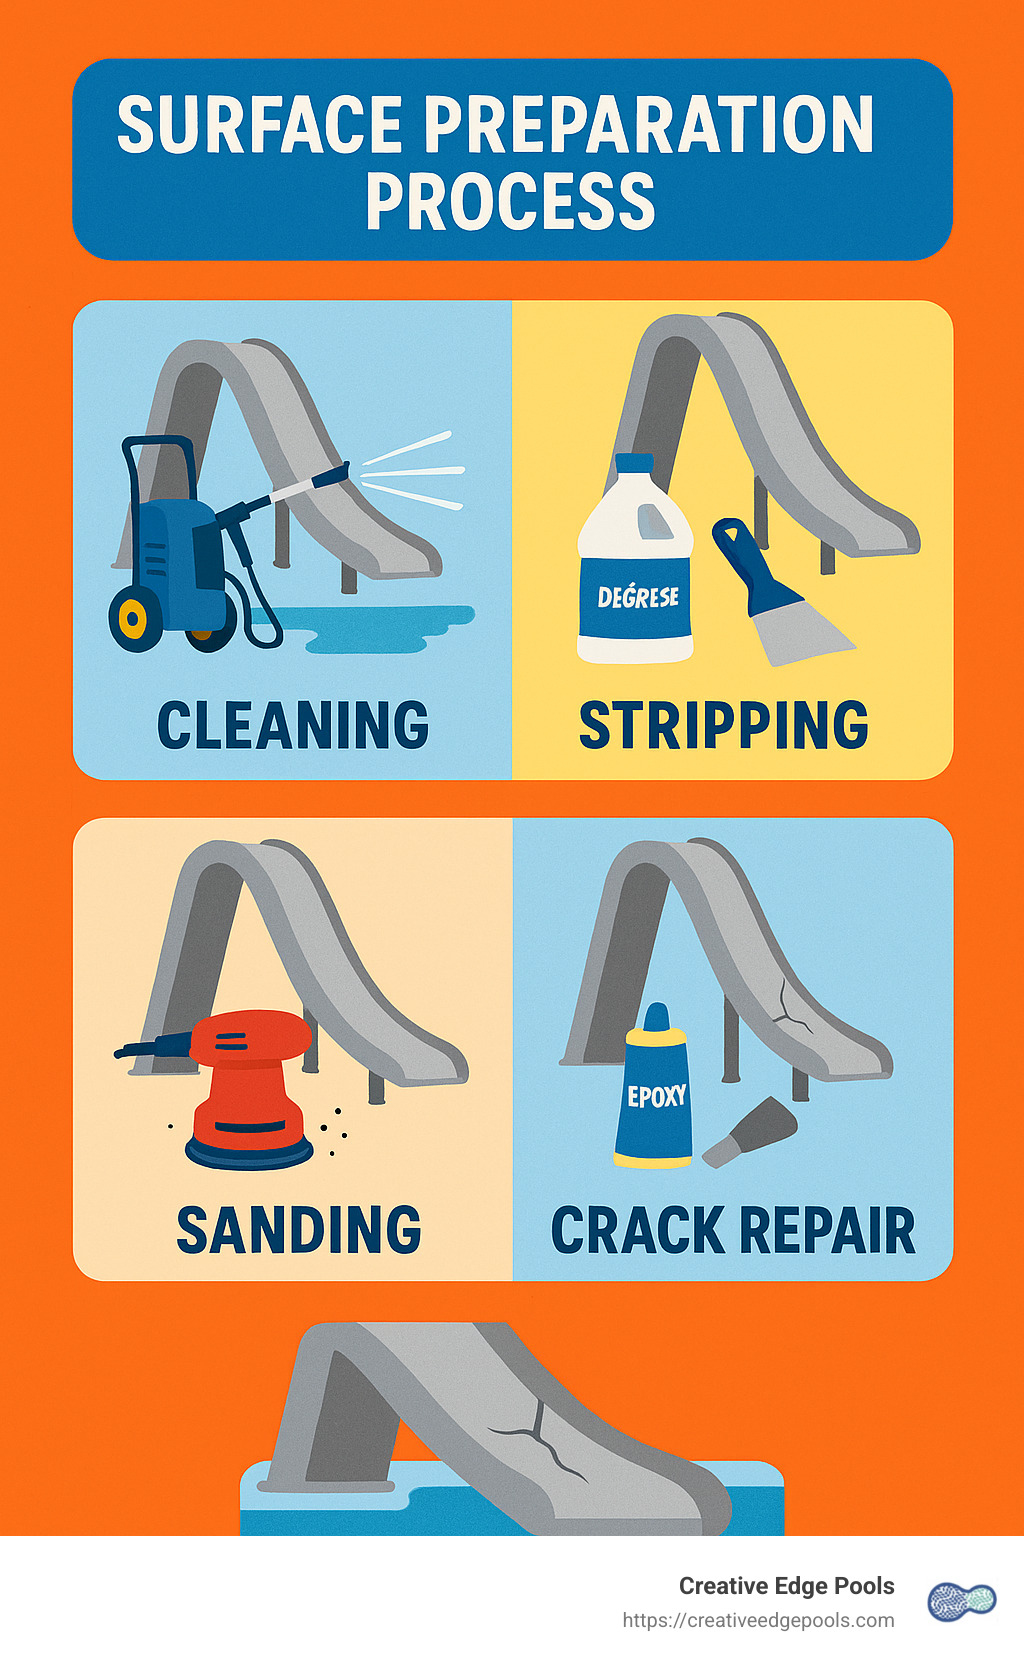
With safety and prep out of the way, it’s time to tackle the slide itself. Proper surface preparation is the backbone of successful concrete pool slide resurfacing. Let’s break it down step by step.
The first step is degreasing. Sunscreen, body oils, and grime build up over the years, and coating won’t adhere well to a dirty surface. A simple mix of mild dish soap and warm water—about one tablespoon per gallon—works wonders for cutting through grease. Using a soft-bristle brush, scrub the entire slide thoroughly. Rinse completely with clean water, and allow the slide to dry entirely before moving on.
Next up, you’ll want to remove any old coatings that have seen better days. If your slide has peeling paint or flaking epoxy, use a chemical stripper formulated specifically for pool surfaces. Follow manufacturer guidelines carefully, apply the stripper, and gently scrape away loosened material using a plastic scraper. For stubborn patches, solvents such as xylene or acetone-based solutions can help, but take care—and remember your gloves and ventilation!
Once the slide’s old coating has been completely removed, sanding comes next. Sanding ensures your new coating adheres properly and results in a smooth, glass-like finish. Start with coarse 80-grit sandpaper to eliminate any remaining rough spots or old coating residue. Sand evenly along the slide surface in small sections, moving carefully in the same direction that water flows. Gradually move to finer paper—120-grit, then 220—and finally finish with ultra-fine 1000-grit paper for a silky smooth result. After sanding, thoroughly vacuum dust and wipe everything down with a tack cloth.
Finally, it’s time to inspect the slide closely and fill cracks or chips. Even minor imperfections can cause issues down the road if ignored. For tiny hairline cracks, a concrete crack filler or epoxy-based filler works perfectly. Larger cracks or chipped areas require something tougher, such as two-part urethane or hydraulic cement. After filling the cracks, allow these repairs ample time to cure, as recommended by the manufacturer. Once cured, sand the repaired areas gently until flush with the surrounding surface.
A quick story from our experience: one Southern New Hampshire homeowner called us, ready to replace his heavily cracked 15-year-old slide. After we guided him through proper surface preparation, repairs, and concrete pool slide resurfacing, he was amazed. “I can’t believe it looks and feels brand new again! I saved a ton compared to buying a completely new slide.”
We can’t stress enough that taking your time during this preparation phase pays off. At Creative Edge Pools, around 70% of our resurfacing project time goes to thorough prep—and it truly makes all the difference.
Methods and Materials for Concrete Pool Slide Resurfacing
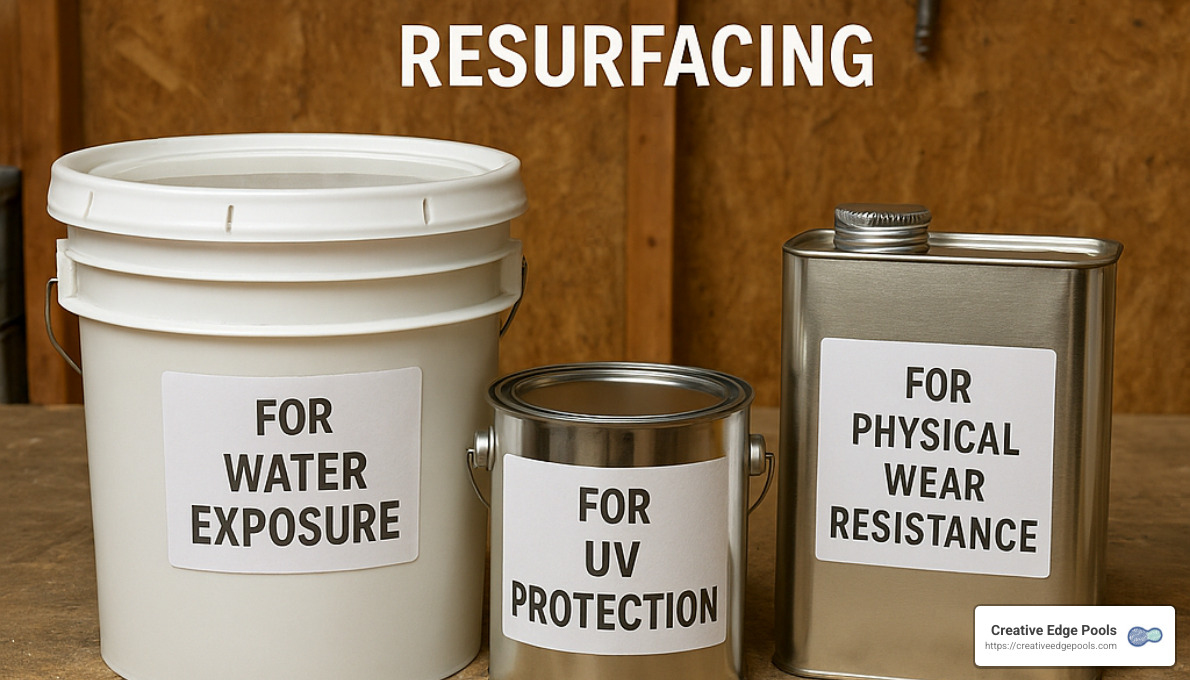
Choosing the right materials and methods is the heart of successful concrete pool slide resurfacing. Unlike typical concrete sealing jobs, pool slides require specialized coatings that provide a smooth, slippery ride while holding up to constant water exposure, sunshine, and heavy use.
Let’s explore the options, so you can make the best choice for your family’s poolside trips.
Choosing the Right Resurfacing Material
There are several high-quality coatings designed specifically for concrete pool slides. Each has its strengths, so let’s break down what makes each type special.
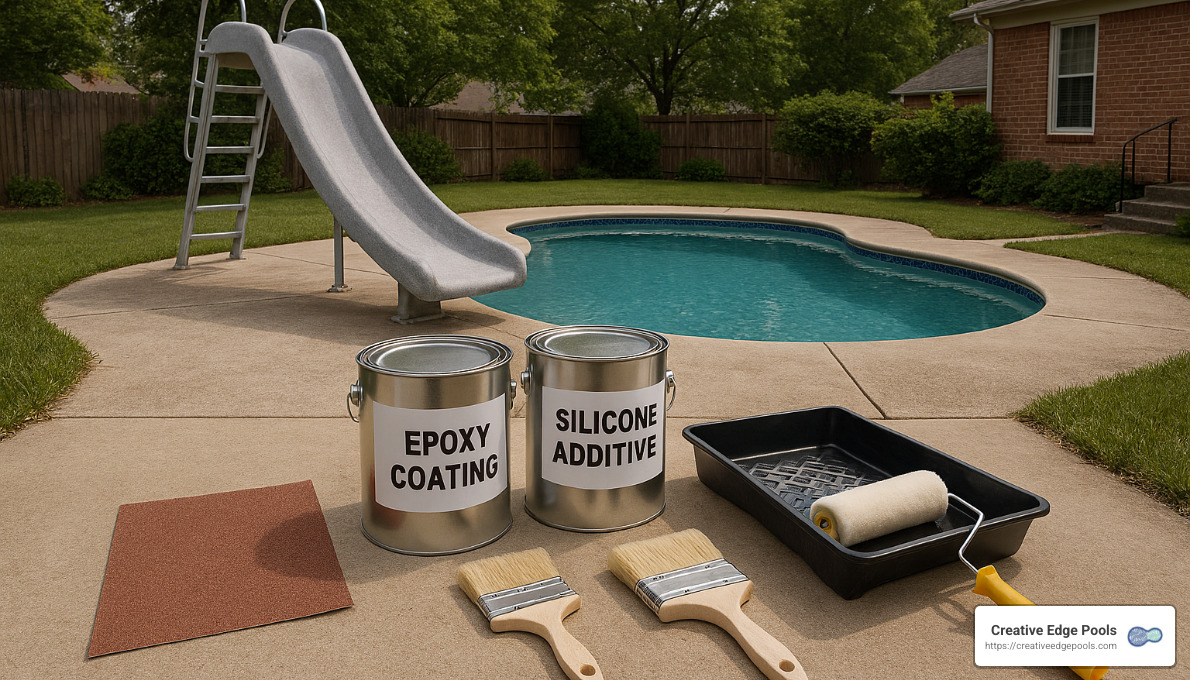
Epoxy Coatings are a go-to choice for many homeowners. These coatings create a thick, glassy surface that covers imperfections and feels fantastic to slide on. Epoxy coatings have excellent durability and chemical resistance, making them ideal for busy family pools and slides showing minor wear and tear.
An epoxy coating typically lasts about 3-4 years, but keep in mind that epoxy can yellow slightly over time with exposure to sunlight. One happy customer from Andover, Massachusetts, told us, “Our epoxy-coated slide has given us three great summers so far. My kids are thrilled that the slide is smooth and fast again!”
Polyurethane-Based Sealants are another favorite, especially in areas with plenty of sun exposure, such as here in Eastern Massachusetts and Southern New Hampshire. These coatings have outstanding UV resistance, which means they won’t yellow or discolor, and they stay flexible even through temperature swings.
The trade-off? Urethane coatings are usually thinner than epoxy, so you might need to reapply every 2-3 years. Our senior technician at Creative Edge Pools says, “We often recommend polyurethane for slides in direct sunlight. Its flexibility helps it withstand New England’s tough weather without cracking.”
Water-Based Primers and Paints are great if you’re looking for an eco-friendlier option. They’re easier to apply, have less odor, and offer decent color retention. However, these coatings typically form a thinner layer, making them best suited for decorative, lightly used slides or environmentally sensitive areas. On average, expect them to last about 1-2 years.
Finally, for slides with extensive damage, Acrylic Overlays can be a wonderful solution. These cement-like overlays adhere well to concrete and can incorporate colors and textures. They’re perfect for slides that need serious TLC and rebuilding. However, acrylic overlays require more skill to apply and usually need a topcoat sealer, but they can remain in good shape for 3-5 years.
The Importance of a Slippery Surface
While most concrete surfaces aim for slip-resistance, your pool slide needs the exact opposite—a smooth, slippery glide! A slide that’s too sticky or rough can cause friction burns, abrupt stops, or even lead to unsafe attempts at speeding things up. Trust us—nobody wants a pool party sidelined by slide injuries.
Creating that ultra-slippery, glass-like finish involves a few special steps. It starts with sanding your slide from coarse (80 grit) to ultra-fine (1000 grit) sandpaper. This preps the surface perfectly for your chosen coating.
Applying multiple layers of your coating—typically two coats of epoxy or polyurethane—builds up the slippery finish your family loves. Adding special silicone or PTFE additives to your coating material can improve slickness even more. And as a finishing touch, some pool enthusiasts add a thin coat of specialized slide wax or silicone-based products after curing to boost the slipperiness further.
At Creative Edge Pools, we’ve developed our own finishing approach that balances slipperiness with durability. As our lead technician puts it, “It’s all about the final buffing. Our secret technique creates a fast, fun ride that lasts for seasons.”
Whatever coating you choose, it’s crucial to carefully follow the manufacturer’s instructions concerning temperature, humidity, and drying times. Properly applying the right coating and technique ensures your resurfaced concrete pool slide stays safe, slippery, and beautiful for years to come.
For more detailed information on coating options, you can check out this scientific research on epoxy coatings for slides or explore more about making slides slippery with specialized coatings.
With the right methods and materials, concrete pool slide resurfacing can transform your worn-out slide from a forgotten backyard fixture into the star attraction at every pool party.
DIY Concrete Pool Slide Resurfacing: A Step-by-Step Guide
If you’re a homeowner who loves rolling up your sleeves and getting hands-on around your backyard oasis, tackling concrete pool slide resurfacing yourself can be an incredibly satisfying project. Not only will you save money in the process, but you’ll also enjoy the pride of knowing you brought your pool slide back to life. With careful prep work and quality materials, your DIY resurfacing job can last up to 5 years. Let’s walk you step-by-step through the process.
Step 1: Gather Materials for Concrete Pool Slide Resurfacing
Before diving in, you’ll want to have everything ready to go. Here’s what you’ll need:
Start with a high-quality epoxy or polyurethane coating that’s specifically designed for pool slides. If the coating manufacturer recommends a primer, grab that too. For repairing any imperfections, have a concrete patching compound available. You’ll need some cleaning supplies like mild detergent, acetone, or xylene for final degreasing.
For sanding, make sure you’ve got sandpaper in various grits—80 grit for initial rough spots, followed by 120, 220, and finally 1000 grit for an ultra-smooth finish. Pick up painter’s tape to protect edges, rollers with a non-shedding 3/8″ nap, paint brushes for detail spots, plastic mixing containers and measuring cups, paint stir sticks, and plastic scrapers.
Don’t forget your safety gear—chemical-resistant gloves, goggles, and a dust mask or respirator are must-haves. A few optional items like an extension pole for your roller, plastic sheeting to cover nearby areas, small foam brushes for tight corners, and knee pads for comfort can really help make the job easier.
One of our customers in Lexington said, “I was overwhelmed at first, but once everything was laid out, the project was smooth sailing.”
Step 2: Preparing the Slide for Concrete Pool Slide Resurfacing
You’ve probably heard us say this before at Creative Edge Pools: preparation is the key to a professional-quality finish. Let’s break down the key steps clearly and simply.
Begin by thoroughly cleaning your slide. Sweep away leaves and debris, then scrub down the slide with warm water and mild detergent. Rinse all soap residue away and allow the slide surface to dry completely (typically about 24 hours).
Next, carefully inspect the slide surface. Look closely for any cracks, chips, or rough spots. Mark these problematic areas with chalk, and do a quick “tap test” with a small hammer—any hollow sounds might indicate areas where the concrete beneath is coming loose.
Now it’s time for repairs. Fill small hairline cracks with appropriate crack filler and repair larger chips or dents with a stronger concrete patching compound. Allow all repairs to fully cure before moving on.
Sanding is crucial—start with 80-grit sandpaper to smooth out rough spots and remove old coatings. Gradually move to finer grits (120, then 220) until you’re using a super-fine 1000-grit paper. Sanding in the direction water flows down the slide gives the best results. Finish by thoroughly cleaning off dust using a vacuum and tack cloth.
Lastly, complete your surface prep by wiping everything down one more time with acetone or xylene, removing any leftover oils or fingerprints. Let the solvent fully evaporate. Your slide should now feel silky-smooth and ready for resurfacing.
Step 3: Applying the Resurfacing Material
Now comes the fun part—applying your coating. Before you start mixing any materials, confirm your weather conditions are right. You’ll want temperatures between 50°F and 90°F, humidity in the 30% to 85% range, no rain in the forecast for at least 24 hours, and ideally, stable or cooling temperatures throughout the day.
When mixing your epoxy or polyurethane, follow the manufacturer’s instructions carefully. Usually, you’ll blend equal parts of two components. Mix thoroughly but gently—avoid whipping air bubbles into the mixture. Once combined, you typically have about 30 to 45 minutes of working time, so planning ahead is essential.
Start applying the resurfacing material at the top of your slide and work downward. Begin by using a brush for edges and small areas, then use your roller for larger surfaces. Thin, even coats are always better than a single thick coat. Keep a wet edge as you work to avoid lap marks, and quickly smooth out any bubbles or imperfections you see.
After your first coat becomes tacky (usually after 2–4 hours, depending on product), you’ll apply a second coat. Check your product directions carefully—sometimes you’ll need to sand lightly if the first coat has fully cured.
As a DIYer from Salem shared, “My first batch hardened faster than I expected because of the summer heat. After that, I worked in smaller batches and stayed in the shade!”
Step 4: Finishing and Curing
You’re almost there! Before walking away, carefully inspect your work while the coating is still workable. Fix any missed spots or imperfections immediately—it’s much simpler to address issues before curing.
Allow your resurfaced slide to cure properly. Usually, this means being touch dry within 2–4 hours, safe for light use after 24 hours, and fully cured after one week. Cooler temps can extend curing times, so keep an eye on weather conditions.
After a full cure, some homeowners like to apply a specialized slide wax for extra slipperiness. Before the big reveal, run water down the slide and test it carefully to ensure it’s smooth and ready for action.
One client from Bedford shared a laugh: “The hardest part was keeping the kids away while it cured! I actually put caution tape across it to make sure we waited the full seven days.”
Doing your own concrete pool slide resurfacing takes patience and care, but the results—and cost savings—are worth every minute. Plus, you’ll have bragging rights for years to come.
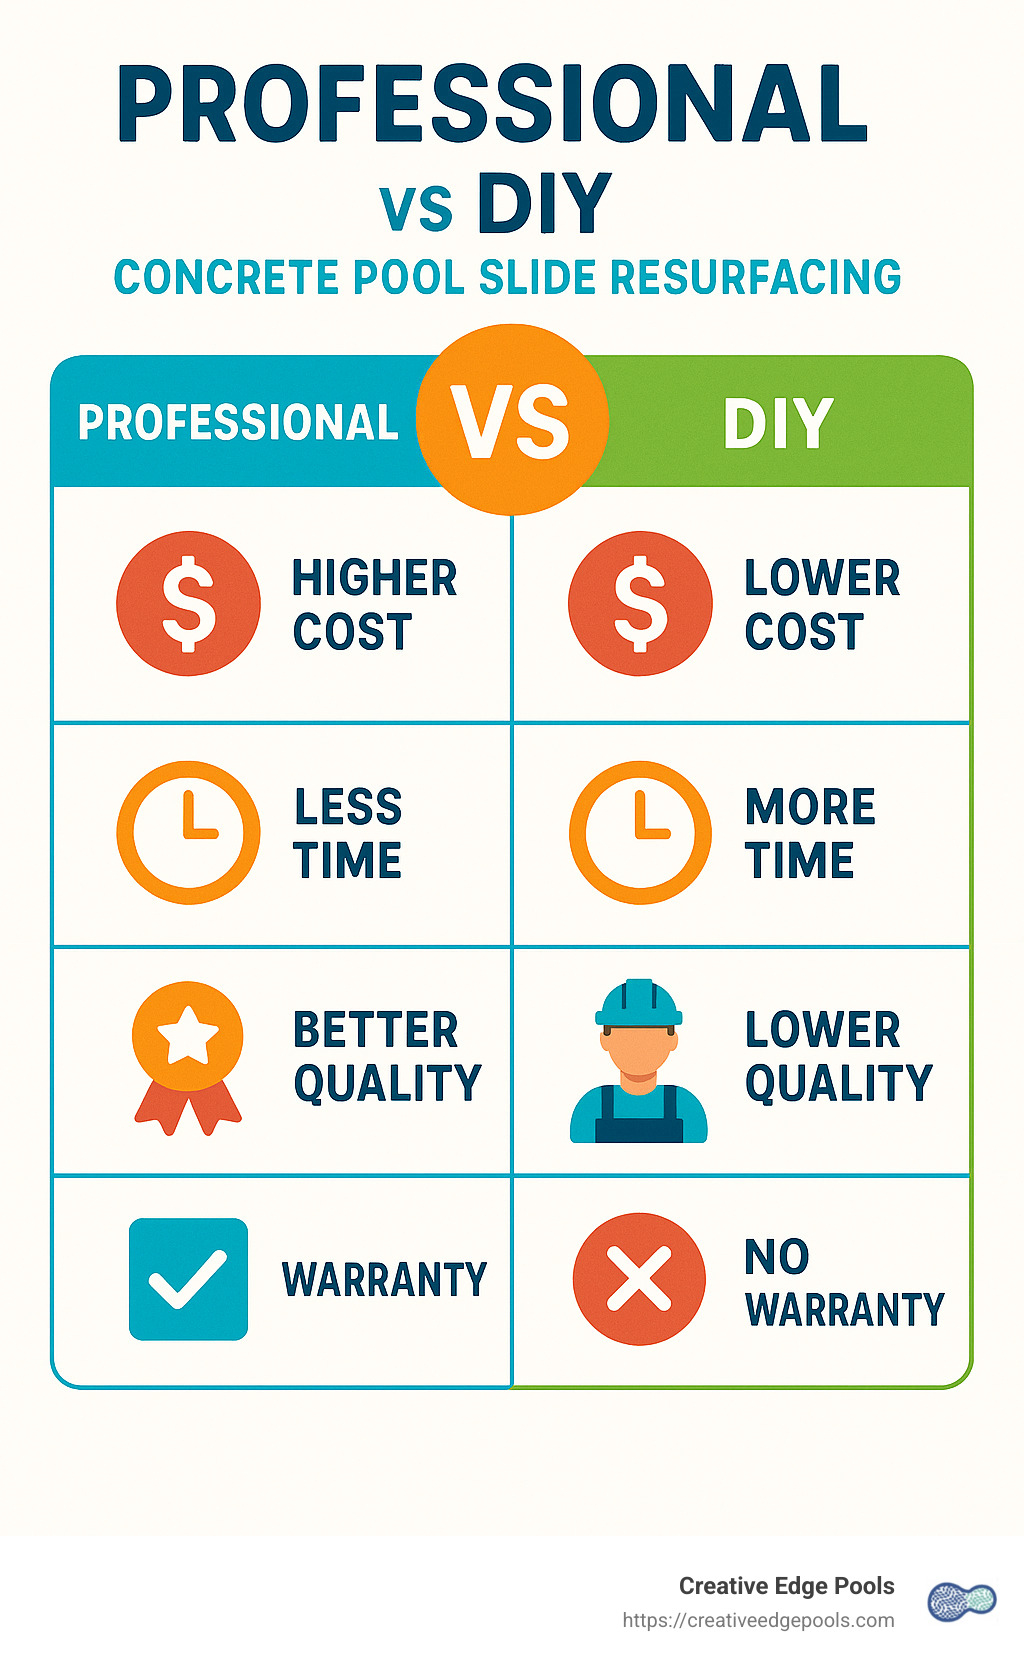
Professional Resurfacing vs. DIY: Making the Right Choice
When planning your concrete pool slide resurfacing, you’re probably wondering if it’s better to take on the project yourself or hire a professional like our experienced team here at Creative Edge Pools. It’s a common question, and the best answer really depends on your specific situation, budget, and skills. Let’s dive right in and help you make the best choice for your slide’s makeover!
When to Consider Hiring a Professional
Hiring an expert can be the smartest choice, especially if your pool slide is facing some major issues. If you notice extensive damage such as deep cracks, significant structural weakening, or areas of delamination, it’s wise to call in professionals.
Our technicians at Creative Edge Pools often find hidden problems that homeowners might overlook. One of our senior technicians recalls, “We’ve seen slides where a small crack hinted at deeper water damage underneath. DIY resurfacing would have simply covered the issue temporarily, potentially compromising the slide’s safety down the line.”
Professionals also have access to specialized equipment and high-performance materials that aren’t typically available at local stores. These commercial-grade coatings and repair compounds deliver superior durability and smoother finishes. Plus, professional teams like ours offer custom color matching to make your slide blend seamlessly into your backyard oasis.
Time constraints are another important consideration. Our experienced crew can usually finish the entire resurfacing project in one to two days—perfect if you have an upcoming pool party or family gathering. One homeowner in Andover told us, “I considered doing it myself, but Creative Edge Pools finished in one day what would’ve taken me an entire week. I got my weekends back!”
A reputable professional service comes with guaranteed results, including a comprehensive warranty. You get peace of mind that your slide restoration will last, with the confidence of professional expertise backing the work.
Finally, hiring professionals makes sense if your slide has a complex design or unique features. Integrated water elements, intricate shapes, or detailed decorative finishes require specialized application techniques. At Creative Edge Pools, we’re experts in handling these tricky projects, ensuring consistently beautiful results.
Benefits of DIY Resurfacing
Of course, tackling your pool slide resurfacing yourself also has some attractive advantages. The biggest one? Cost savings. By doing the labor yourself, you could potentially save over half of the total cost compared to professional services.
Here’s how typical costs compare: DIY materials for an average-sized slide generally run about $300-$500, whereas professional resurfacing typically ranges from $800-$1,500, depending on the slide’s size and condition. If you’re comfortable handling the work, the savings can be significant.
Doing it yourself also gives you full control over each step of the process. If you’re someone who likes things done a certain way, DIY resurfacing lets you ensure every detail meets your standards. Plus, you can schedule work around your availability and work at your own pace—a major plus if you’re juggling a busy household schedule.
And let’s not underestimate the sense of personal satisfaction you’ll gain. Successfully resurfacing your concrete pool slide adds a valuable skill to your DIY toolbox and gives you one more reason to proudly show off your backyard paradise.
One homeowner from Southern New Hampshire shared his experience: “After some research and watching online tutorials, I decided to tackle resurfacing myself. It was incredibly rewarding to see the finished product—and the money I saved allowed me to upgrade our pool lighting!”
Making Your Decision
Still undecided? Here are a few key questions to help you figure out which path is best for your concrete pool slide resurfacing project:
- How extensive is your slide’s damage? Minor cosmetic wear and tear can typically be handled with a DIY approach, while structural issues are best left to the pros.
- What’s your experience level with DIY projects? If you’re familiar with concrete repairs, coating applications, or similar tasks, you’re probably ready to tackle this yourself. If not, hiring a pro might be your best bet.
- Do you have ample time for the project? DIY resurfacing usually requires a few full days of work, plus additional curing time. Make sure you can commit the necessary hours.
- Are you comfortable working with chemicals and coatings? Resurfacing materials require careful handling and proper safety precautions. If you’re cautious about chemical handling, professional help could be safer and easier.
- How important is a warranty to you? Professional services like ours come with warranties, offering added reassurance that any issues will be promptly addressed.
The best choice comes down to evaluating your slide’s condition, your skills, available time, and comfort level with this type of project.
Here’s a handy infographic comparing both options to help you visualize your decision:
At Creative Edge Pools, we’re always here to support your decision. We’ve happily worked with homeowners who’ve successfully completed their own slide resurfacing and later teamed up with us for larger projects. We’ve also stepped in to help DIYers when unexpected challenges arose.
Whichever path you choose for your concrete pool slide resurfacing, remember the secret to success is careful preparation, quality materials, and thorough application. Done right—whether by you or our professional team—your slide will give you years of renewed family fun.
Costs of Concrete Pool Slide Resurfacing
One of the most common questions we’re asked at Creative Edge Pools is, “How much does concrete pool slide resurfacing actually cost?” It’s an important query—after all, knowing the costs upfront helps you make informed decisions and stay within your budget. Let’s break down the factors that determine the price and explore ways to keep your project affordable.
Factors Affecting Cost
Several factors can influence the final price tag when it comes to resurfacing your concrete pool slide. First off, consider the size and complexity of your slide. Naturally, larger slides require more coating materials, labor, and preparation. Slides with complex curves, twists, or specialty features also typically involve extra labor costs due to the time and precision required.
Next, the current condition of your slide matters significantly. If your slide only has minor wear and tear, the costs will naturally be lower. But if your slide has extensive cracks, chips, or structural issues, you’ll need additional materials and more detailed repair work, which can push the budget higher.
Location matters, too. Labor rates can vary based on your geographic area. For example, homeowners in the Boston metro area might see slightly higher costs compared to those in more rural parts of Southern New Hampshire or Eastern Massachusetts.
Your choice of resurfacing materials also affects pricing. For instance, standard epoxy coatings typically run between $75 and $125 per gallon. If you’re opting for premium polyurethane systems that offer superior UV resistance, expect to pay roughly $100 to $150 per gallon. Specialized slide-specific products, designed specifically for maximum slipperiness and durability, usually come in at around $150 to $200 per gallon.
Finally, consider the accessibility of your slide. If your slide is tough to reach or requires special equipment, it could add to labor costs.
Average Cost Ranges
If you’re considering the DIY route for your concrete pool slide resurfacing project, you can expect the total DIY costs to fall roughly between $300 and $600.
Here’s how that typically breaks down: You’ll spend around $50 to $75 on cleaning and preparation supplies, $25 to $50 on repair compounds (if your slide has cracks or chips), and another $30 to $50 on sandpaper and abrasives. Expect to spend the most on the epoxy or polyurethane coating itself—usually between $150 and $300. Throw in roughly $30 to $50 for application tools (like rollers and brushes) and around $20 to $40 for necessary safety equipment. If you opt for specialized finishing products to boost slipperiness and durability, factor in another $25 to $50.
One homeowner from Nashua, who tackled his own slide refinishing, summed it up nicely: “I spent about $425 total on materials and ended up with enough epoxy leftover to do some minor garage repairs too. Not bad at all!”
On the other hand, professional concrete pool slide resurfacing typically ranges from $800 to $1,500 for average-sized residential slides. When you hire professionals (like our team at Creative Edge Pools), your cost covers everything from premium materials and careful preparation work to skilled application, thorough cleanup, and an included warranty—usually 2 to 3 years. If you have a particularly large or complex slide, anticipate a higher price—anywhere from $1,500 to $3,000 or more.
At Creative Edge Pools, we believe transparency is key. We always provide detailed, itemized quotes, so you know exactly where your money is going.
Cost-Saving Tips
If you’re looking for ways to keep your concrete pool slide resurfacing costs down, here are some practical tips we’ve seen work well for homeowners:
First, regular maintenance goes a long way. Addressing small issues early can prevent costly repairs down the road.
Timing your project carefully can also help. Scheduling resurfacing during the off-season, typically fall or early spring, may land you discounted rates from professional contractors.
Another budget-friendly idea is to handle some of the preparation work yourself. If you’re comfortable cleaning and tackling basic repairs, you might reduce professional labor costs. We’ve had clients successfully take a hybrid approach—doing the initial prep themselves and then having us finish the project professionally. One client from Newton saved about 30% by taking this path. “I cleaned and patched the cracks myself over a weekend, then had Creative Edge Pools apply the coating. It was a great compromise,” he explained.
Choosing standard coating materials instead of premium options can also save you money upfront. While high-end products generally last longer, affordable coatings can still perform well if properly applied and maintained.
Long-Term Cost Considerations
When evaluating your resurfacing costs, think about the long-term value of your investment. A professionally resurfaced slide typically lasts 3 to 5 years, while a DIY job might require attention after 2 or 3 years. Premium coating materials, even though pricier initially, often deliver greater durability and fewer reapplications, providing better long-term value.
One of our clients recently joked, “When I divided the resurfacing cost by how many times my grandkids slid down over the years, it turned out to be just pennies per use—well worth every smile!”
Concrete pool slide resurfacing isn’t just another home expense—it’s an investment in years of safe, enjoyable outdoor fun. Whether you choose a DIY approach or trust professionals like us at Creative Edge Pools, understanding all these cost factors helps you make the most informed decision possible.
Want to learn more about overall pool resurfacing costs? Check out this helpful guide on concrete pool resurfacing cost.
Maintenance Tips After Resurfacing Your Concrete Pool Slide
You’ve invested valuable time and money in concrete pool slide resurfacing, so now it’s crucial to maintain your slide properly. With consistent care, your resurfaced slide can stay safe, glossy, and fun for years—often surpassing the standard 5-year lifespan. Let’s explore how to keep your slide smooth, safe, and looking brand new.
Regular Cleaning
A simple cleaning routine goes a long way toward protecting your freshly resurfaced slide. Each week, take a few minutes to rinse off any lingering chlorine, sunscreen residues, or body oils with clean water. Once a month, give your slide a deeper clean using a soft cloth or gentle sponge and a mild, non-abrasive cleaner designed for pool surfaces. Be sure to avoid harsh chemicals or abrasive scrubbers—they can scratch or dull your new finish.
One of our customers in Nashua shared a simple trick: “Right after pool time, I give the slide a quick rinse with a garden hose. It takes less than two minutes and keeps it looking spotless all summer!”
Seasonal Maintenance
Seasonal care helps your slide stay protected throughout the year, especially here in New England where weather swings can be extreme.
In the spring, perform a thorough check of your slide. Remove accumulated leaves, pollen, and winter debris. Inspect the surface closely, looking for tiny cracks or worn spots from freeze-thaw cycles. If you spot minor damage, repair it early to avoid bigger problems later.
Summer is your slide’s busiest time, so step up your cleaning schedule—particularly if it’s heavily used. Add a UV protectant coating if your slide sits in direct sunlight to help preserve its slick, glossy finish.
In the fall, give your slide one last deep clean before winter arrives. Apply a protective wax or sealant recommended by your coating manufacturer. Covering your slide for the off-season is highly recommended—it helps extend its life and reduces springtime cleanup.
Resealing Intervals
Even the best resurfacing job doesn’t last forever. To keep your concrete pool slide safe and sleek, plan to apply a maintenance coat of sealant every 2-3 years. This lighter coat refreshes the surface, helps maintain slipperiness, and protects from UV rays.
At Creative Edge Pools, we suggest marking your calendar or setting a reminder for a professional inspection around the two-year mark. It’s a proactive move that can prevent minor issues from becoming costly problems down the road.
Protecting Your Investment
Beyond regular cleaning, a few extra measures can dramatically extend your slide’s lifespan.
Sun Protection is key. UV rays gradually degrade pool slide coatings, causing them to dull or become brittle. To protect your slide, consider adding a shade structure, using a UV-protective clear coat each season, or covering your slide when it’s not in regular use.
Proper pool chemistry also plays a big role. Keep your pool water balanced, maintaining a pH between 7.2 and 7.8, and ensuring chlorine levels remain stable. Regularly testing and adjusting your pool chemistry prevents harsh water from damaging your resurfaced slide.
Don’t forget about physical protection. Encourage family and guests to leave abrasive items like toys, watches, and jewelry off the slide. Swimsuits with metal or rough elements can also scratch the surface, so gentle swimwear is best.
Winter Precautions
Here in Massachusetts and Southern New Hampshire, winter doesn’t mess around. Ice and snow accumulation can damage your slide’s finish. If possible, invest in a breathable, waterproof cover designed specifically for pool slides. Ensure water drains properly from the slide to prevent ice buildup, and apply a winter protectant recommended by your coating manufacturer.
As one of our longtime clients from Portsmouth wisely told us, “After investing in professional concrete pool slide resurfacing, I learned it’s worth taking a few extra steps to protect it each winter. Five years later, our slide still looks brand new—and the kids love it!”
Keeping your concrete pool slide in tip-top condition doesn’t have to be complicated. With a little regular care, seasonal attention, and preventive measures, you can ensure your slide keeps delighting family and friends season after season.
Frequently Asked Questions about Concrete Pool Slide Resurfacing
At Creative Edge Pools, we’ve helped homeowners across Eastern Massachusetts and Southern New Hampshire bring their pool slides back to life. Over the years, we’ve heard plenty of great questions about concrete pool slide resurfacing. Here are answers to some of the most common ones—straightforward, clear, and ready to help you make informed decisions.
How often should I resurface my concrete pool slide?
The timeline for resurfacing your concrete slide depends on several factors, including how often it’s used, weather exposure, and the quality of the previous resurfacing job. However, generally speaking, you can expect to fully resurface every 4-5 years. For slides that get heavier traffic, resurfacing every 3-4 years might be necessary. On the other hand, lightly-used slides that enjoy good weather protection could last 6+ years.
Between full resurfacings, applying a maintenance coat every 2-3 years is a smart way to protect your investment and extend your slide’s lifespan.
How can you tell it’s time? We recommend the simple “hand test.” At the start of the swimming season, gently run your palm along the slide. If it feels rough, catches your skin, or you notice visible cracks, chips, discoloration, or reduced slipperiness—it’s time to consider resurfacing.
How do weather conditions affect my pool slide surface?
Weather certainly plays a big role in how quickly your slide surface wears down. Sun exposure is especially tough on pool slides, causing certain coatings to yellow, become brittle, and lose their flexibility. Choosing a UV-stable, non-yellowing coating will help counteract these effects.
Here in New England, we’re also familiar with temperature fluctuations and the notorious freeze-thaw cycles. These temperature shifts can stress a rigid coating, causing cracks or even delamination if moisture gets trapped underneath. This makes flexibility important in choosing the right resurfacing material.
Humidity and moisture also factor into slide care. High humidity during application can slow curing times, potentially affecting how well the coating bonds. Additionally, regular exposure to pool chemicals like chlorine can gradually break down the coating over time, impacting its slipperiness and appearance.
One homeowner from Lexington shared their experience, “Our slide gets intense afternoon sun, so Creative Edge Pools recommended a premium UV-resistant coating. It outlasted our previous coating by years—worth every penny!”
What is the best sealer for a concrete pool slide?
Selecting the best sealer for your concrete pool slide depends on your priorities:
If you’re looking for maximum durability, a two-part polyurethane system typically offers excellent abrasion and chemical resistance, good flexibility to handle temperature changes, and UV stability, giving you 3-5 years of reliable performance.
For optimal slipperiness, many homeowners prefer high-solids epoxy coatings. These coatings create that ultra-smooth, glossy finish for a fast, enjoyable ride. Epoxy might require a topcoat to protect against UV rays and prevent yellowing, giving a lifespan of about 3-4 years.
If you’re considering a DIY project and prefer easier application, water-based acrylic coatings can be a good choice. They’re simpler to apply, have lower toxicity, and clean up easily. However, they typically have a shorter lifespan, usually around 1-3 years.
At Creative Edge Pools, we’ve found a hybrid approach often gives the very best results: applying a durable epoxy base coat for an ultra-smooth ride, then sealing it with a UV-stable polyurethane topcoat. It’s the best of both worlds—slick, durable, and made to last.
Can I change the color of my concrete slide during resurfacing?
Absolutely! One fantastic benefit of concrete pool slide resurfacing is the opportunity to refresh its look. You have several great options:
You can choose integral coloring, mixing the color directly into the coating material. This gives you consistent, uniform color and a fresh new appearance.
Another fun choice is to add color flakes or chips to the wet coating. This creates visual interest, hides minor imperfections, and makes your pool slide the star of your backyard.
For a truly custom look, topical staining can create artistic effects like marble or faux stone. While this requires a skilled touch and proper sealing, the results can be stunning.
One creative homeowner in Southern New Hampshire decided to add a beautiful blue gradient, blending from light to dark blue. They tell us, “It made our slide a real feature in our backyard—everyone loves it!”
How long before we can use the slide after resurfacing?
We get it—waiting is tough, especially when excited kids (or adults!) are eager to test the slide. However, patience is key for ensuring your newly resurfaced slide cures properly and remains durable for years.
Here’s a general curing timeline after concrete pool slide resurfacing:
- Touch dry: Usually within 2-4 hours (avoid touching during this time)
- Running water: After about 24 hours, you can let water run gently down the slide
- First gentle use: Allow about 48 hours for very light use, under supervision
- Regular use: Wait at least 72 hours until regular and more active use
- Full cure: Maximum hardness, slipperiness, and chemical resistance come after about 7 days
That cooler temperatures or higher humidity can lengthen these curing times. Always follow the manufacturer’s guidelines provided with your specific coating product to avoid premature wear.
A Bedford client shared their fun family tradition: “We made the waiting period easier by planning a ‘grand reopening’ party. It built excitement and turned the waiting game into something fun for the kids.”
Have more questions about concrete pool slide resurfacing? We’re always here to help at Creative Edge Pools—bringing backyard dreams and family fun to life!
Conclusion
Concrete pool slide resurfacing is more than just a maintenance task—it’s an investment in your family’s enjoyment and safety. Throughout this guide, we’ve explored the entire process from identifying when your slide needs attention to selecting the right materials and techniques for a successful restoration.
Whether you choose the DIY approach or hire professionals like our team at Creative Edge Pools, proper preparation and quality materials are the keys to long-lasting results. A well-executed resurfacing project can extend your slide’s life by up to five years, providing countless moments of poolside fun.
Let’s recap the essential points:
- Regular inspection helps catch wear and damage early, preventing more extensive repairs later.
- Thorough preparation—including cleaning, repairing, and sanding—creates the foundation for a successful resurfacing project.
- Material selection matters—choose coatings designed specifically for pool slides with consideration for UV stability, durability, and slipperiness.
- Application technique significantly impacts both the appearance and longevity of your resurfaced slide.
- Proper maintenance after resurfacing extends the life of your investment and ensures continued safe enjoyment.
“Bring your pool back to life!”
At Creative Edge Pools, we’ve been helping families throughout Eastern Massachusetts and Southern New Hampshire create and maintain beautiful, functional pool environments for decades. Our comprehensive approach to backyard development means we understand how each element—including your pool slide—contributes to the overall enjoyment of your outdoor space.
If you’re considering concrete pool slide resurfacing but feeling overwhelmed by the process, we’re here to help. Our expert team can assess your slide’s condition, recommend the appropriate solutions, and either guide you through the DIY process or handle the entire project professionally.
A smooth, well-maintained slide isn’t just about aesthetics—it’s about safety and enjoyment for everyone who uses your pool. By investing in proper resurfacing, you’re ensuring that your pool slide remains a source of joy rather than frustration or potential injury.
Ready to breathe new life into your pool slide? Contact Creative Edge Pools today for a consultation, and let us help you make your backyard dreams a reality. From custom gunite pools to comprehensive resurfacing services, we’re your partners in creating the perfect poolside experience.
Learn more about our gunite pool resurfacing options and find how we can transform your entire pool area into the backyard oasis you’ve always wanted.
