Pool Liner Repair: Top 10 Essential Tips for 2024
Why Pool Liner Repair is Crucial
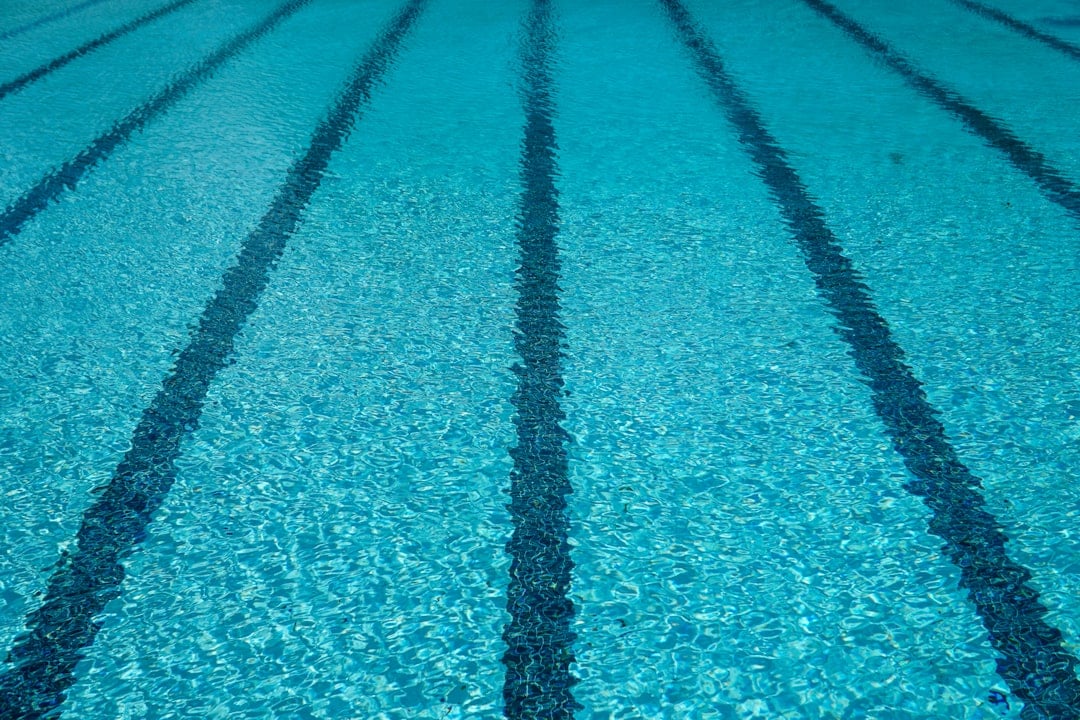
Pool liner repair is vital for any pool owner. Your pool’s liner not only keeps water in but also ensures a smooth, attractive swimming experience. Ignoring small issues like a tear or puncture can lead to significant water loss, potentially damaging the pool structure. Here’s a quick summary of how to handle common pool liner problems:
- Identify the Leak – Visual inspection or using a dye test.
- Gather Necessary Supplies – Vinyl patch kits, waterproof tape, adhesive.
- Patch the Area – Clean, trim the patch, apply adhesive, and smooth out bubbles.
- Monitor & Maintain – Regularly check for other issues and maintain proper chemical balance.
Timely repairs not only extend the life of your pool liner but also save you money and hassle in the long run. If you’ve spotted a hole or tear, addressing it immediately can prevent bigger problems such as structural damage or excessive water bills.
I’m David Brabant, and with over thirty years in the swimming pool industry, I’ve seen the importance of prompt pool liner repair. My experience spans many roles—from plumbing and excavation to supervisory and site development. This depth of knowledge ensures that you get the best advice and service for your pool needs. Let’s ensure your pool stays in top shape!

Understanding Pool Liner Damage
Causes
Pool liners can get damaged due to several reasons, and understanding these causes is the first step in effective pool liner repair.
- Sharp Objects: Toys, cleaning tools, or even debris can puncture the liner.
- Chemicals: An imbalance in pool chemicals can weaken the liner over time.
- Sunlight: Prolonged exposure to UV rays can make the liner brittle.
- Aging: Just like any material, pool liners deteriorate with age.
Signs of Wear
Knowing the signs of wear can help you catch issues early. Here are some common indicators:
- Fading: UV rays can cause the liner to lose its color.
- Wrinkles: These can appear due to water chemistry imbalances or liner stretching.
- Tears and Holes: Visible punctures or tears are obvious signs of damage.
- Water Loss: Unexplained water loss could indicate a leak in the liner.
Impact of Neglect
Ignoring damage to your pool liner can lead to more severe issues. Here’s what can happen:
- Increased Water Bills: Leaks can cause your water bill to spike.
- Structural Damage: Continuous water leakage can affect the pool’s structure.
- Algae Growth: Tears and holes can become breeding grounds for algae.
- Shortened Liner Lifespan: Neglecting minor repairs can lead to the need for a full liner replacement sooner than expected.
By understanding these causes, signs, and impacts, you can take proactive steps in pool liner repair and maintenance. This ensures your pool remains a source of joy and relaxation for years to come.
Next, let’s explore how to detect a leak in your pool liner.
How to Detect a Leak in Your Pool Liner
Detecting a leak in your pool liner early can save you time and money. Here are some simple methods to help you identify leaks quickly:
Bucket Test
The bucket test is a straightforward way to determine if you have a leak. Here’s how to do it:
- Fill a 5-gallon bucket with water.
- Place the bucket on the steps of your pool, ensuring the water level in the bucket matches the pool water level.
- Mark the water level inside the bucket with painter’s tape.
- Turn off the pool pump and leave it for 24 hours.
- Measure the difference between the water level in the bucket and the pool. If the pool water level is lower than the bucket, you have a leak.
This method helps distinguish between water loss due to evaporation and an actual leak.
Food Coloring
Using food coloring is another effective way to detect leaks:
- Walk around the pool and look for any squishy spots on the ground.
- Apply food coloring near these areas.
- Observe the movement of the food coloring. If it gets drawn into a specific spot, that’s where your leak is.
This method works well for pinpointing small leaks.
Visual Inspection
A visual inspection is always a good starting point:
- Walk around your pool and look for obvious signs of water seeping out.
- Check the liner for wrinkles or gathered spots; these often indicate a tear.
- Inspect the pool deck and surrounding ground for wet or soggy areas.
Sometimes, the leak is visible and can be identified quickly through a thorough visual check.
Dye Test
When other methods don’t reveal the leak, try a dye test:
- Use food coloring or a special pool dye.
- Release the dye near potential leak areas inside the pool.
- Watch for the dye being pulled towards a specific spot, indicating the leak location.
This test is particularly useful for finding leaks underwater.
Essential Tools and Materials for Pool Liner Repair
When it comes to pool liner repair, having the right tools and materials can make all the difference. Here’s what you’ll need:
Vinyl Patch Kits
Vinyl patch kits are a popular choice for repairing pool liners. They come with adhesive and a piece of vinyl that you can cut to size. These kits are designed to work underwater, which means you don’t need to drain your pool to make the repair.
Steps to use a vinyl patch kit:
1. Cut the patch: Ensure it’s at least 2 inches larger than the tear.
2. Apply adhesive: Spread it evenly on the back of the patch.
3. Stick it on: Quickly place the patch over the tear and smooth out any air bubbles.
4. Hold firmly: Press down for a few minutes to ensure a good bond.
For best results, place a weighted item, like a brick wrapped in plastic, on the patch for 24 hours.
Peel-and-Stick Patches
Peel-and-stick patches are another convenient option. They come pre-cut and have an adhesive backing, making them easy to apply.
How to use peel-and-stick patches:
1. Choose the right size: Pick a patch slightly larger than the tear.
2. Peel the backing: Expose the adhesive side.
3. Apply the patch: Stick it directly over the tear and press firmly.
For fewer chances of the edges curling up, opt for round patches instead of rectangular ones.
Waterproof Tape
Waterproof tape is a quick and inexpensive solution for small tears. It’s easy to use but may not last as long as other options.
Using waterproof tape:
1. Cut the tape: Ensure it covers at least 2 inches beyond the tear.
2. Apply the tape: Press it over the tear and smooth out the edges.
You might want to layer a few pieces of tape for better coverage. That the corners might start peeling over time, especially under UV exposure.
Adhesives
Adhesives are crucial for ensuring your patches stick properly. Most vinyl patch kits come with adhesive, but you can also buy it separately.
Types of adhesives:
– Solvent-based adhesives: These are strong and work well underwater.
– Water-based adhesives: Easier to clean up but may not be as durable.
Applying adhesive:
1. Clean the area: Make sure it’s free of debris.
2. Apply generously: Use a dauber to spread the adhesive evenly, reaching all edges.
3. Quickly place the patch: Time is crucial to ensure a strong bond.
Having these tools and materials on hand will prepare you for any pool liner repairs that come your way. Next, we’ll guide you through the step-by-step process of repairing your pool liner.
Step-by-Step Guide to Pool Liner Repair
Preparing the Damaged Area
Before you can repair your pool liner, you need to prepare the damaged area properly. This ensures the patch sticks well and lasts long.
- Clean the area: Use a pool brush or sponge to remove any dirt, algae, or debris around the hole. A clean surface is crucial for the adhesive to bond effectively.
- Assess the size: Measure the hole or tear. This helps you determine the size of the patch needed. The patch should be at least two inches larger than the hole on all sides to ensure a good seal.
Applying the Patch
Once the area is prepped, you can move on to the actual repair.
- Cutting the patch: Using scissors, cut a piece of the patch material. Make sure it’s large enough to cover the hole with an extra two inches on all sides.
- Adhesive application: Apply a generous amount of adhesive to one side of the patch. Make sure to cover the entire surface, especially the edges. If you’re using a peel-and-stick patch, simply remove the backing to expose the adhesive side.
- Placing the patch: Fold the patch in half with the adhesive side out. Slowly lower it into the water and gently unfold it over the hole. This method helps you avoid any air bubbles.
- Smoothing out: Use your hand or a flat object to press down on the patch from the center outwards. This will help remove any bubbles or wrinkles, ensuring a tight seal.
Post-Patch Care
After applying the patch, a few more steps will help ensure your repair is long-lasting.
- Monitoring: Allow the patch to set for 24 to 48 hours. During this time, avoid using the pool. Afterward, check for any signs of water loss to make sure the patch is holding.
- Preventing future damage: Regularly inspect your pool liner for any new holes or weak spots. Proper chemical balance and regular cleaning can also help prevent future damage.
By following these steps, you can effectively repair your pool liner and keep your pool in great condition. Next, we’ll discuss when it might be time to consider a full pool liner replacement.
When to Consider Pool Liner Replacement
Sometimes, patching up your pool liner just isn’t enough. Here are the key factors to help you decide when it’s time for a full pool liner replacement.
Age of the Liner
Vinyl pool liners typically last between 10 and 25 years, depending on maintenance and material quality. If your liner is nearing or beyond this age range, it might be more cost-effective to replace it rather than continually patching it up.
Fact: Most vinyl liners offer 5-9 years of worry-free pool enjoyment after replacement.
Size of Damage
Small holes and tears are often patchable. But if you’re dealing with a large tear, multiple holes, or damage near tricky spots like corners or fittings, a patch might not hold up well.
Rule of Thumb: A tear larger than 6 inches or multiple tears in close proximity often indicate the need for a new liner.
Long-term Costs
While a patch can be a quick fix, it’s not always the most economical long-term solution. Frequent repairs can add up, and a deteriorating liner can lead to other costly issues, such as:
- Water loss: Ongoing leaks can significantly increase your water bill.
- Structural damage: Leaks can cause soil erosion or rust in steel pools, leading to more expensive repairs.
Cost Insight: The average cost to replace a vinyl pool liner is around $4,500. While it’s a significant expense, it can save you money and headaches in the long run.
Tip: You can use a patch as a temporary fix while shopping around for a new liner, but don’t delay the replacement for too long.
Next, we’ll dive into essential maintenance tips to keep your pool liner in great shape and extend its lifespan.
Pool Liner Maintenance Tips
Maintaining your pool liner is crucial for extending its lifespan and ensuring your pool remains a source of enjoyment. Here are some essential tips:
Regular Inspections
Frequent checks help you spot small issues before they become big problems. Make it a habit to inspect your pool liner regularly for signs of damage like tears, holes, or fading.
Tip: Schedule a thorough inspection at the start and end of each swimming season. This proactive approach can save you time and money in the long run.
Chemical Balance
The wrong chemical balance can damage your pool liner over time. Regular testing and adjustment of pool chemicals are essential to prevent holes from forming.
Key Points:
– pH Levels: Keep the pH between 7.2 and 7.8.
– Chlorine: Maintain chlorine levels between 1.0 and 3.0 ppm (parts per million).
– Alkalinity: Aim for 80-120 ppm.
Fact: Proper chemical balance not only protects your liner but also ensures safe swimming conditions.
Proper Cleaning
Regular cleaning of your pool can prevent debris from causing damage to your liner. Using the right cleaning tools can help ensure you clean your pool without damaging your liner.
Steps:
1. Skim the Surface: Remove leaves and debris daily.
2. Brush the Walls: Use a pool brush to clean the liner surface weekly.
3. Vacuum the Pool: Vacuum the pool floor and walls to remove dirt and algae.
Tip: Use a pool vacuum designed for your type of pool liner to avoid damage.
By following these maintenance tips, you can keep your pool liner in excellent condition and enjoy your pool for years to come. Next, we’ll explore the differences between DIY pool liner repair and professional services, and when you should consider calling in the experts.
DIY Pool Liner Repair vs. Professional Services
When it comes to pool liner repair, you have two main options: DIY or hiring a professional. Each approach has its own set of benefits and considerations.
Benefits of DIY
- Cost Savings: One of the biggest advantages of DIY pool liner repair is the potential to save money. Professional services can be pricey, so doing it yourself can be more budget-friendly.
- Immediate Action: You can address minor issues right away without waiting for a professional to schedule a visit. This quick response can prevent small problems from becoming bigger ones.
- Learning Experience: Repairing your pool liner on your own can be a valuable learning experience. You’ll gain skills that can help you manage future repairs and maintenance.
- Satisfaction: There’s a sense of accomplishment that comes from fixing something yourself. Knowing you have the ability to maintain your pool can be quite rewarding.
When to Call a Professional
While DIY has its perks, there are situations where professional help is essential:
- Large Tears or Multiple Holes: If the damage is extensive, a professional can ensure the repair is done correctly. Large tears or multiple holes often require specialized tools and expertise.
- Complex Locations: Holes near fittings, corners, or seams can be tricky to repair. Professionals have the experience to handle these challenging areas effectively.
- Liner Replacement: If your pool liner is old or severely damaged, it might be time for a replacement. Professionals can handle the entire process, ensuring a perfect fit and long-lasting results.
- Avoiding Mistakes: Incorrect repairs can lead to further damage and higher costs down the line. Professionals guarantee quality work, reducing the risk of costly errors.
Creative Edge Pools
At Creative Edge Pools, we understand the importance of a well-maintained pool liner. Our team of experts offers comprehensive pool liner repair and replacement services to keep your pool in top condition.
Why Choose Creative Edge Pools?
- Expertise: With over a hundred years of combined experience, our team knows how to handle any pool liner issue.
- Quality Materials: We use high-quality materials and the latest techniques to ensure durable repairs.
- Customer Satisfaction: As a family-owned business, we prioritize customer satisfaction and personalized service.
Whether you need a quick patch or a complete liner replacement, Creative Edge Pools is here to help. Contact us today to learn more about our services and how we can keep your pool in great shape.
Next, we’ll answer some frequently asked questions about pool liner repair to help you make informed decisions.
Frequently Asked Questions about Pool Liner Repair
Can you repair a pool liner with water in it?
Yes, you can repair a pool liner with water still in the pool. Most pool liner repair kits are designed to work underwater. This makes the repair process easier and avoids the risks associated with draining the pool, such as potential collapse or liner damage.
To patch a liner underwater, you’ll need:
– A vinyl patch kit or peel-and-stick patches
– Waterproof adhesive
Steps:
1. Clean the area around the tear.
2. Cut the patch to size, ensuring it covers the hole with at least a 2-inch margin.
3. Apply adhesive to the patch.
4. Smooth out the patch to remove any bubbles.
Remember to let the patch set for 24-48 hours before using the pool.
How much does it cost to patch a pool liner?
The cost to patch a pool liner is relatively low compared to full replacement. Vinyl patch kits range from $10 to $30. If you need professional help, labor costs can add an additional $200 to $500 depending on the complexity and location of the tear.
Factors affecting cost:
– Size of the tear
– Location of the damage
– Whether you do it yourself or hire a professional
Patching is a cost-effective solution for small to medium-sized tears, but always monitor the patch to ensure it holds up over time.
Is it worth patching a pool liner or should it be replaced?
Patching a pool liner is worth it for minor tears or leaks. It’s a quick and inexpensive fix that can extend the life of your liner. However, in some cases, replacement might be more cost-effective in the long run.
Consider replacement if:
– The liner is older than 10 years
– There are multiple tears or a large hole
– The liner shows signs of extensive wear and degradation
A new liner can cost anywhere from $1,000 to $5,500 for the liner itself, with total replacement costs averaging around $4,500. While this is a significant investment, it can provide peace of mind and many years of trouble-free pool enjoyment.
In the next section, we’ll discuss the importance of pool liner maintenance and how to extend the life of your liner.
Conclusion
Long-term maintenance of your pool liner is essential to ensure it remains in good condition and provides years of enjoyment. Regular inspections, proper chemical balance, and diligent cleaning can prevent small issues from becoming major problems. By taking a proactive approach to pool liner repair and maintenance, you can avoid costly repairs and extend the life of your pool liner.
Proactive care involves regularly checking your pool liner for signs of wear and tear, maintaining the correct chemical balance, and keeping your pool clean. These simple steps can prevent damage and ensure that your pool remains a source of fun and relaxation. Catching small issues early can save you from more significant problems down the road.
At Creative Edge Pools, we understand the importance of maintaining your pool liner. Our expert team is here to help with all your pool liner repair and maintenance needs. Whether you need a quick patch or a complete liner replacement, we have the experience and tools to get the job done right.
For more information about our vinyl liner installation services, contact us. Let’s keep your pool in top shape, so you can enjoy it for years to come.
Happy Swimming!