Inground Pool Liner Replacement: 2025 Ultimate Success Guide
Is Your Pool Liner Ready for a Refresh?
Inground pool liner replacement is a critical maintenance task that can breathe new life into your swimming pool. Here’s what you need to know at a glance:
| Quick Facts: Inground Pool Liner Replacement | Details |
|---|---|
| Average Cost | $2,467 (range: $1,219-$3,846) |
| Typical Lifespan | 10-15 years |
| Installation Time | 1-3 days (professional) |
| Best Time to Replace | Fall or early spring |
| DIY Possible? | Yes, but professional installation recommended for warranty protection |
Your pool liner is more than just the visible surface of your pool – it’s the protective barrier that holds thousands of gallons of water and creates the backdrop for your backyard oasis. Over time, exposure to chemicals, UV rays, and regular use causes vinyl liners to deteriorate.
When properly maintained, most inground vinyl pool liners will last between 10 and 15 years before requiring replacement. However, waiting too long can lead to more extensive damage to your pool structure.
Signs your liner needs replacement include:
- Visible cracks, tears, or holes
- Fading or discoloration
- Stretching or wrinkling
- Liner pulling away from the track
- Persistent leaks or water loss
- Brittle or stiff vinyl texture
I’m David Brabant, owner of Creative Edge Pools with over thirty years of experience in the swimming pool industry, including countless inground pool liner replacement projects throughout Massachusetts and New Hampshire.
Inground Pool Liner Replacement terms explained:
– cost of replacing inground vinyl pool liner
What You’ll Learn
In this comprehensive guide, we’ll walk you through everything you need to know about inground pool liner replacement. By the time you finish reading, you’ll understand:
- How to identify when your liner truly needs replacement versus simple repairs
- What factors influence the cost of liner replacement in 2025
- The step-by-step process of replacing an inground pool liner
- How to choose the right liner material, thickness, and pattern for your pool
- DIY versus professional installation considerations
- Essential add-ons and accessories to consider during replacement
- Post-installation care to maximize your new liner’s lifespan
Lifespan & Warning Signs: Knowing It’s Time
Your vinyl pool liner is like a faithful friend that eventually shows signs of aging. Most will serve you well for 10-15 years, though I’ve seen some last longer with meticulous care and others fade faster due to harsh conditions.
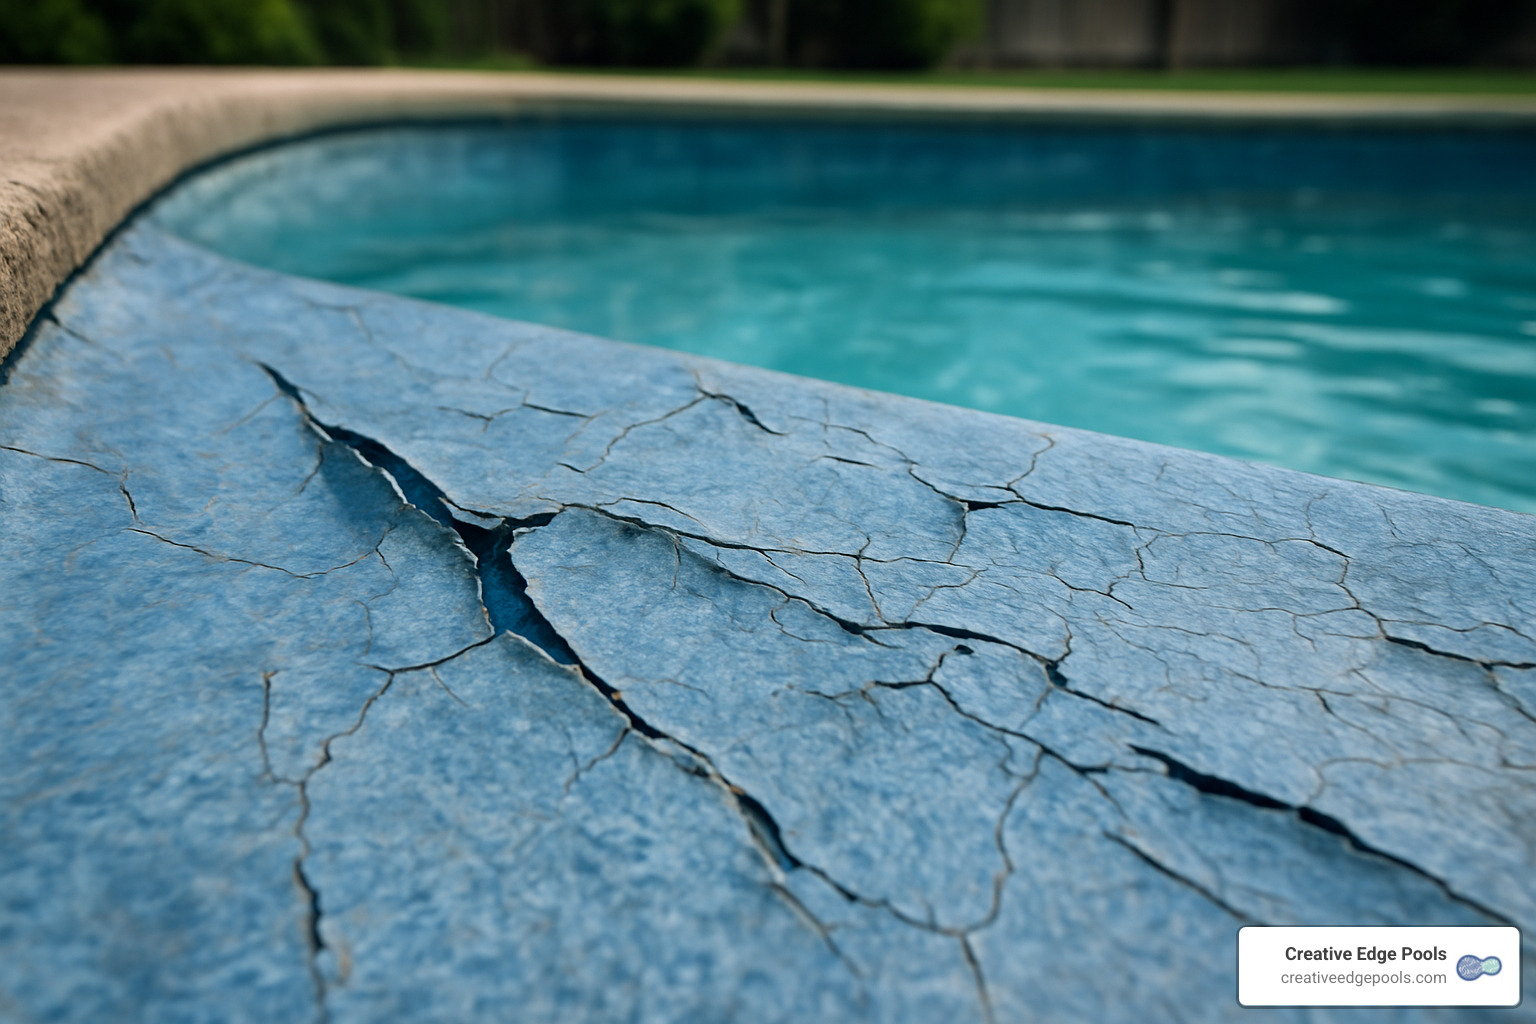
Here’s what to watch for when considering an inground pool liner replacement:
Those tiny cracks along seams might seem harmless at first, but they’re often the first whispers of trouble. Significant fading isn’t just a cosmetic issue—it signals that UV rays have weakened your liner’s structure. When you find yourself patching the same spots repeatedly, your liner is telling you it’s ready to retire.
When your liner starts looking like a poorly made bed with wrinkles and sagging areas, the vinyl has lost its elasticity. Similarly, if the liner keeps popping out of its track (bead slippage) despite your best efforts to reset it, that’s another clear signal.
Unexplained water loss usually points to liner failure. And if balancing your pool chemistry feels like you’re constantly fighting a losing battle, your aging liner might be absorbing chemicals like a sponge.
Diagnostic Checklist
Before you commit to a full inground pool liner replacement, let’s be sure with these simple tests:
The bucket test is my go-to for confirming leaks. Simply fill a bucket with pool water, place it on your pool steps so it’s partially submerged, and mark water levels both inside the bucket and at your pool’s edge. After 24 hours, compare the levels—if your pool dropped more than the bucket, you’ve got a leak.
For pinpointing leak locations, I recommend the dye test. With your pump off, squeeze some food coloring near suspected problem areas and watch—the dye will be drawn toward leaks like a magnet.
When deciding between repair and replacement, consider the liner’s age and condition. Repairs make sense for younger liners (under 7 years) with isolated damage. Replacement becomes necessary when you’re dealing with multiple problem areas, a liner over 8 years old, significant deterioration, or persistent leaks that return after repairs.
Common Causes of Early Failure
Understanding what shortens a liner’s life can help you protect your investment:
- UV damage is particularly harsh in our New England summers, breaking down the material over time
- Chemical imbalance is another silent killer – high chlorine or low pH can deteriorate vinyl prematurely
- Freeze-thaw cycles in Massachusetts and New Hampshire put extra stress on liner seams
- Poor initial fit creates stress points that fail early
- Thickness matters – choosing a thinner 20 mil liner instead of a sturdier 27+ mil option means shorter lifespan
2025 Budget & Cost Factors for Inground Pool Liner Projects
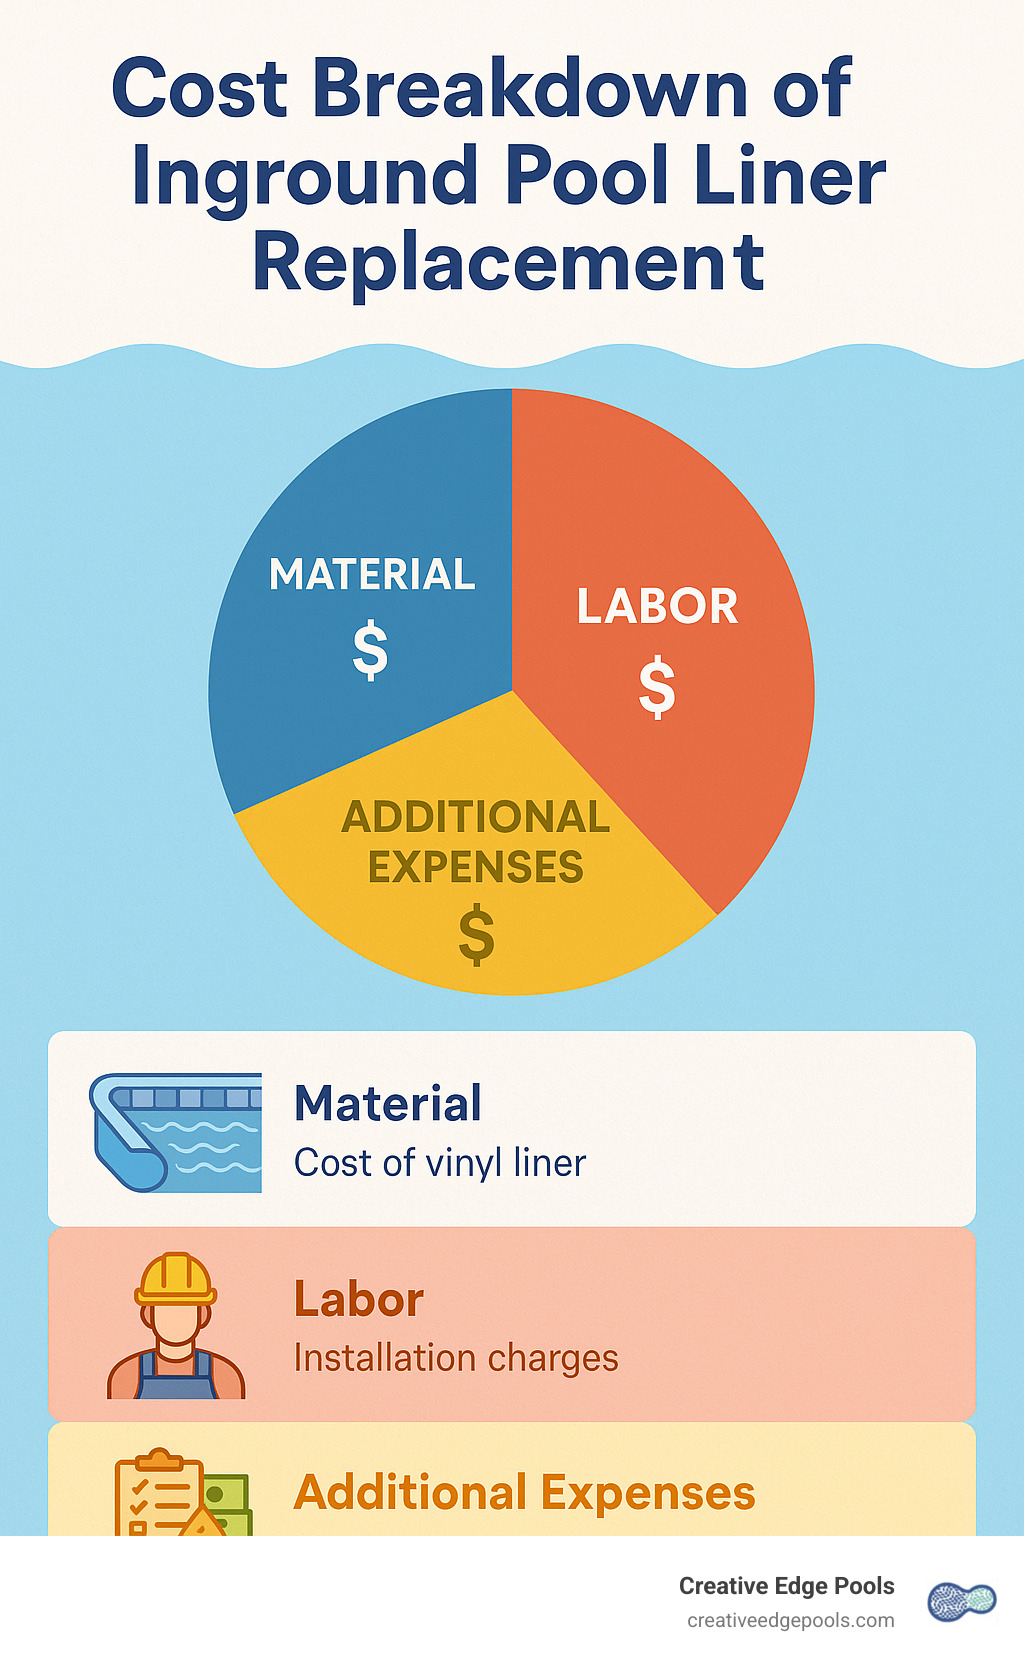
Planning your inground pool liner replacement in 2025 doesn’t have to feel like diving into the deep end financially. Most homeowners spend around $2,467 on average, though costs typically range between $1,219 and $3,846 depending on your specific situation.
Let’s break down what’s influencing that final number on your quote:
- Materials: About $5 per square foot for standard options, more for premium patterns
- Labor: Between $1,000 and $2,500, depending on pool complexity
- Size matters: A 20′ x 40′ pool requires more material than a 16′ x 32′
- Shape complexity: Unique kidney or freeform shapes cost more than simple rectangles
- Thickness upgrade: Going from standard 20 mil to 27-30 mil adds $300-$500 but extends lifespan
Insider tip: scheduling your replacement during fall or early spring could save you 10-15% on labor costs when pool pros aren’t as busy.
Don’t forget about hidden costs: permits ($150-$300), water refill charges ($60-$120), and old liner disposal fees ($75-$150).
Inground Pool Liner Replacement Cost Snapshot
| Pool Size | Standard 20 mil (DIY) | Standard 20 mil (Professional) | Premium 27 mil (Professional) |
|---|---|---|---|
| 16′ x 32′ | $1,100-$1,500 | $2,100-$2,800 | $2,400-$3,300 |
| 18′ x 36′ | $1,400-$1,800 | $2,400-$3,200 | $2,700-$3,700 |
| 20′ x 40′ | $1,800-$2,300 | $2,800-$3,800 | $3,100-$4,300 |
Note: These figures represent average costs in the Eastern Massachusetts and Southern New Hampshire regions as of 2025.
Inground Pool Liner Replacement Money-Saving Hacks
- Book during the off-season (fall or early spring) for potential discounts
- Maintain proper water chemistry (pH 7.4-7.6, chlorine 1-3 ppm) to extend liner life
- Upgrade to 27 mil thickness – only a few hundred dollars more but can extend life by 20-30%
- Bundle other pool improvements during liner replacement to save on labor
- Register your warranty within 30 days – many manufacturers offer 15-25 year warranties
As I often tell my customers, “A suspiciously low price tag usually means you’ll be paying more later.” When comparing quotes, make sure they include everything—water refill, disposal, and potential wall or floor repairs.
For a deeper dive into what your specific project might cost, visit our detailed Cost to Replace Vinyl Pool Liner resource page, or Get Free Quotes on costs to start planning your project today.
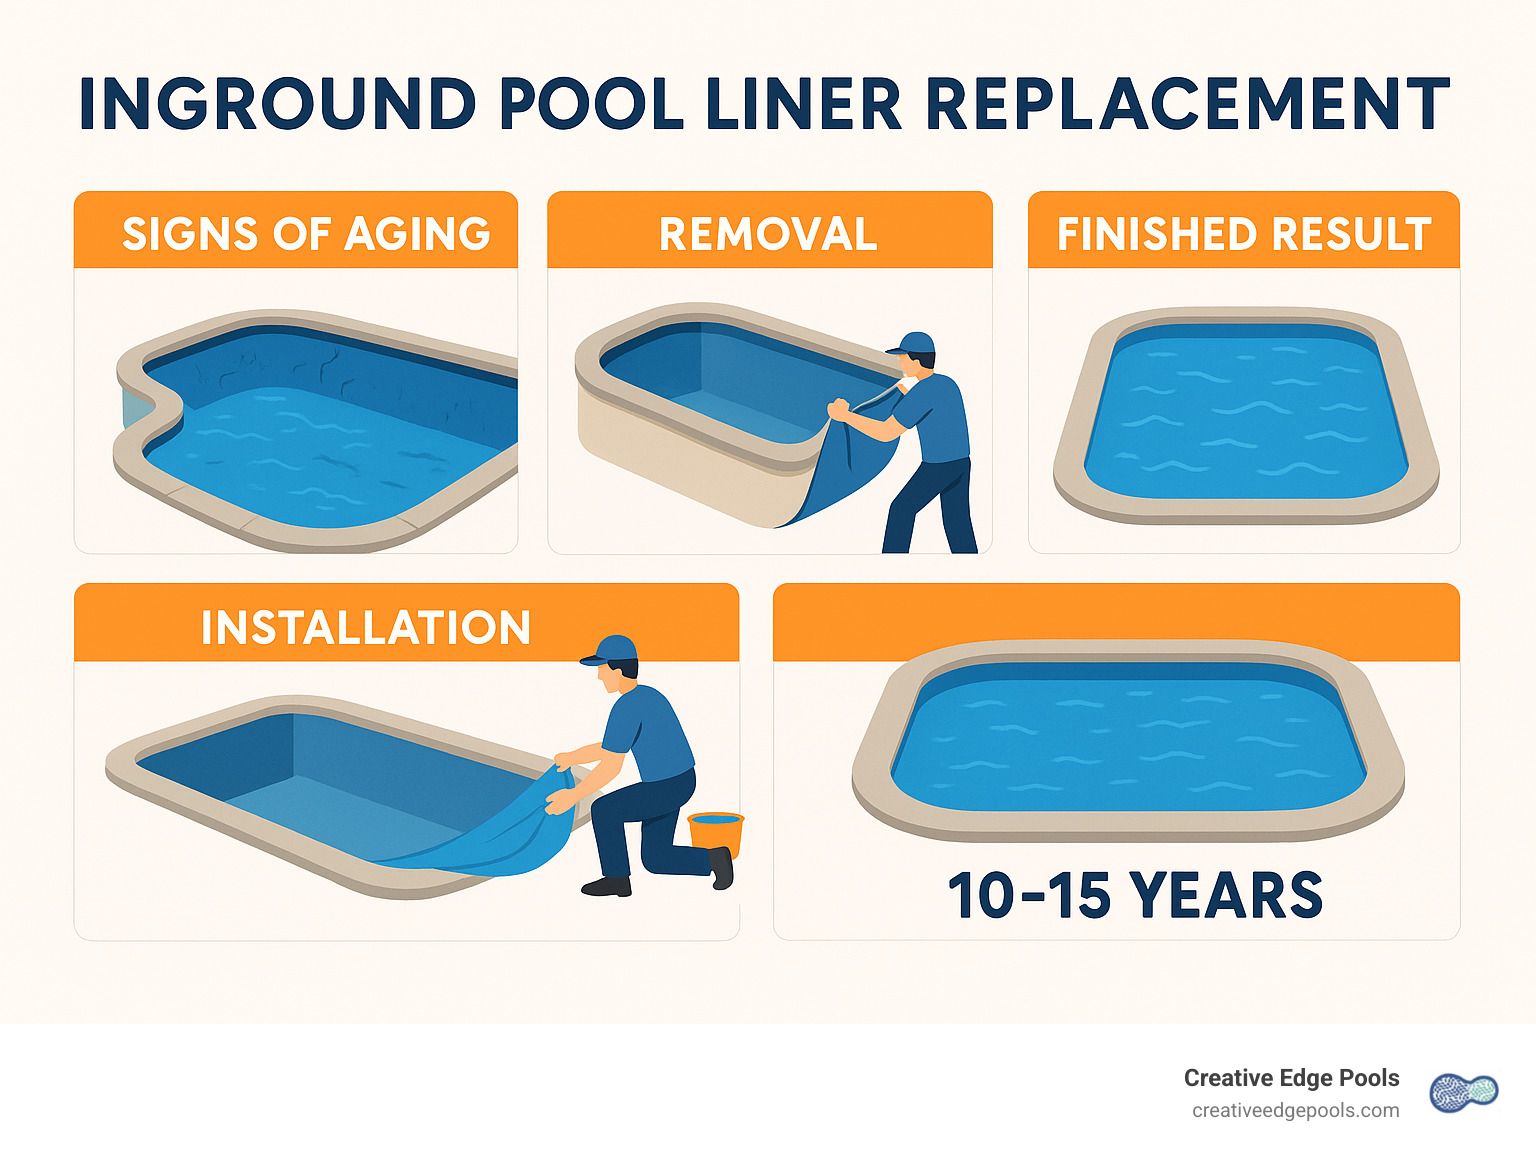
Inground Pool Liner Replacement: Step-by-Step & Service Options
Replacing your pool liner isn’t just a maintenance task—it’s a pool revival project. Whether you’re a hands-on homeowner or prefer to leave it to the pros, understanding what happens during an inground pool liner replacement helps set realistic expectations.
The Complete Process
- Draining the pool using submersible pumps (professional oversight crucial in areas with high water tables)
- Removing the old liner by cutting it into manageable sections
- Surface preparation – cleaning surfaces, treating rust spots, patching cracks, and leveling uneven areas
- Measuring – using the A-B method for custom shapes or careful measurements for standard pools
- Installing the new liner – positioning and inserting the bead into the track around the pool perimeter
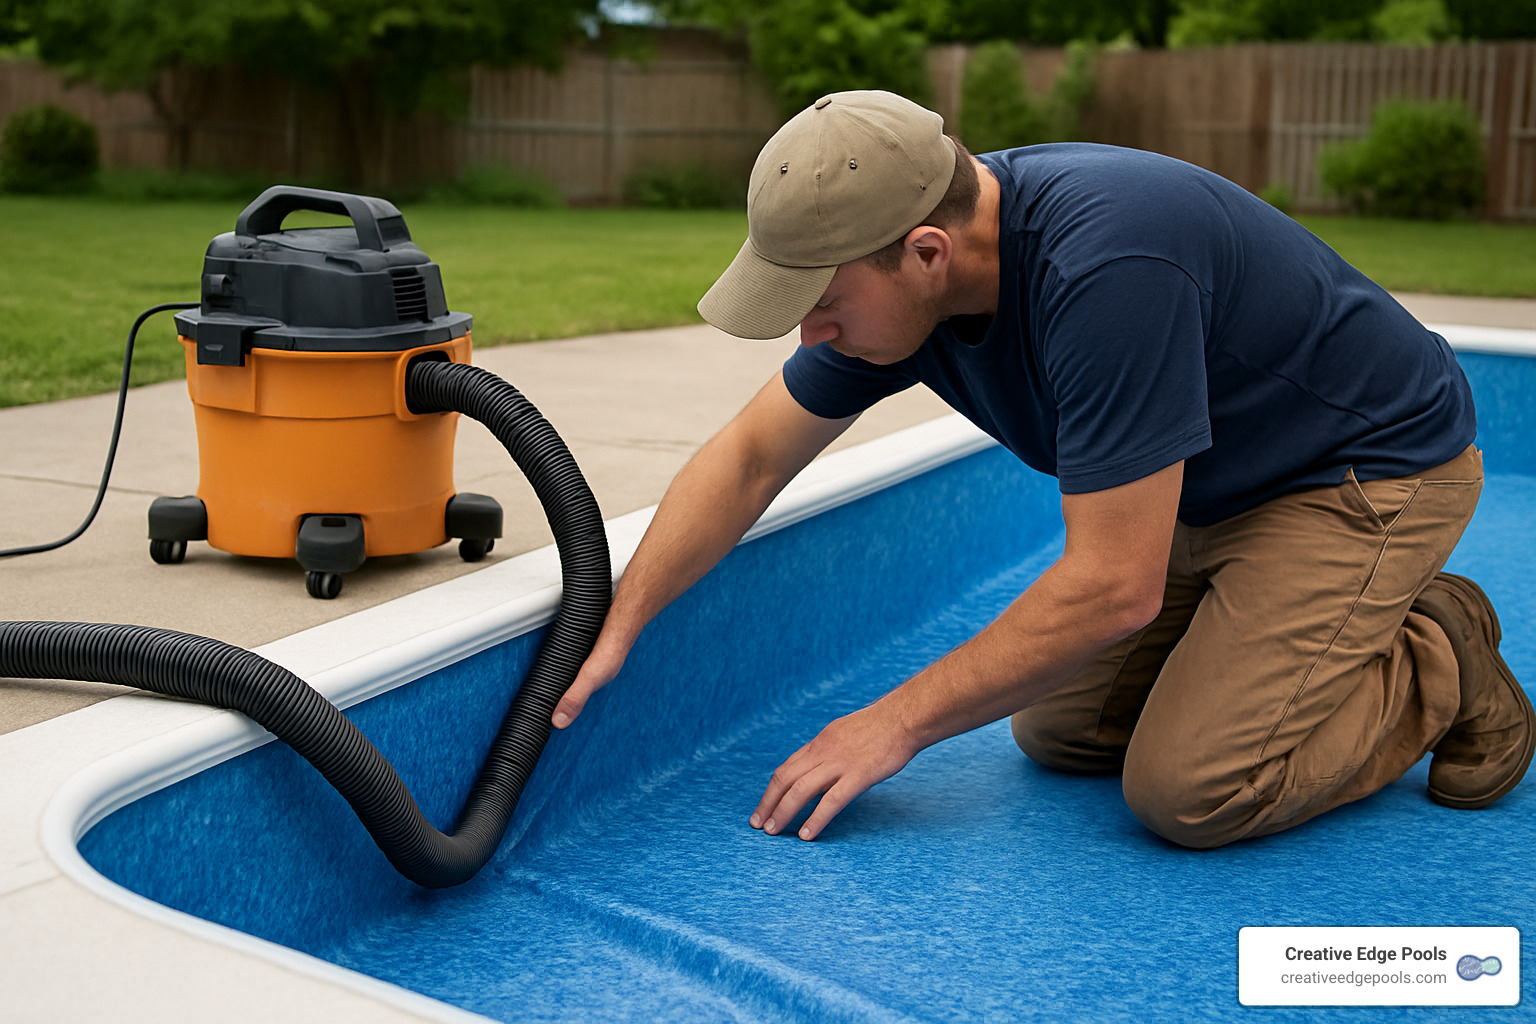
- Vacuum setting – removing air between the liner and pool structure to pull vinyl tight against walls and floor
- Cutting and reinstalling hardware – once there’s enough water (6-12 inches), cutting openings for returns, skimmers, drains, and lights
- Completing the fill – restarting equipment, balancing water chemistry, and performing safety checks
As we often tell our customers, “The actual replacement time can extend from days to weeks if additional renovation work is required once the old liner is removed.”
DIY Inground Pool Liner Replacement Pros & Cons
DIY Pros:
* Save $1,000-$2,500 in labor costs
* Flexibility in scheduling and pace
* Personal satisfaction from completing a major project
* Control over preparation work quality
DIY Cons:
* Many manufacturer warranties require professional installation
* Need for specialized tools like a liner vacuum
* Physical demands – heavy lifting and awkward positions
* First-timers typically need 3-7 days versus 1-3 days for professionals
* Mistakes in measurement or tears during installation can be costly
Professional Services for Inground Pool Liner Replacement
At Creative Edge Pools, our professional approach offers several key advantages:
- Licensed, experienced installers who handle unexpected challenges
- Completion in just 1-3 days, minimizing pool downtime
- Manufacturer warranty protection (most require professional installation)
- Expertise with complex shapes like freeform and kidney pools
- Comprehensive service from draining to refilling and water chemistry balancing
As one industry expert puts it, “Professional installation is the smarter choice over DIY to protect your warranty.”
For more information about our installation services, visit our Vinyl Liner Installation page.
Picking the Perfect Liner & Smart Add-Ons
Choosing the right liner for your inground pool liner replacement isn’t just about picking a pretty pattern—it’s a decision that affects everything from how warm your pool stays to how long your investment will last.
Material and Thickness Considerations
Vinyl liners offer several advantages: they’re budget-friendly upfront, provide numerous design options, and create a smooth, comfortable surface for swimmers.
Thickness is where many pool owners face their first big decision:
- 20 mil vinyl is the standard thickness, adequate for moderate use in milder climates
- 27-30 mil vinyl is recommended for New England customers – costs more initially but delivers a significantly longer lifespan (30-40% longer)
As I often tell customers, “In New England, the thicker the liner, the happier you’ll be in the long run.”
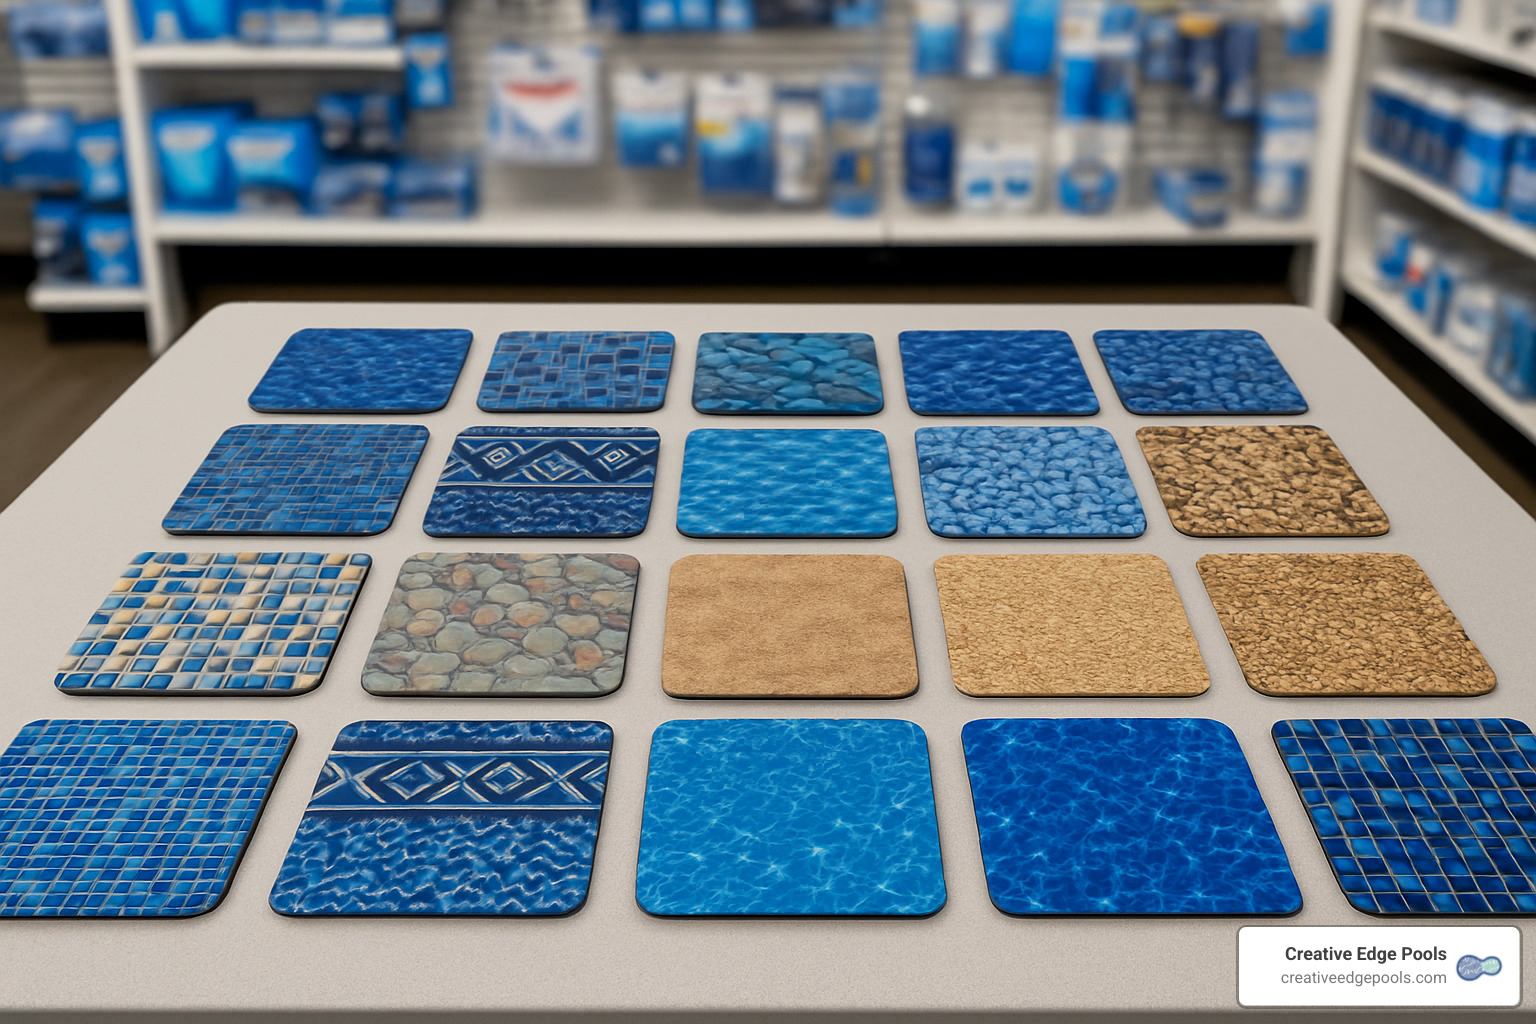
Color and Pattern Selection
Your liner choice transforms your pool’s personality and practical performance:
- Dark blues and blacks create a stunning lagoon look, absorb more sunlight to warm water, and hide minor debris
- Light blues and whites reflect heat (keeping water cooler), create an airy feeling, but show dirt more readily
- Medium tones and patterns strike a balance, disguising some dirt while maintaining brightness
Essential Add-Ons to Consider
Liner replacement time offers the perfect opportunity to include valuable upgrades:
- Liner pad – cushioned underlayment that protects against punctures, provides insulation, and creates a smoother feel
- Wall foam – insulates against heat loss and protects your liner from wall imperfections
- Cove molding – creates a smooth transition between pool wall and floor, preventing stress on your liner
While your pool is empty, consider feature upgrades like textured step surfaces, tanning ledges, LED lighting, or updated main drains with safety-enhancing anti-entrapment covers.
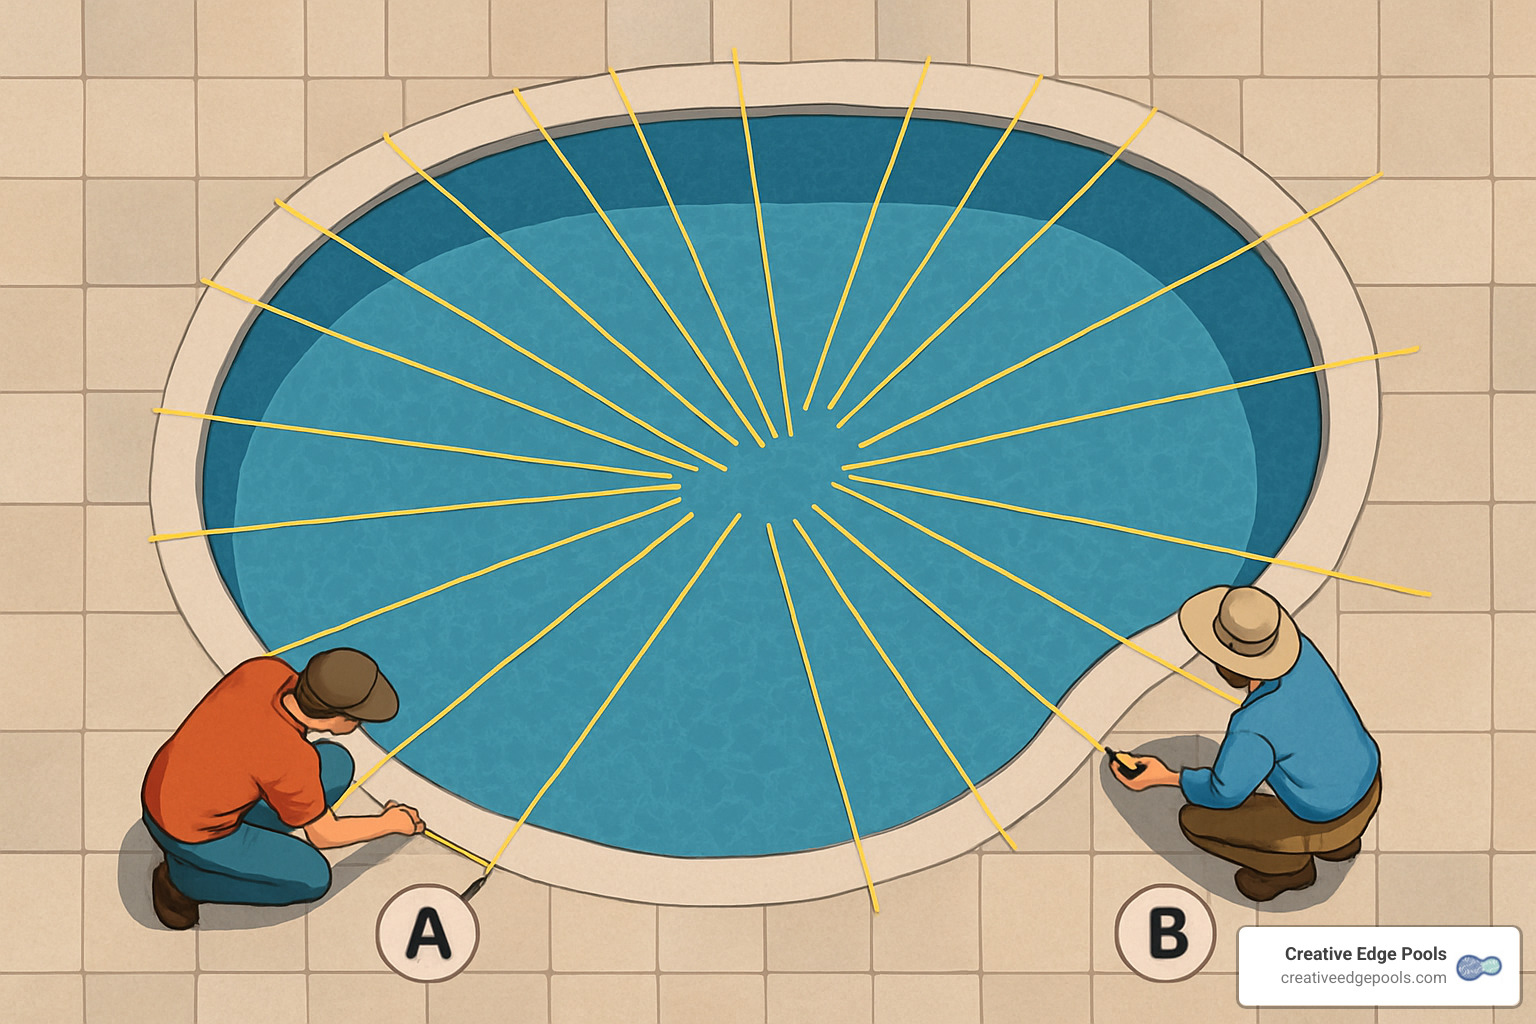
How to Measure & Order
Accurate measurements are critical for a successful inground pool liner replacement. For complex pools, we use the A-B plot method:
- Establish two fixed reference points (A and B) at opposite corners
- Measure from each point to multiple locations around the pool perimeter
- Create a precise template that ensures your custom liner fits perfectly
Expect lead times of 2-3 weeks for standard shapes and 3-5 weeks for custom designs, with additional 1-2 weeks during peak season.
Accessories Worth Considering
While your pool is already opened up, consider these valuable accessories:
- Automatic pool cover – adds safety, reduces evaporation, preserves chemicals
- New skimmer faceplates – prevent leaks with proper seals
- Directional return eyeballs – improve water circulation
- Main drain updates – improve safety with modern, anti-entrapment designs
- Safety grip coping – provides better traction around your pool edge
For more information about liner options, check our Pool Liner Inground Replacement resource page.
After-Install Care, Warranties & FAQs
The first few weeks after your inground pool liner replacement are critical for ensuring your investment lasts for years to come.
Initial Care Protocol
- Keep the vacuum system running for the first 24-48 hours until the liner is fully set
- Maintain proper water chemistry: pH 7.4-7.6, total alkalinity 80-120 ppm, chlorine 2-4 ppm initially (then 1-3 ppm), calcium hardness 200-400 ppm
- Use only soft brushes for cleaning during the first few weeks
- Keep sharp objects away from your fresh liner
- Proper winter closing is crucial – use appropriate covers and maintain correct water levels
Understanding Your Warranty
Most quality vinyl liners come with warranties ranging from 15-25 years, but they’re typically pro-rated, with full replacement value usually only available in the first 2-3 years.
Important warranty conditions:
* Registration deadlines are strict – typically within 30 days of installation
* Many manufacturers require professional installation for warranty validity
* Warranties typically cover seam separation and manufacturing defects, not punctures or chemical damage
At Creative Edge Pools, we handle all warranty paperwork for you, ensuring your protection is firmly in place.
For more detailed information about liner longevity, visit our How Long Does a Vinyl Pool Liner Last? resource page.
Inground Pool Liner Replacement FAQ #1 — How long does the job take?
Q: How long should I expect my pool to be out of commission during liner replacement?
A: Most standard pools are completed in just 1-3 days without complications. Weather, pool size, shape, and additional updates can extend the timeline. For planning purposes, allow 3-5 days from draining to swimming. We’ll provide a more specific timeline during your initial consultation.
Inground Pool Liner Replacement FAQ #2 — Can I install over the old liner?
Q: To save time and money, can I just install the new liner over the existing one?
A: Installing over an existing liner is never recommended because:
* Your new liner won’t fit properly with an old one underneath
* Manufacturers won’t honor warranties on liners installed this way
* Moisture trapped between liners creates a breeding ground for mold and bacteria
The small amount of time saved during installation isn’t worth the headaches and shortened lifespan that follow.
Inground Pool Liner Replacement FAQ #3 — What should I expect right after install?
Q: What’s normal and what’s concerning in the days following a new liner installation?
A: Normal conditions include minor wrinkles that disappear as water warms (1-2 weeks), slight stretching as the liner conforms to your pool’s shape, small air bubbles that resolve within the first week, and a “new vinyl” smell that dissipates within days.
Concerning signs that warrant a call: large, persistent wrinkles after 2 weeks, visible gaps between liner and pool surfaces, liner slipping from the track, or water loss exceeding ¼ inch per day.
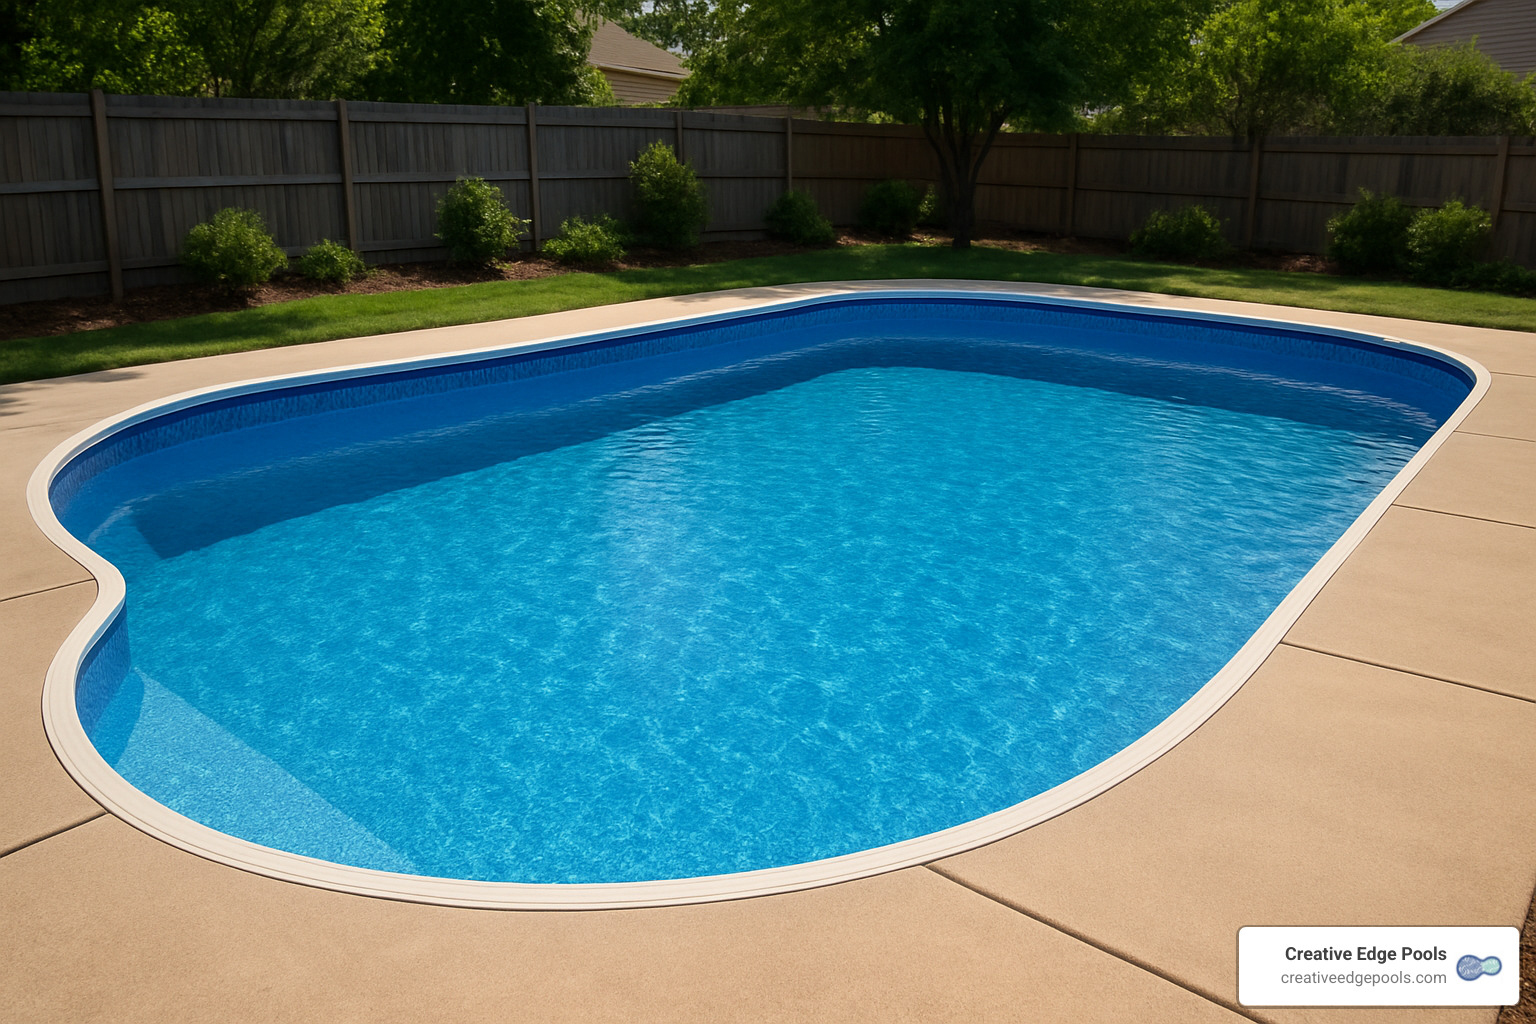
Conclusion & Next Steps
Replacing your inground pool liner is more than just a maintenance task – it’s an opportunity to breathe new life into your backyard retreat. As we’ve explored throughout this guide, inground pool liner replacement can transform both the appearance and functionality of your swimming pool, giving you and your family many more years of splashing, swimming, and making memories.
At Creative Edge Pools, we’ve guided countless Massachusetts and New Hampshire homeowners through this process. We’ve seen how a fresh liner can turn a tired, leaking pool into the centerpiece of outdoor entertainment once again.
Remember these essential points:
- Don’t wait until you’re bailing water or patching tears weekly – address early warning signs proactively
- Quality matters – that extra investment in 27-mil vinyl instead of standard 20-mil can add years to your liner’s life
- Professional installation offers peace of mind through warranty protection and expert handling of unexpected issues
- Consistent maintenance significantly extends your liner’s lifespan – proper water chemistry is key
As a family-owned business with deep roots in Eastern Massachusetts and Southern New Hampshire, Creative Edge Pools brings a neighborly approach to every inground pool liner replacement project. We understand that your pool isn’t just a hole with water – it’s where birthdays are celebrated, where kids learn to swim, and where you unwind after long workdays.
Our comprehensive approach considers your entire outdoor living space. We’ll help you select a liner pattern that complements your landscaping and home exterior while ensuring the technical aspects of the installation are flawless.
Whether you’re ready to schedule your replacement or just starting to explore options, we’re here to help without pressure or sales tactics. Our consultations include detailed measurements, pattern selection guidance, and clear pricing without hidden costs.
Transform your aging pool into the backyard paradise you deserve with Creative Edge Pools. Visit our inground vinyl pool liner replacement page to learn more or schedule your free consultation today.
Your perfect pool day is just a liner away!
