Removing an Inground Swimming Pool: 7 Expert Steps Today
Removing an inground swimming pool can seem like a daunting task, but with the right information, it can be managed smoothly. Whether you’re tired of high maintenance costs, worried about safety, or simply want to repurpose your backyard, there are good reasons for considering this significant home improvement.
Here’s what you need to know right away:
– High maintenance costs: Pools can be expensive to maintain.
– Safety concerns: Pools pose drowning risks, especially for young children.
– Underutilization: Many pools are not used enough to justify their upkeep.
– Space issues: Removing a pool can free up valuable yard space.
– Environmental concerns: Reducing water and chemical use leads to a greener home.
By taking action now, you can not only save on costs but also improve the overall value and appeal of your property.
At Creative Edge Pools, we specialize in both installing and removing inground pools. With years of hands-on experience, we know how to make the process stress-free and efficient.
I’m David Brabant, owner of Creative Edge Pools. With over thirty years in the swimming pool and site development industry, I’ve helped countless homeowners safely and efficiently remove their inground pools.

Important removing an inground swimming pool terms:
– cost of removing a pool
– cost to fill in an inground pool
Why Remove an Inground Pool?
Removing an inground swimming pool can be a game-changer for many homeowners. Whether it’s due to high maintenance costs, safety concerns, underutilization, space issues, or environmental concerns, there are plenty of compelling reasons to take this step.
High Maintenance Costs
Owning a pool isn’t cheap. According to a 2021 Pool Maintenance Costs report from HomeAdvisor, maintaining a pool can cost an average of $1,400 per year. This doesn’t even include water, electricity, and repairs, which can bring the total yearly cost to between $3,000 and $5,000. For many, these expenses simply aren’t worth it.
Safety Concerns
Pools can be hazardous, especially for families with young children. The Centers for Disease Control and Prevention reports that drowning is the leading cause of injury-related death for children aged 1 to 4. Removing a pool can eliminate this risk and provide peace of mind.
Underutilization
Many homeowners find that their pool is not used enough to justify its upkeep. If you’re not swimming regularly, the pool becomes an expensive, underused feature. Removing it allows you to repurpose your yard for activities you enjoy more.
Space Issues
Pools take up a lot of space. If your yard feels cramped, removing the pool can free up valuable real estate for other uses. Imagine having a spacious garden, a play area for kids, or an outdoor entertainment space instead.
Environmental Concerns
Pools require a significant amount of water and chemicals, which isn’t great for the environment. By removing your pool, you can reduce your household’s water consumption and eliminate the need for harmful chemicals, making your home more eco-friendly.
Removing an inground swimming pool can be a smart move for many reasons. Whether it’s to save money, improve safety, or make better use of your yard, the benefits are clear. Up next, we’ll dive into the different methods for removing an inground pool and help you decide which is best for you.
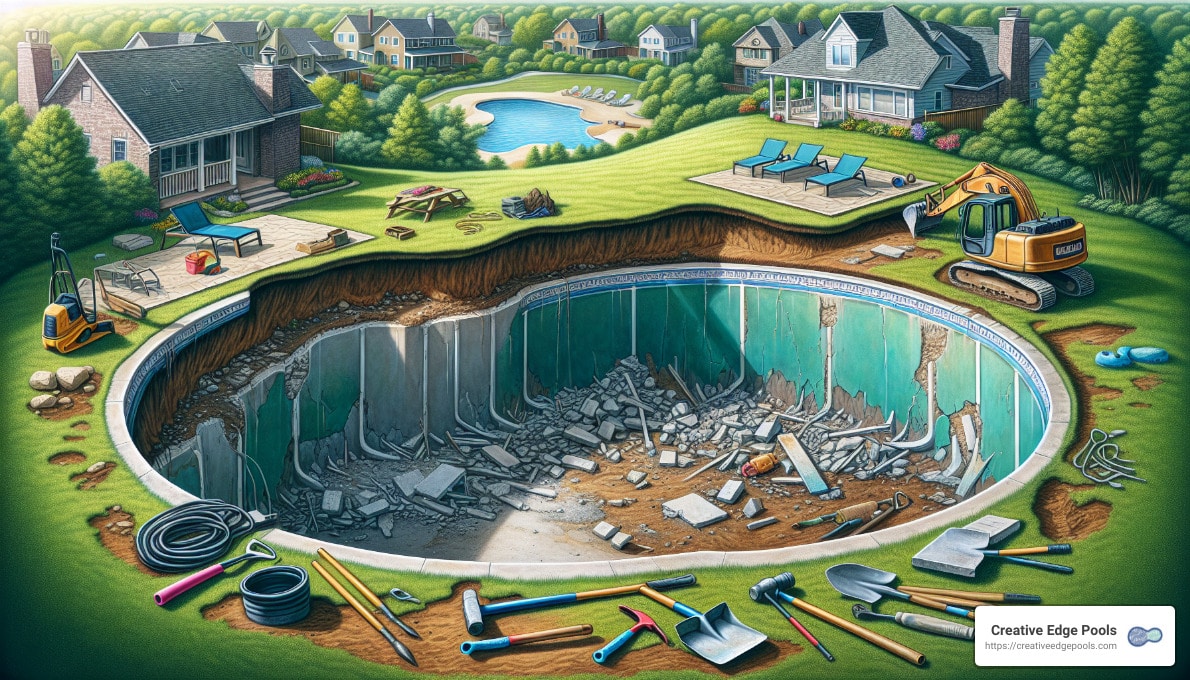
Pool Removal Methods
When it comes to removing an inground swimming pool, there are two main methods: partial removal and complete removal. Each has its own set of procedures, costs, and implications. Let’s break them down.
Partial Removal (Filling In)
Partial removal, often referred to as “filling in,” is a more cost-effective and quicker option for pool removal. Here’s how it works:
- Draining the Pool: The first step is to drain the pool using a submersible pump. Make sure to follow local regulations for water disposal.
- Breaking Up the Top Layer: The top layer of the pool, usually the concrete or fiberglass, is broken up. This is necessary to ensure proper drainage and to prevent the area from becoming a mud hole.
- Filling with Gravel or Sand: The pool cavity is then filled with materials like gravel or sand. This helps in stabilizing the ground and ensures that water doesn’t accumulate.
- Compacting the Soil: After filling, the soil is compacted to prevent future sinkage or swelling. Proper compaction is crucial for the stability of the area.
Risks: While partial removal is faster and more affordable, it carries some risks. If not done correctly, there is a potential for sinkage, swelling, or improper drainage. If you plan to sell your home, you’ll need to disclose this to potential buyers, which could affect the property’s value.
Complete Removal
Complete removal involves demolishing the entire pool structure and is generally more thorough but also more expensive. Here’s what it entails:
- Demolishing the Entire Structure: This involves breaking up all the pool materials, including concrete, fiberglass, or liner. The debris is then removed from the site.
- Backfilling with Soil and Gravel: After the demolition, the pool cavity is filled with soil and gravel. This ensures the area is stable and suitable for future use.
- Removing Debris: All the demolished materials are hauled away to be disposed of responsibly. This step is crucial for environmental safety and adhering to local regulations.
- Restoring the Area: Finally, the area is restored with topsoil, making it ready for landscaping or other uses.
Benefits: Complete removal eliminates the risks associated with partial removal, such as sinkage and improper drainage. It also doesn’t typically affect the home’s value negatively, as the pool area is fully restored.
Above-Ground Pool Removal
If you have an above-ground pool, the removal process is simpler:
- Draining the Pool: Similar to inground pools, start by draining the water using a pump.
- Tearing Down the Pool: The pool structure is then disassembled. This usually involves unscrewing bolts and taking apart the walls.
- Hauling Away Debris: Finally, the debris is removed. Renting a dumpster or hiring a junk removal service can help streamline this process.
Note: Above-ground pool removal is generally less complex and less costly compared to inground pool removal.
By understanding these methods, you can choose the best approach for removing an inground swimming pool that suits your needs and budget. Next, we’ll cover the essential steps involved in the pool removal process, ensuring you comply with local regulations and safety standards.
Steps to Remove an Inground Pool
Complying with Local Regulations
Before starting the process of removing an inground swimming pool, check your local regulations. Most municipalities require a demolition permit for pool removal. The cost of this permit varies, so it’s best to contact your local building department for specifics.
Some areas have strict zoning ordinances or codes that dictate how the pool must be removed. For instance, some codes may require complete removal, while others may allow for partial removal. Always follow these regulations to avoid fines or complications down the line.
Draining the Pool
The first physical step in the removal process is draining the pool. Use a submersible pump for this task. Make sure to lay the discharge hose flat to prevent clogs and direct the water to an appropriate sewer point as specified by local regulations.

Safety Tip: Never use an extension cord with the pump. Ensure the pump is plugged into a ground-fault circuit interrupter (GFCI) outlet to avoid electrical hazards.
Utility Cables Check-In
Before any heavy machinery is used, check for utility cables around the pool area. This includes plumbing pipes, electrical lines, and gas lines. Damaging these can lead to costly repairs and dangerous situations.
Pro Tip: Hiring a professional to perform a utility check can save you from potential hazards and unexpected expenses.
Decking Removal
Next, remove any surrounding decking or structures. This includes concrete, wood, or other materials that frame the pool. Use a jackhammer or a bobcat with a grapple attachment to break up and haul away the debris.
Cost Consideration: Removing decking can add to the overall cost of the project. It’s essential to include this in your budget.
Pool Removal
The core of the project is pool removal. This involves breaking up the pool materials, whether it’s concrete, fiberglass, or a vinyl liner. Use a concrete saw to cut large holes in the pool floor. This prevents water accumulation in the future.

Debris Disposal: Haul away all broken materials responsibly. Some municipalities have specific disposal requirements, so check local rules to ensure compliance.
Backfilling and Compacting Soil
Once the pool is removed, the cavity must be backfilled. Use a mix of soil and gravel to fill the space. The next critical step is compacting the soil. This ensures the ground is stable and reduces the risk of future sinkage.
Compaction Tools: A padded drum roller or sheep foot roller is ideal for compacting soil. If space is limited, a plate compactor can be used, but it requires an experienced operator.

Ensuring Stability: Proper compaction is crucial for the stability of the area. If you plan to build a structure like a shed or patio over the filled area, consult with an engineer to ensure the ground can support it.
By following these steps, you can safely and effectively remove an inground pool, changing your backyard into a more usable space. Up next, we’ll discuss the costs involved in pool removal, helping you budget for this significant project.
Cost of Removing an Inground Pool
When it comes to removing an inground swimming pool, understanding the costs involved is crucial. The total expense can vary based on several factors such as the type of demolition, pool material, size, accessibility, and more. Let’s break down these costs to give you a clearer picture.
Full Pool Demolition Costs
Full pool demolition is the most thorough method, involving the complete removal of all pool materials. This process ensures that the area is free from any remnants of the pool, making it suitable for any future construction or landscaping.
Average Cost: The cost for a full pool demolition typically ranges from $4,000 to $16,000, with an average cost of around $9,000.
Process:
1. Draining the Pool: Using a submersible pump to remove all water.
2. Breaking Up Materials: Concrete, gunite, vinyl, or fiberglass materials are broken up using heavy machinery.
3. Hauling Away Debris: All broken materials are hauled away for disposal.
4. Backfilling and Compacting: The cavity is filled with soil and gravel, then compacted to ensure stability.
Fact: Full pool demolition can increase your property value more than partial removal because it leaves the land completely buildable.
Partial Removal Costs
Partial removal, or pool fill-in, is a less costly and quicker method. However, it comes with some risks and limitations.
Average Cost: The cost for partial removal ranges from $4,500 to $6,250.
Process:
1. Draining the Pool: Similar to full demolition, the pool is first drained.
2. Breaking Up the Top Layer: The top portion of the pool is broken up, and holes are made in the bottom to prevent water accumulation.
3. Filling with Gravel or Sand: The pool is filled with a mix of gravel or sand and then topped with soil.
4. Compacting: The soil is compacted to reduce the risk of future sinking.
Risk: Partial removal may limit future use of the area and could affect property value. Some areas even consider it illegal due to potential drainage issues.
Additional Cost Factors
Several additional factors can influence the cost of removing an inground swimming pool. Here are some key considerations:
- Deck Removal: Removing surrounding decking can add to the overall cost. Materials like concrete or wood need to be broken up and hauled away.
- Fence Removal: If fencing is in place, it may need to be removed to allow access for heavy machinery.
- Disposal Fees: Costs for disposing of pool materials can vary based on local regulations and the type of materials.
- Labor: Labor costs can fluctuate depending on the complexity of the job and local labor rates.
- Structural Engineer: Hiring a structural engineer may be necessary, especially if you plan to build on the area afterward. Their fees can add to the project cost but are essential for ensuring the stability and safety of the site.
By understanding these costs and factors, you can better plan and budget for removing an inground swimming pool. Up next, we’ll explore some creative post-removal landscaping ideas to help you transform your newly freed space.

Post-Removal Landscaping Ideas
Once you’ve completed removing an inground swimming pool, the next exciting step is changing that space into something new and useful. Here are four popular ideas to consider:
Convert to Patio
Turning your old pool area into a patio is a fantastic way to create a functional outdoor space for relaxation and entertainment.
Foundation Preparation: After the pool is removed, you’ll need to prepare the area for the patio’s foundation. This involves leveling the ground and ensuring proper drainage.
Durable Materials: Choose durable and weather-resistant materials like concrete or stone for your patio. These materials will stand up to the elements and provide a long-lasting surface.
Contractor Consultation: It’s advisable to consult with a contractor to ensure the foundation is laid correctly. A professional can help you avoid issues like uneven surfaces or poor drainage.
Turn into Garden
Changing your pool area into a garden can be a rewarding project, especially if you love plants and gardening.
Drainage: Proper drainage is crucial. Holes must be drilled in the bottom of the pool to allow water to escape, preventing your garden from becoming waterlogged.
Soil Compaction: The soil needs to be compacted to prevent sinking. This step ensures that your garden remains stable and easy to maintain.
Garden Layout: Plan your garden layout carefully. Decide where to place your vegetable beds, flowers, and any other plants you want to grow. A well-planned layout can make your garden both beautiful and functional.
Pool-to-Deck Conversion
Building a deck over the former pool area can add value to your home and create a beautiful outdoor living space.
Site Preparation: After the pool is removed, prepare the site by leveling the ground and removing any remaining debris. Fix any drainage or grading issues to ensure the deck remains stable.
Design Layout: Design your deck layout to suit your needs. Consider features like seating areas, planters, and maybe even a pergola for shade.
Material Selection: Choose materials such as wood or composite for your deck. Both options have their pros and cons, so consider factors like durability, maintenance, and cost.
Compliance: Check with your local building department to ensure your deck design complies with local regulations and codes.
Cement Pond
If you want to keep the option of restoring your pool in the future, consider turning it into a cement pond.
Structural Changes: You may need to make changes to your pool’s structure, such as adding a liner or reshaping the pool to suit a pond design.
Filtration System: A good filtration system is essential to keep the water clean, especially if you plan to add plants or fish.
Professional Upkeep: Maintaining a pond requires regular upkeep. Hiring a professional can help you keep the pond in top condition and avoid issues like algae growth or water quality problems.
By exploring these options, you can find the best way to repurpose your space after removing an inground swimming pool. Whether you opt for a patio, garden, deck, or pond, the change can add beauty and functionality to your backyard.
Frequently Asked Questions about Removing an Inground Swimming Pool
Is it possible to remove an inground pool yourself?
Yes, it is possible to remove an inground pool on your own, but it’s not advisable. The process is complex and involves several challenging tasks:
- Draining the pool: You’ll need a submersible pump and a proper sewer point.
- Breaking up the structure: This requires heavy machinery and tools like jackhammers and concrete saws.
- Disposing of debris: You’ll need to rent a dumpster or hire a junk removal service.
Hiring professionals ensures safety and efficiency. They have the right equipment and expertise to handle the job properly. Plus, they can steer local regulations and permits, which can be tricky for DIYers.
How much does the swimming pool removal service cost?
The cost of removing an inground swimming pool varies widely based on several factors:
- Type of removal: Full demolition costs more than partial removal.
- Pool material: Concrete pools are typically more expensive to remove than vinyl or fiberglass.
- Size of the pool: Larger pools cost more to remove.
- Accessibility: Hard-to-reach pools may incur additional costs.
On average:
– Full pool demolition: $9,000, ranging from $4,000 to $16,000.
– Partial removal: $4,500 to $6,250.
These costs cover labor, equipment, permits, and debris disposal. Always get multiple quotes to ensure you’re getting a fair price.
Can I repurpose or recycle materials from my removed pool?
Yes, you can repurpose or recycle many materials from your removed pool. Here are some options:
- Metal components: Recycle or repurpose for other projects.
- Concrete and masonry: Crush for use in landscaping or as a base for new construction.
- Wooden decking: Repurpose for garden beds or other outdoor projects.
- Vinyl liners: These have limited recycling options but can sometimes be repurposed creatively.
Always check with local recycling facilities for proper disposal methods. Repurposing materials can save costs and reduce environmental impact.
By understanding these common questions, you can better steer the process of removing an inground swimming pool. Whether you choose to DIY or hire professionals, knowing the costs and recycling options can help you make informed decisions.
Conclusion
Removing an inground swimming pool is a significant decision with many factors to consider. Whether you’re facing high maintenance costs, safety concerns, or simply want to repurpose your backyard space, understanding the process is crucial.
Summarizing the Process
The pool removal process involves several steps, including complying with local regulations, draining the pool, checking utility cables, removing decking, demolishing the pool structure, and backfilling the area. Each of these steps requires careful planning and execution to ensure a smooth transition from pool to garden or any other desired use.
Benefits of Professional Removal
While it might be tempting to tackle the project yourself, hiring professionals offers several advantages:
- Safety and Compliance: Professionals understand local regulations and ensure all permits are in place. They also handle hazardous tasks safely.
- Efficiency: With the right equipment and expertise, professionals complete the job faster and more efficiently.
- Quality Results: Proper backfilling and soil compaction prevent future issues like sinkage or swelling.
Creative Edge Pools: Your Trusted Partner
At Creative Edge Pools, we specialize in removing inground swimming pools with precision and care. Our experienced team handles everything from permits to debris disposal, ensuring a hassle-free experience. We also offer post-removal landscaping services to help you transform your backyard into a beautiful, functional space.
For more information or to request a free estimate, visit our swimming pool removal page. Let us help you make the most of your outdoor space!